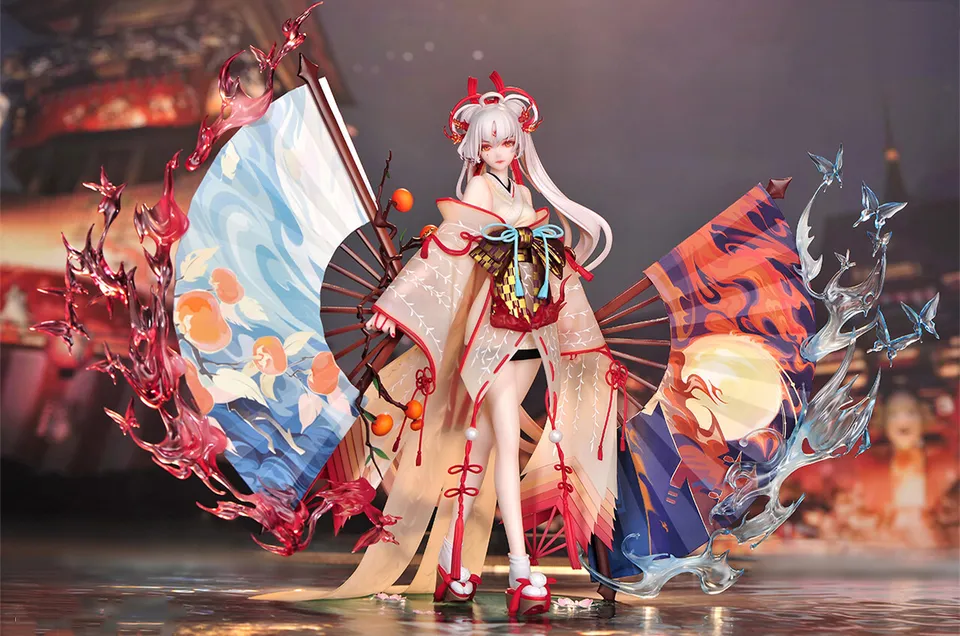
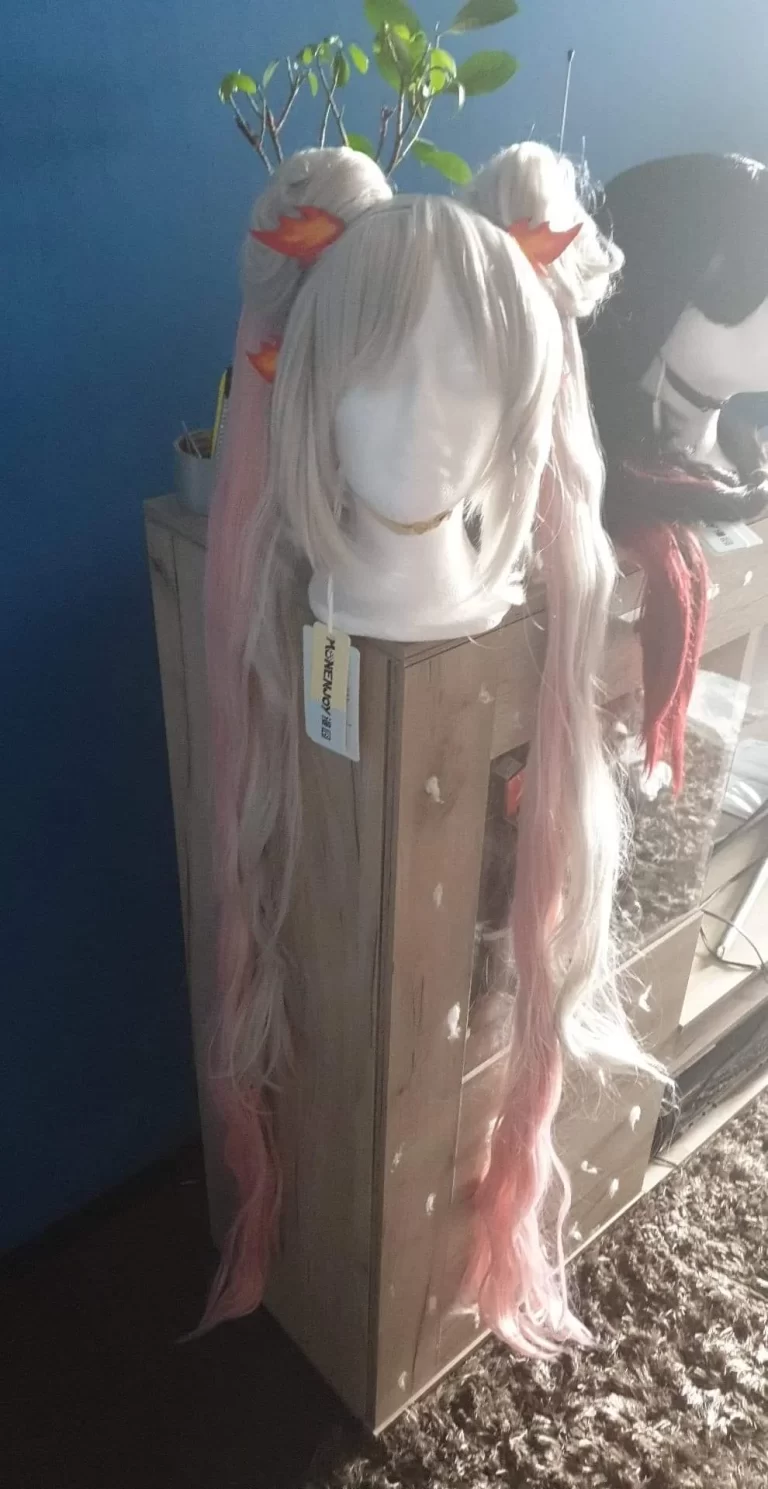
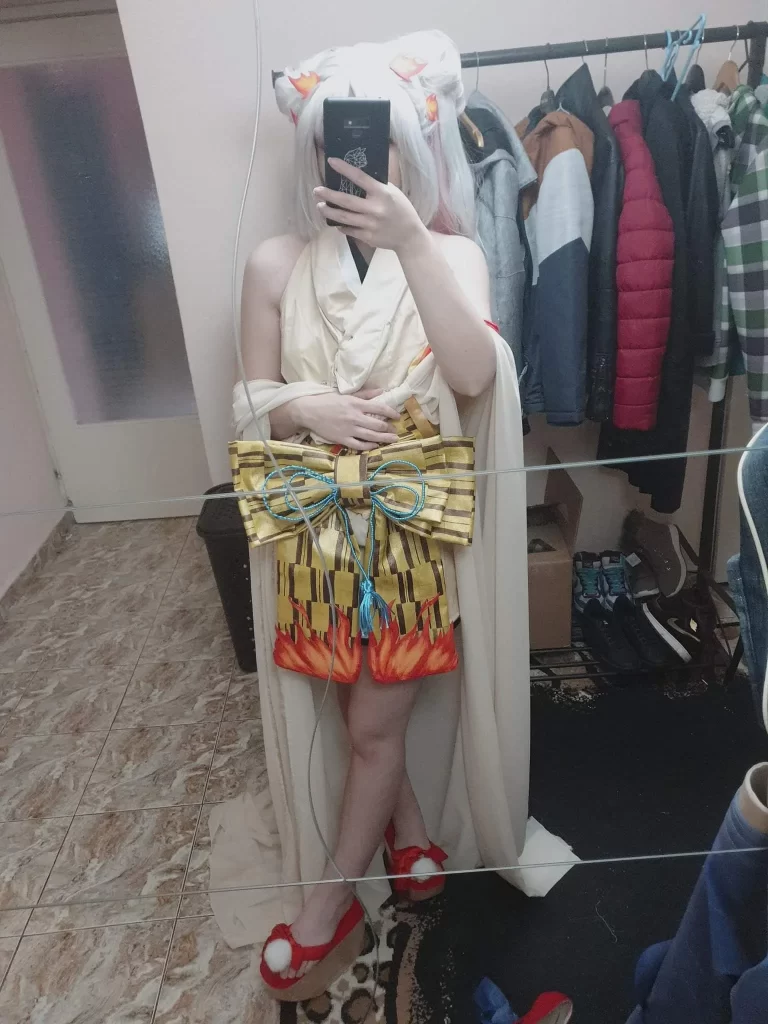
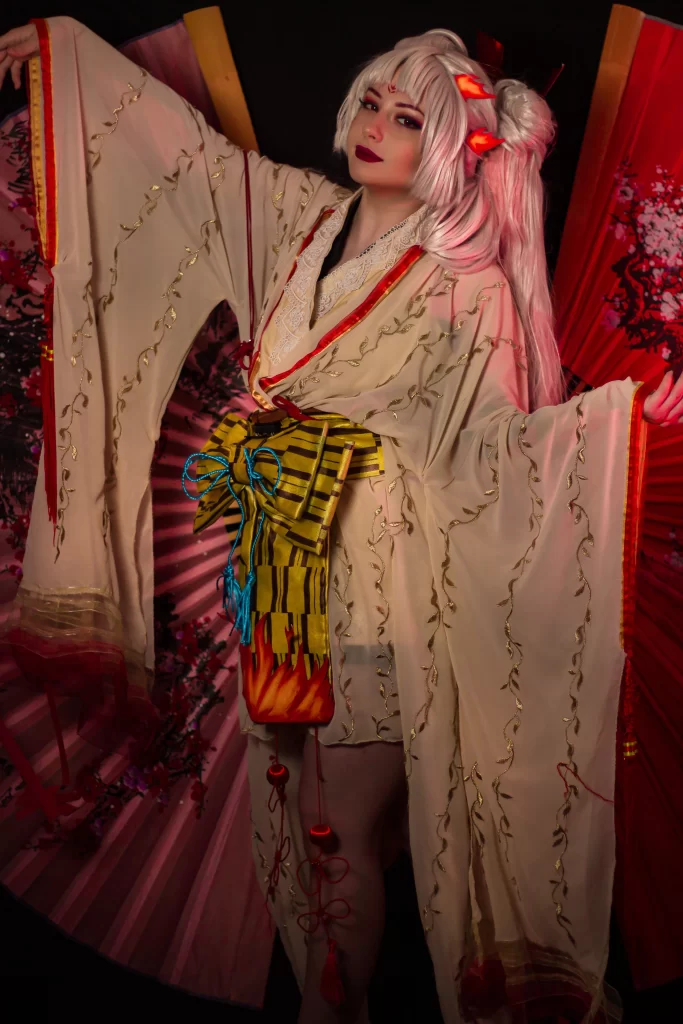
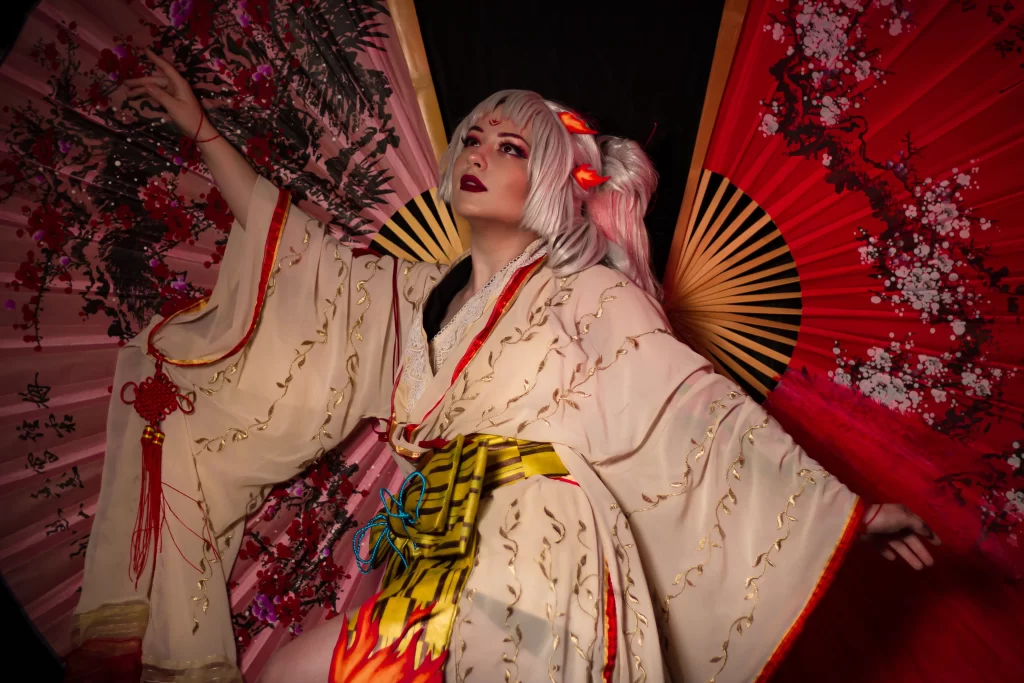
I bought the wig from a Taobao distributor. The wig was created to suit the character so there was not much to be adjusted. I made a few changes to make the accessories more durable and stylized the bangs accordingly. Shortened the pigtails as well, as they were quite long and the wig was overall too heavy.
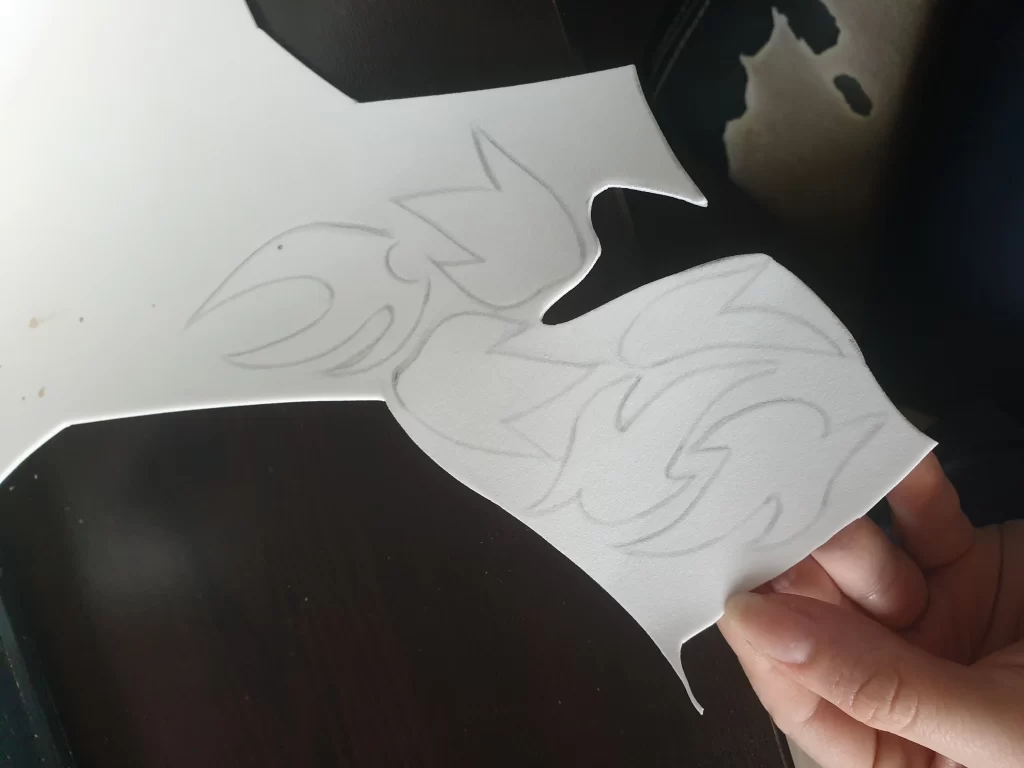
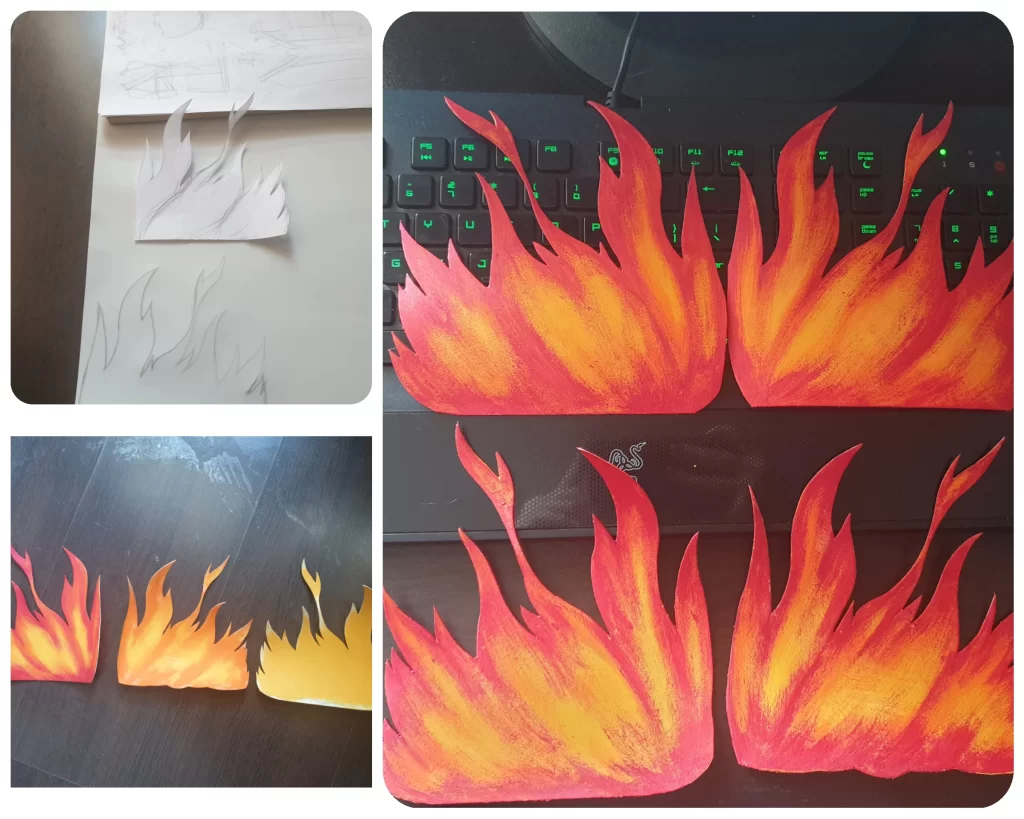
For the little flames she has in her hair, I used 0.1mm high-density
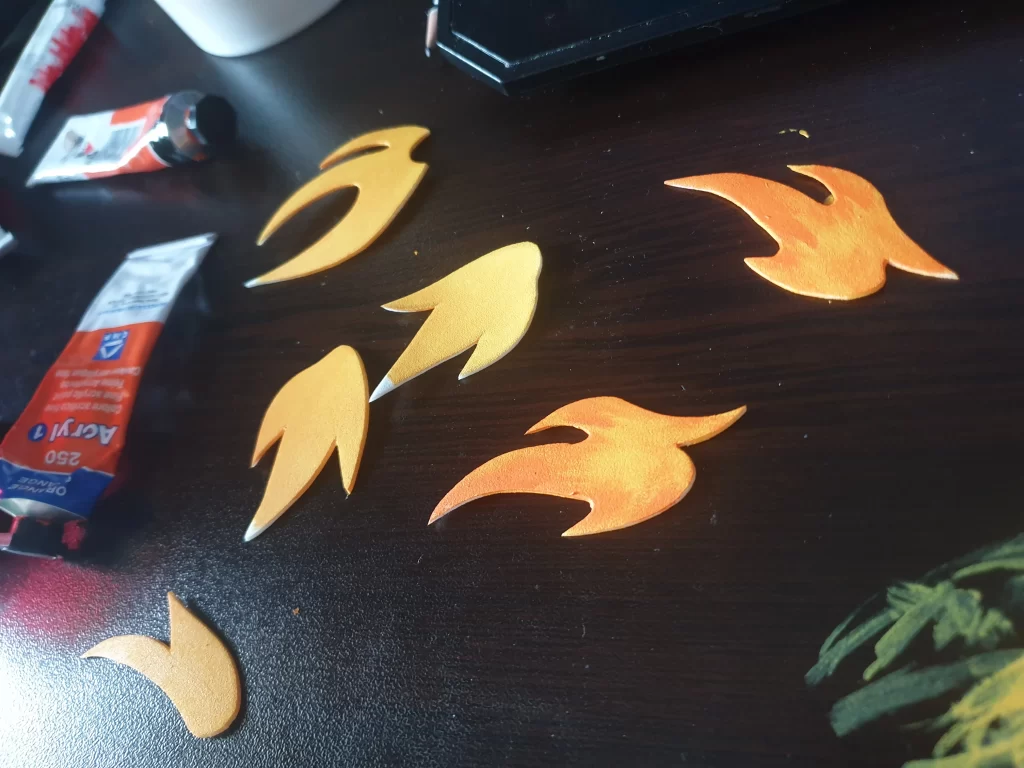
EVA Foam which I managed to get my hands on when I was in Japan during my stay for the WCS 2019. I first made a paper draft of the flames, traced the shape onto the EVA foam, and cut it with a nail scissor. Nail scissors are great for making curves on small details and are easy to work with. For the painting part, I started with my base color – warm yellow.
No primer was used with this method as the EVA foam was not absorbing the paint nor did it crack it. All of the acrylic paints
used are Cadence Hybrid – Warm orange (H-010); Blood red (H- 054); Yellow (H-009).
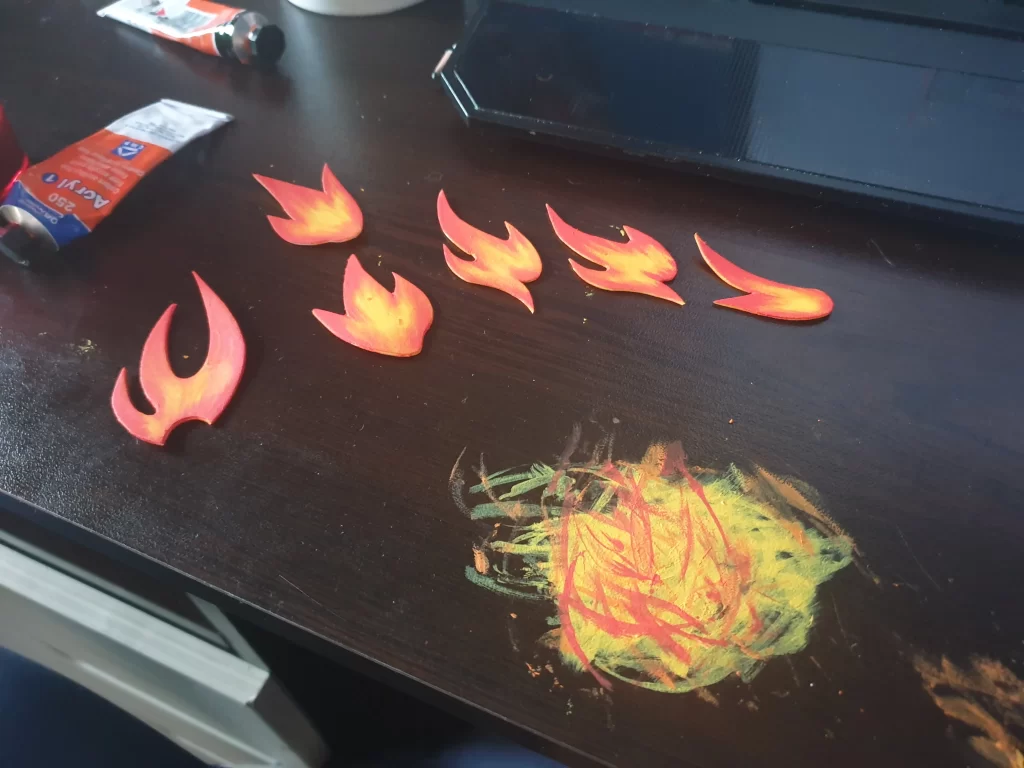
Once I applied the base color I started darkening the edges with the rest of the colors and making sure to leave the center as the brightest spot. I used a bristled paintbrush to create the texture and imitate visually the flame. After both of the sides were completely painted – I attached a hair clip with super glue to the backside of each flame.
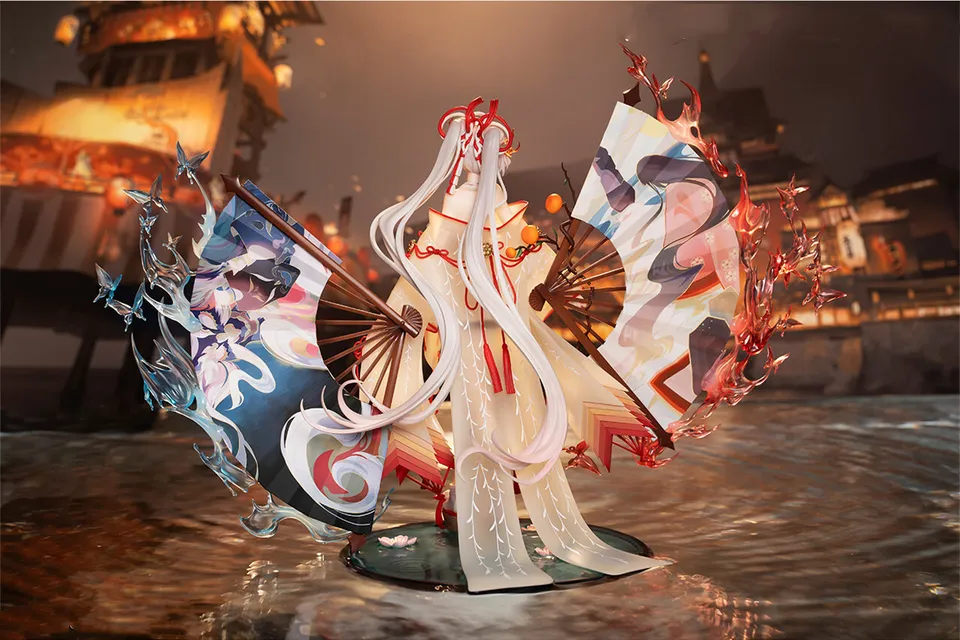
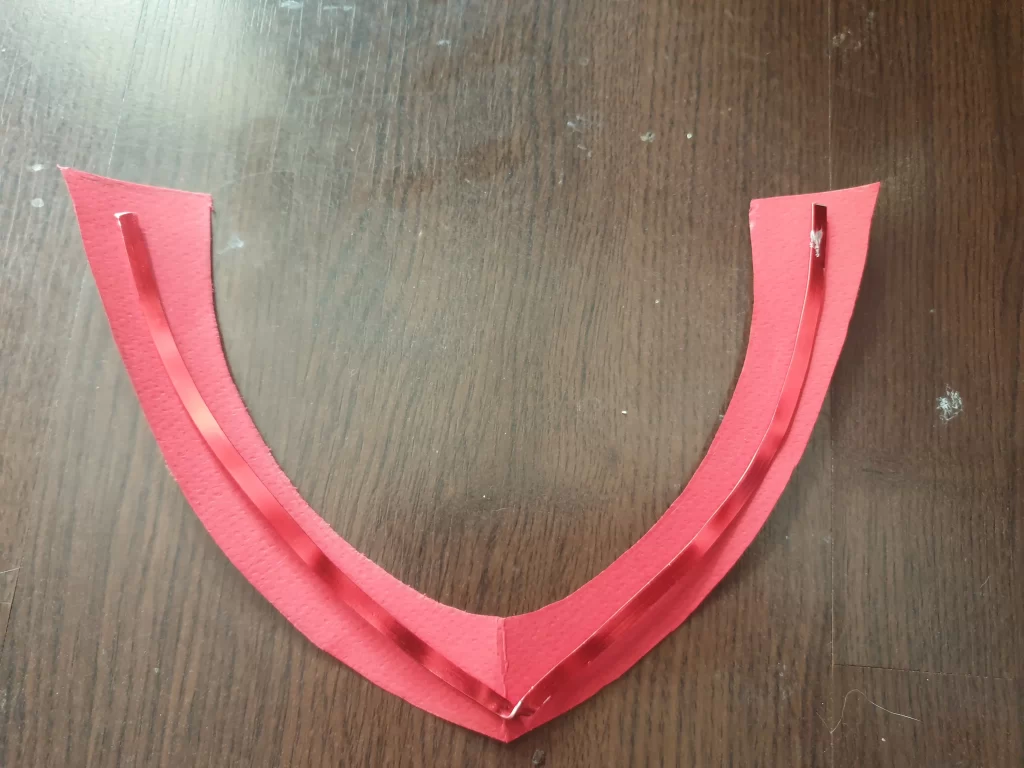
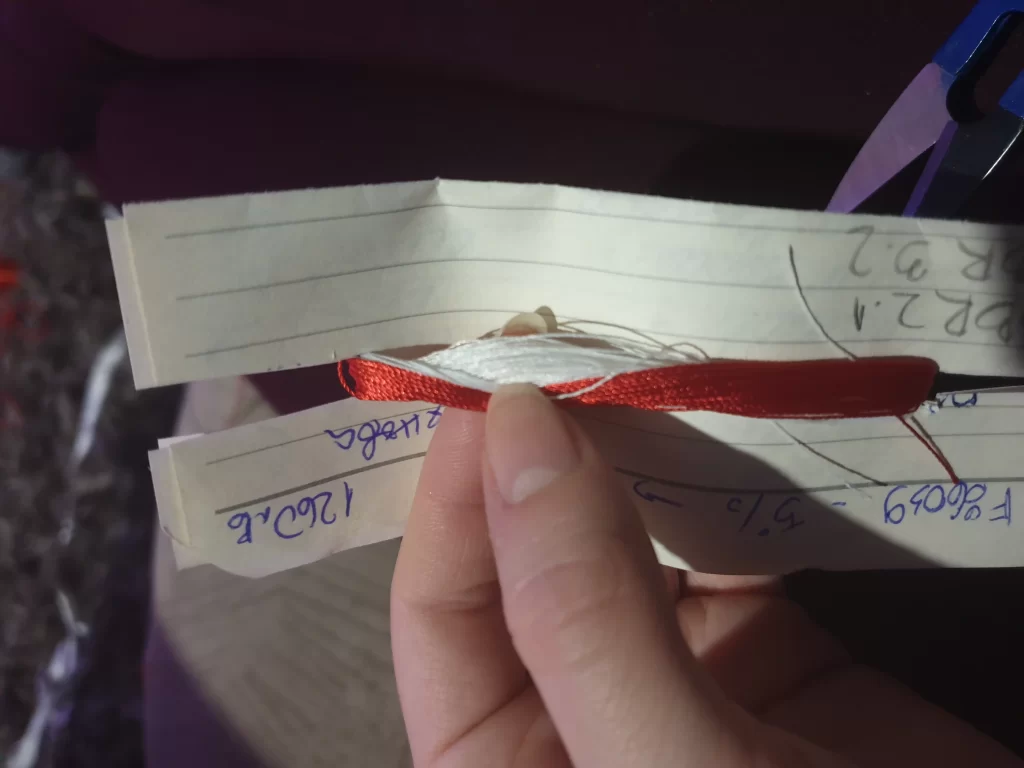
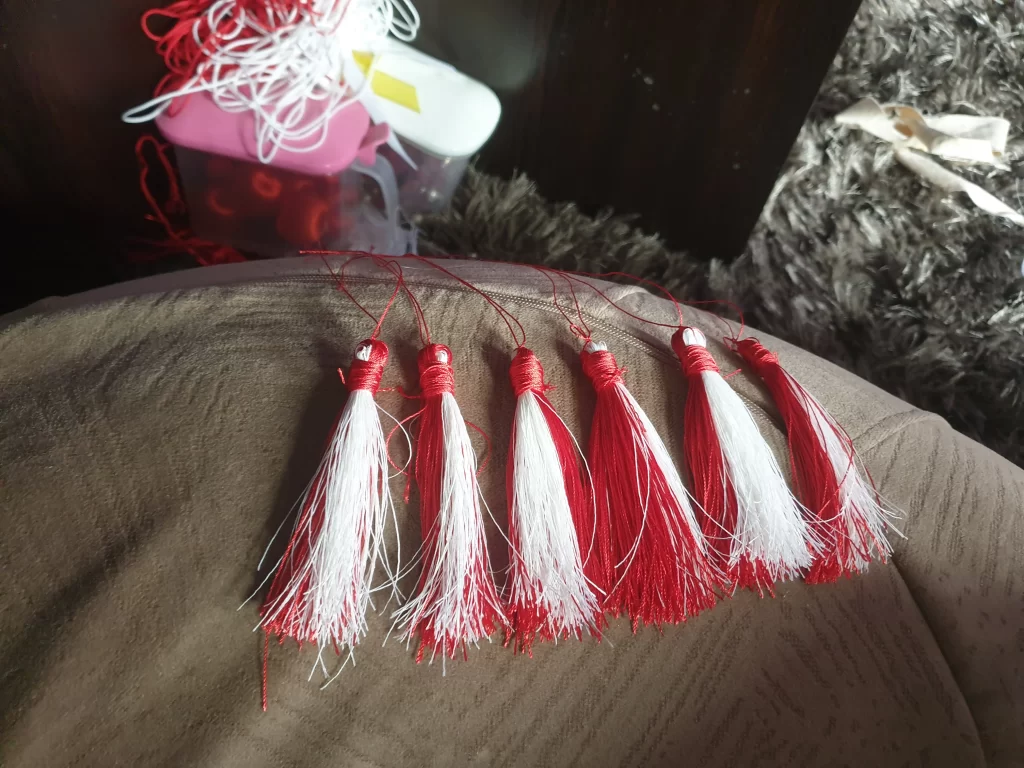
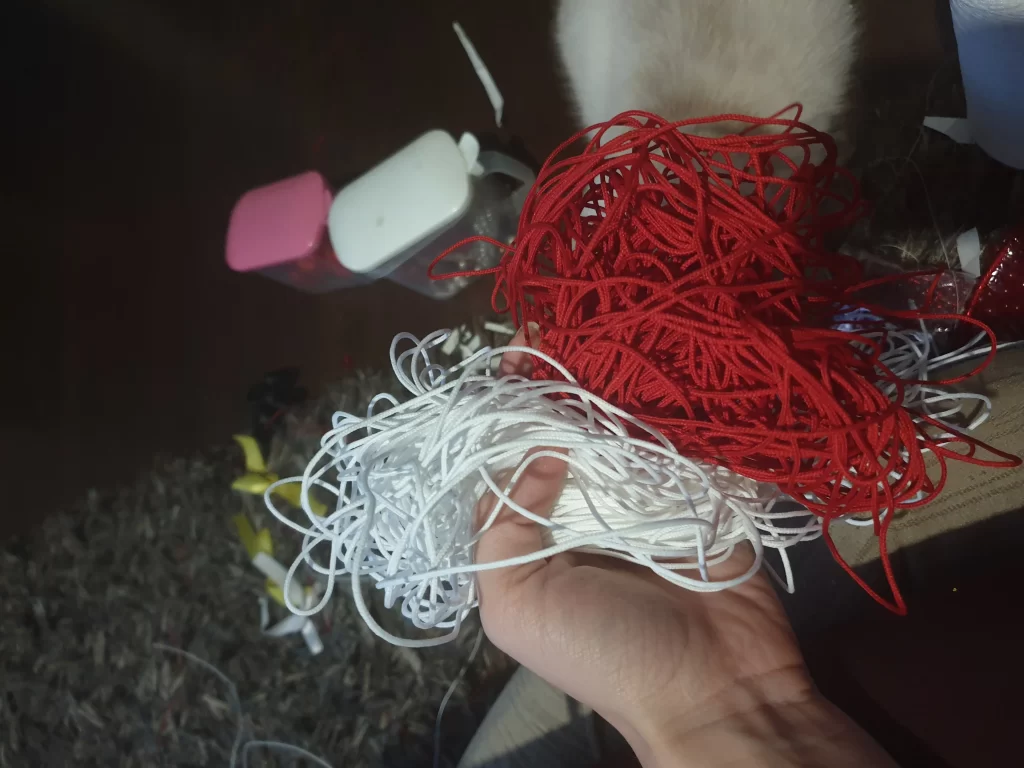
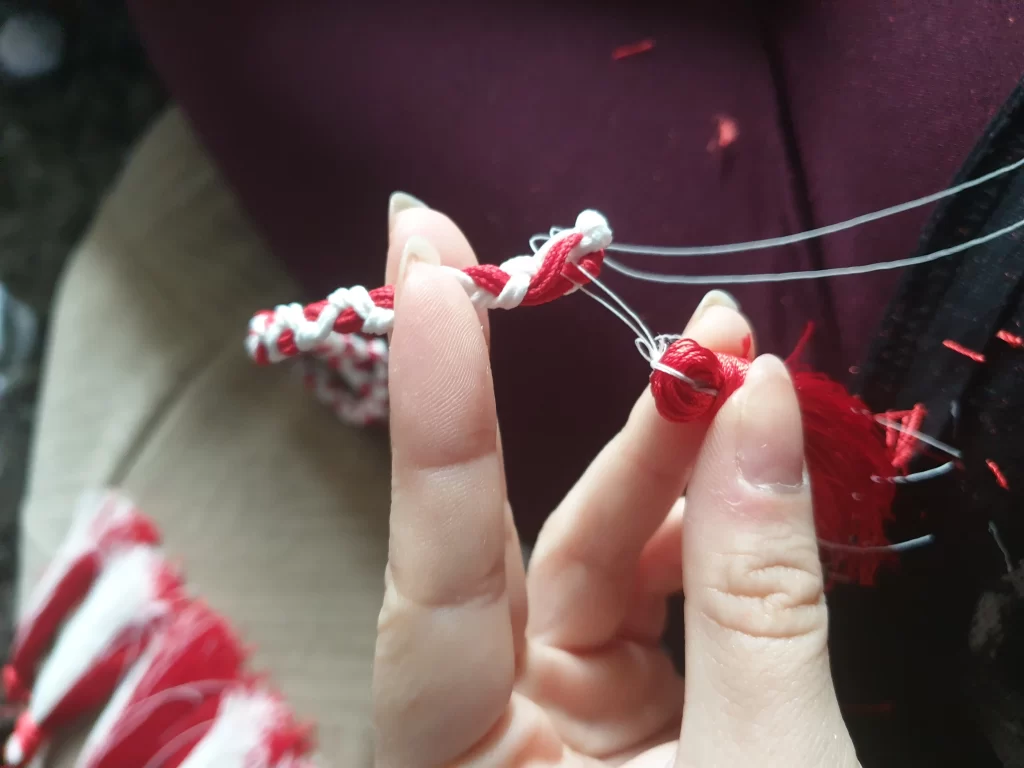
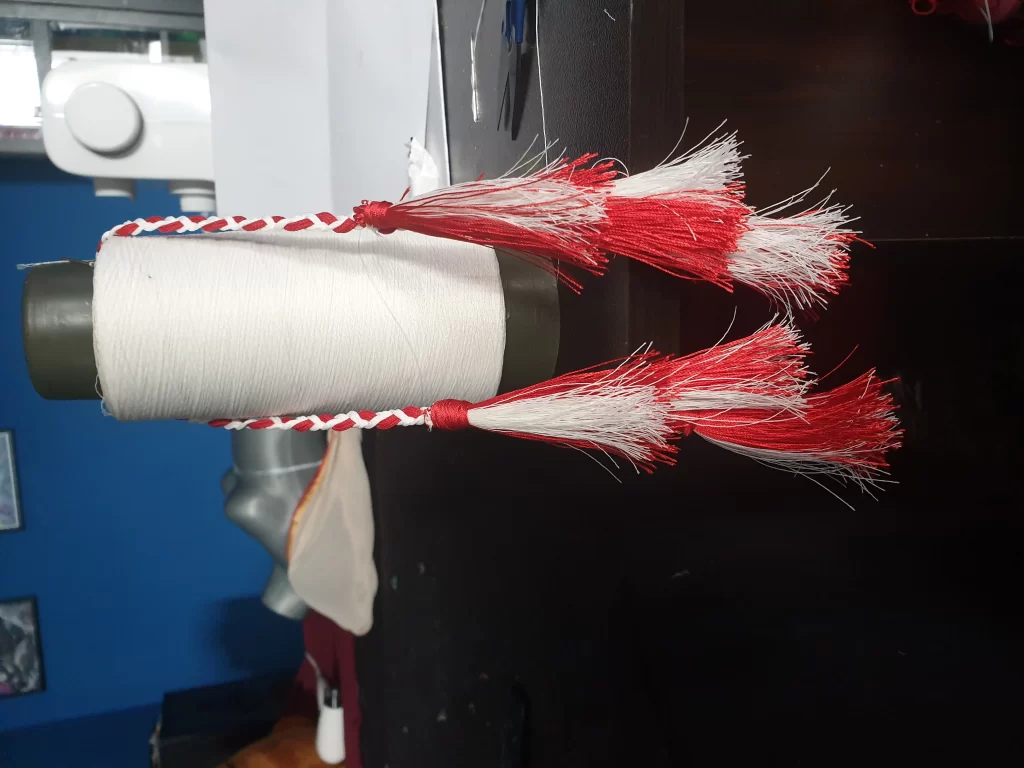
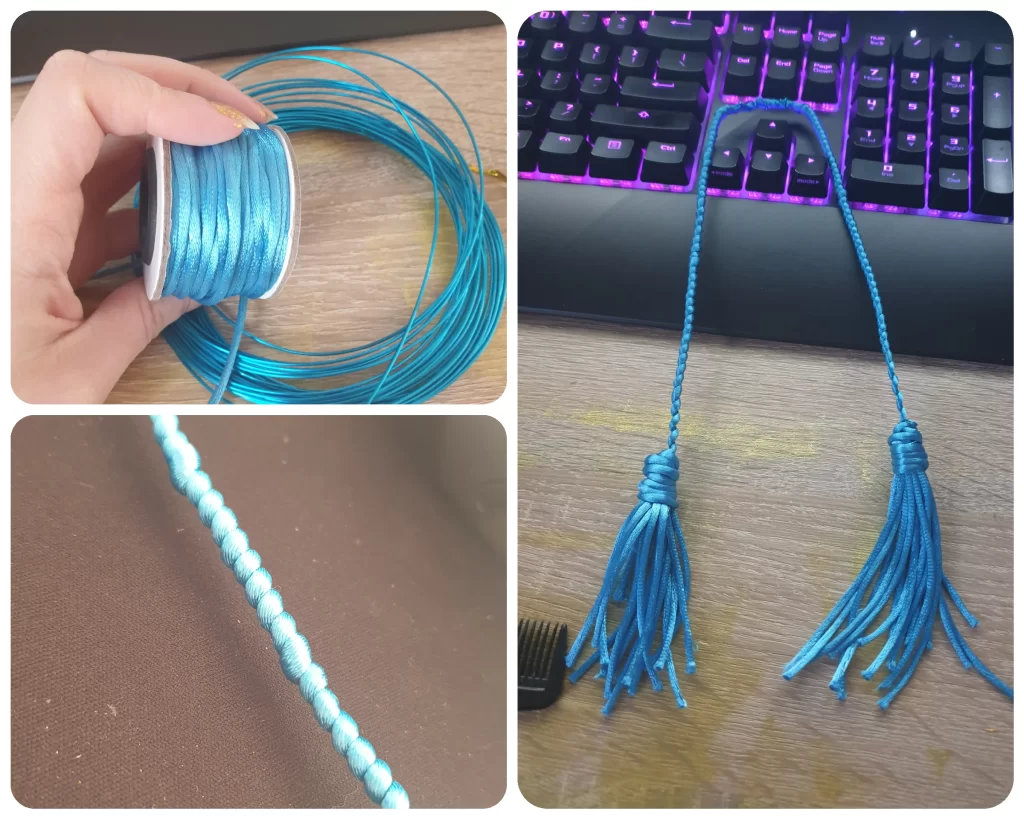
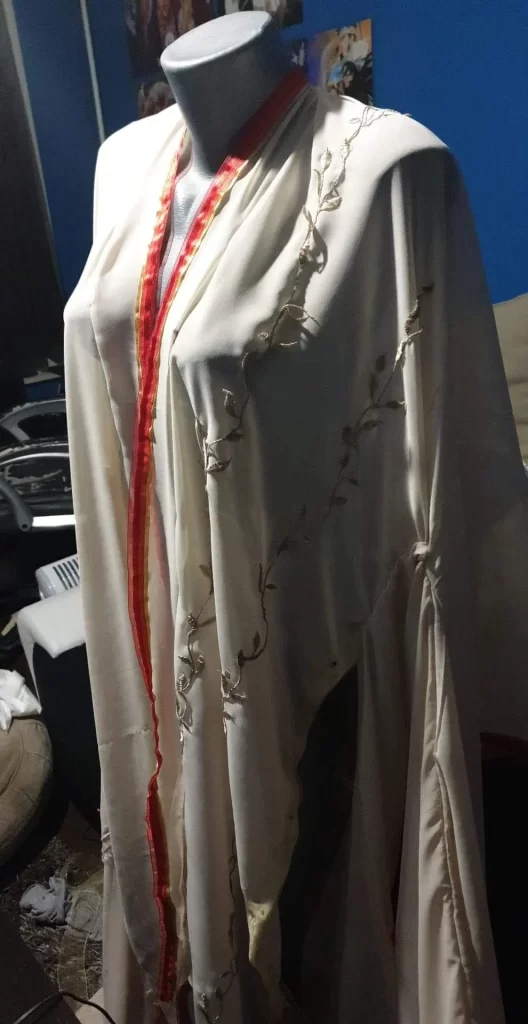
For the back accessories, I used white and red laces and thick threads for the tassels.
I intertwined the laces to create the form and the shape of the accessory. For the tassels I have developed a weird technique – I folded a piece of paper. Then cut out the center of the paper at both ends. I started wrapping the thread over the edges until I had a thick bundle of thread. Once the amount was enough I cut the base part and wrapped some more thread to create “the head of the tassels.” The arch detail I created with thick paper and some wire inside of it, to make the desired shape.
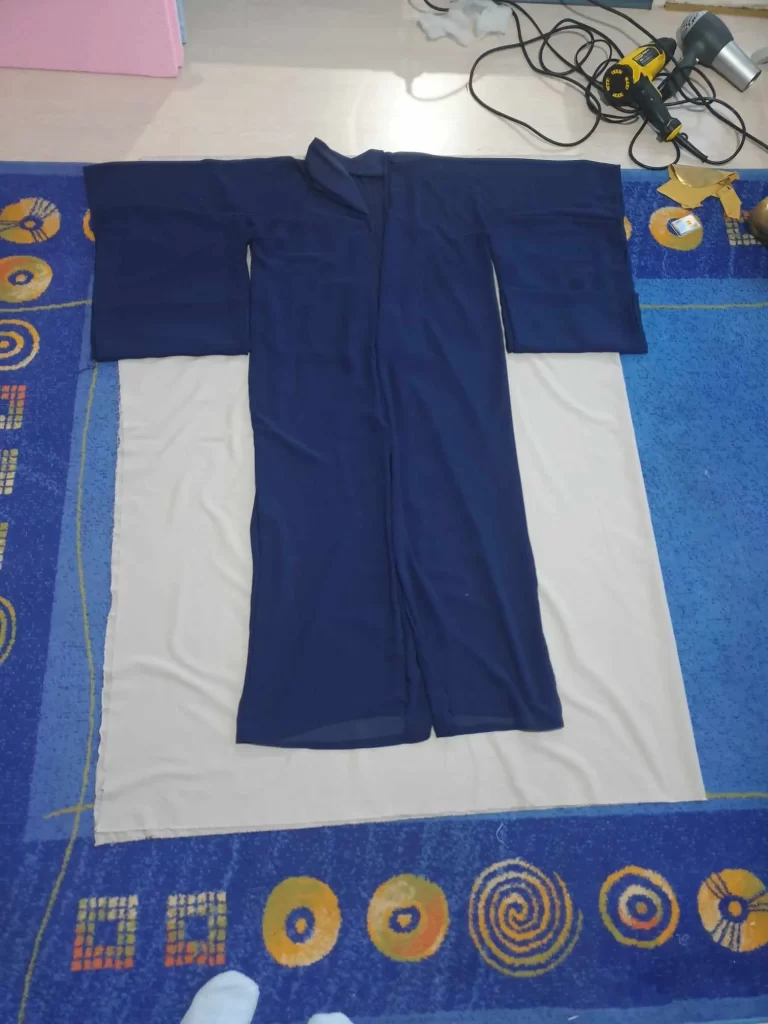
Dress/ Kimono
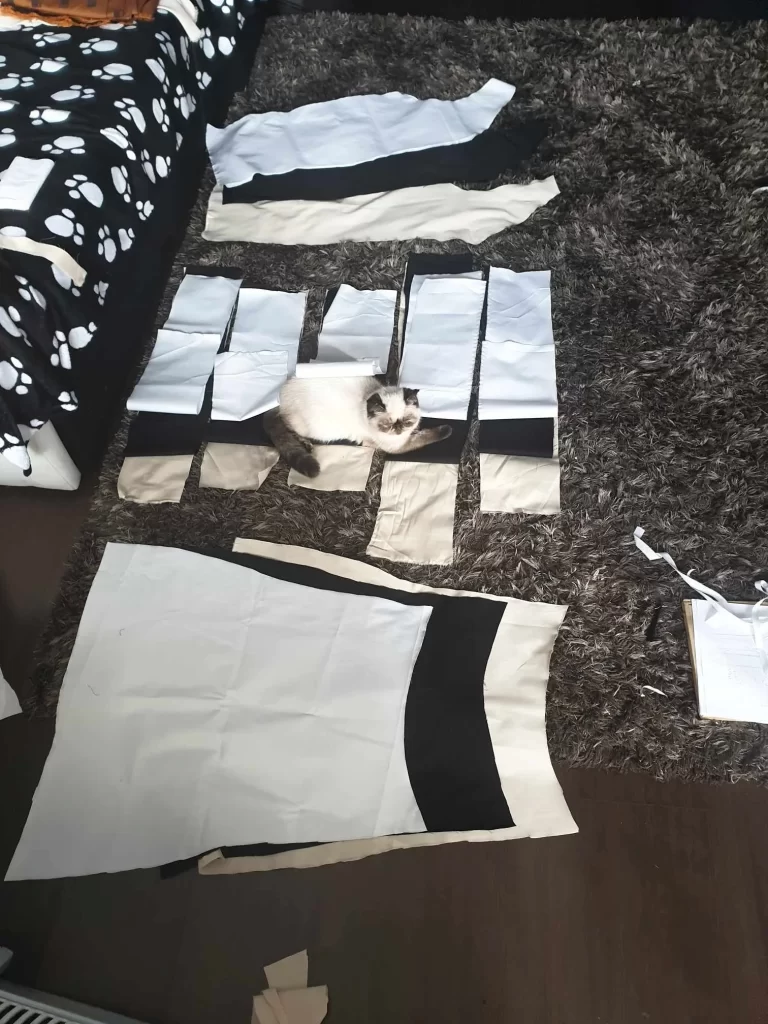
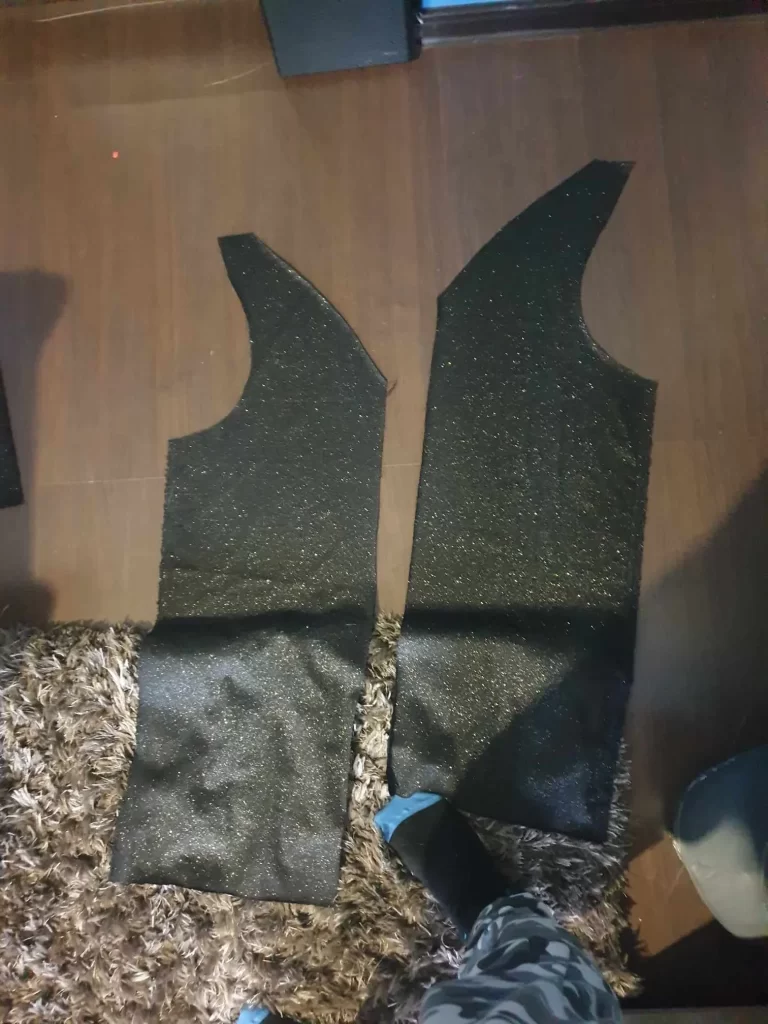
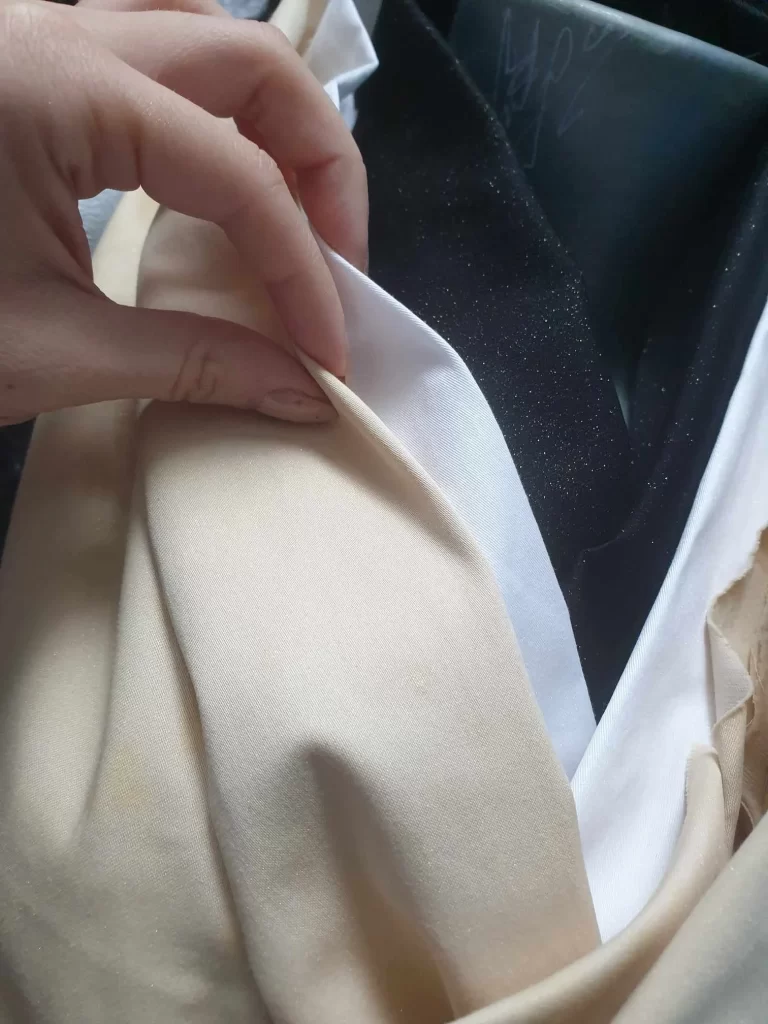
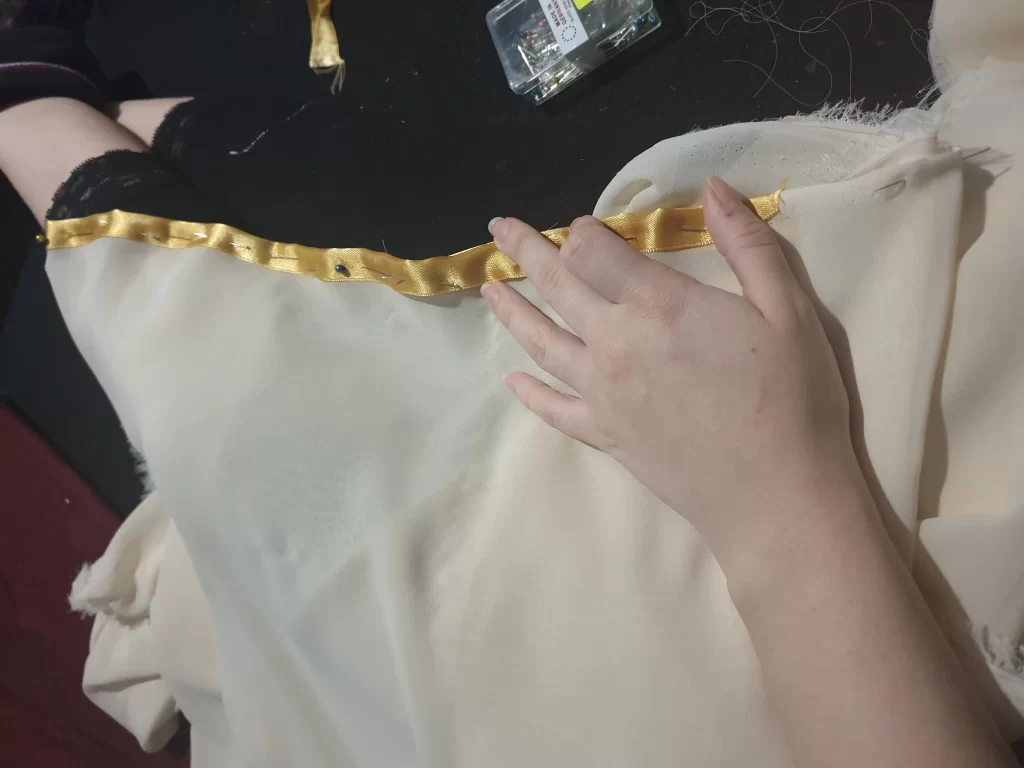
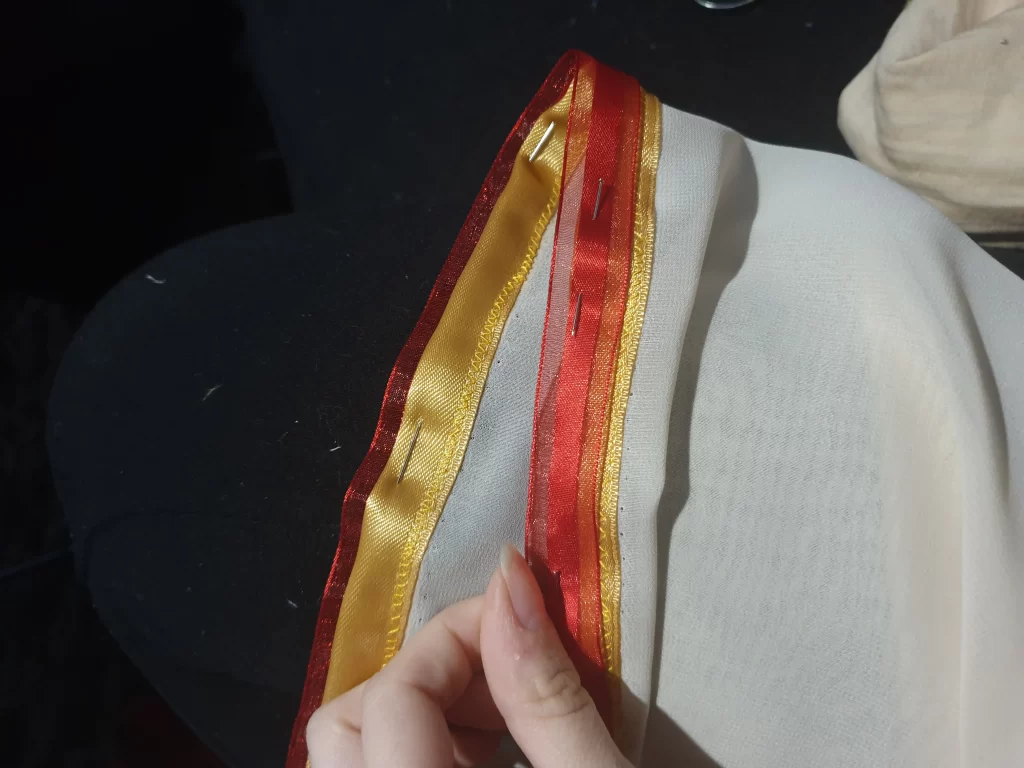
For the base garments, I used cotton with the satin mix. I used several patterns taken from the internet and modified them to suit the character. Since both of the backs are open – I had to cut out most of the back panels of the garments. The whole piece contains 3 layers – 1 white; 1 black and one in beige.
Since they are graduating – the biggest one is the black one and the smallest one is the beige one. They have a few centimeters apart in terms of length.
Once the drafts were ready – I outlined all of the panels and cut them from the fabric. I used glittery multipurpose paint which I watered down in a spray bottle. Then sprayed the liquid over the panels to create a shiny texture. When the fabric dried, I began assembling the garments. Most of the seams were made using the straight stitch. I used zig-zag with a small width to create a finish since I do not own an overlock just yet.
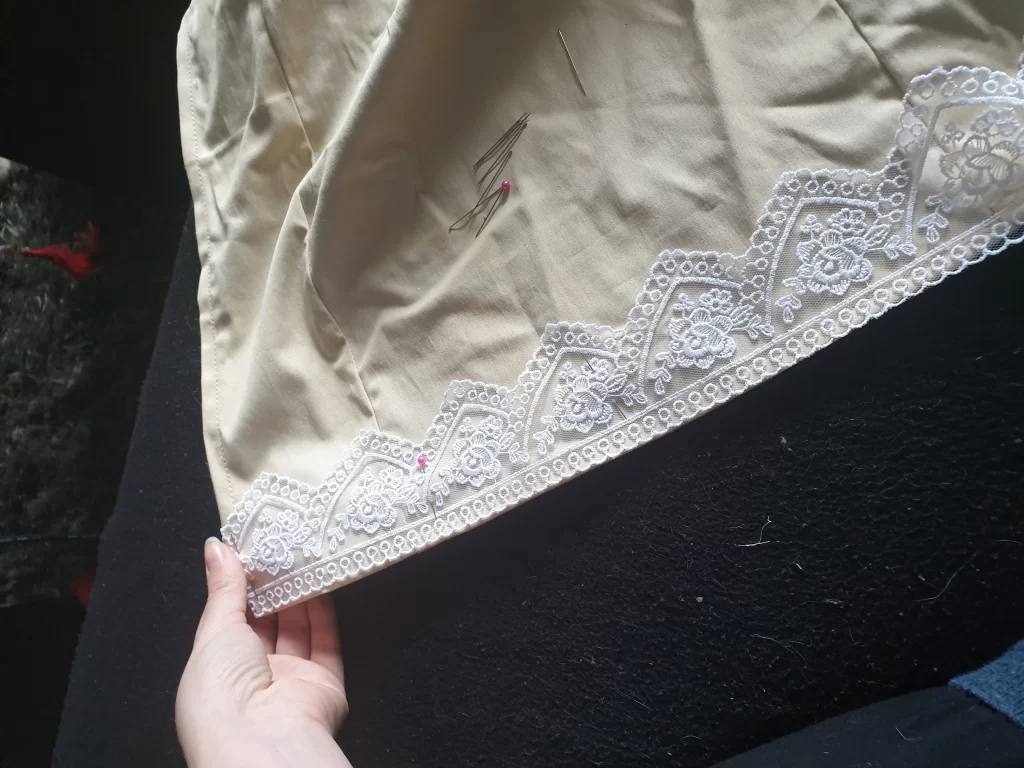
At the bottom of the beige kimono, I attached a lace that is similar in shape to the original.
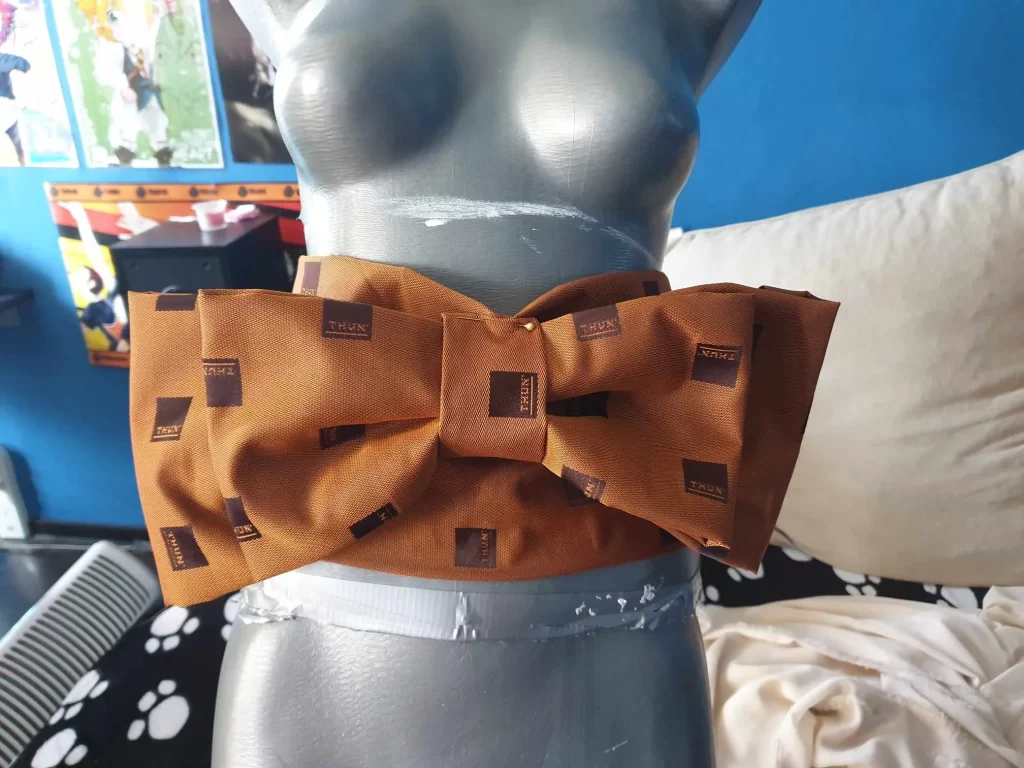
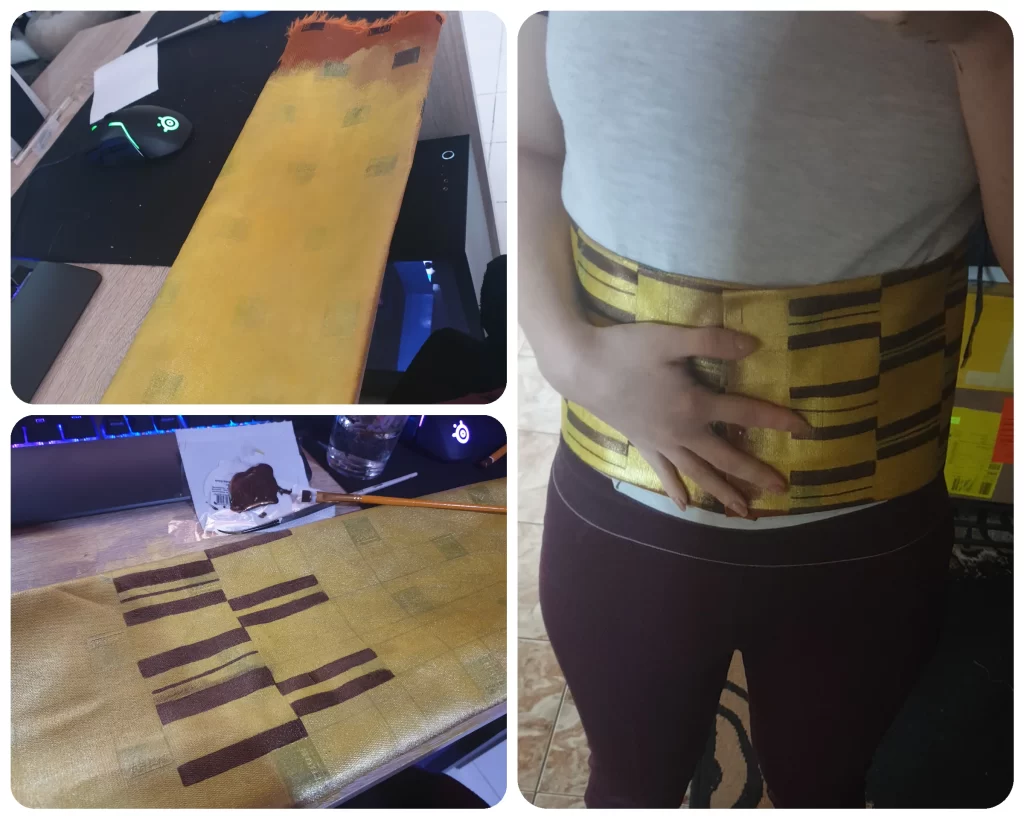
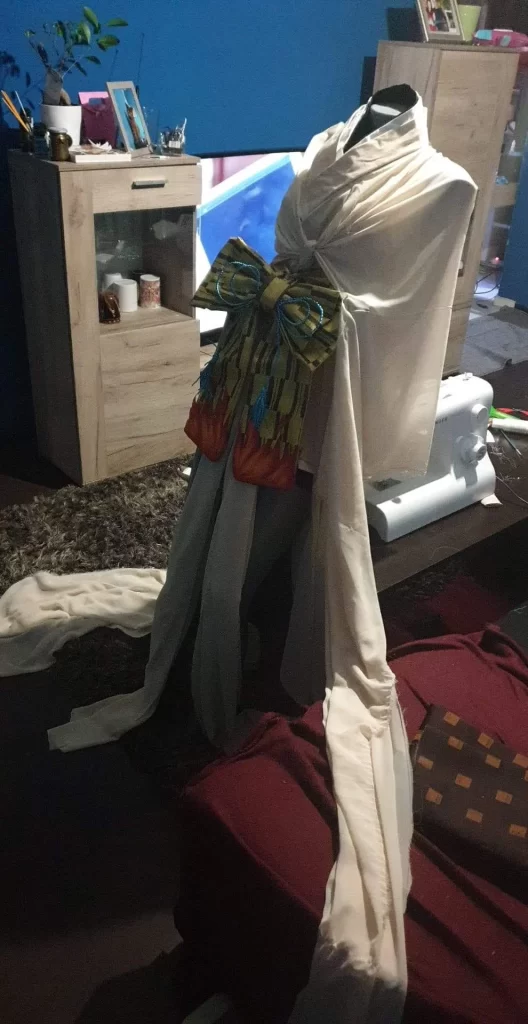
Obi belt
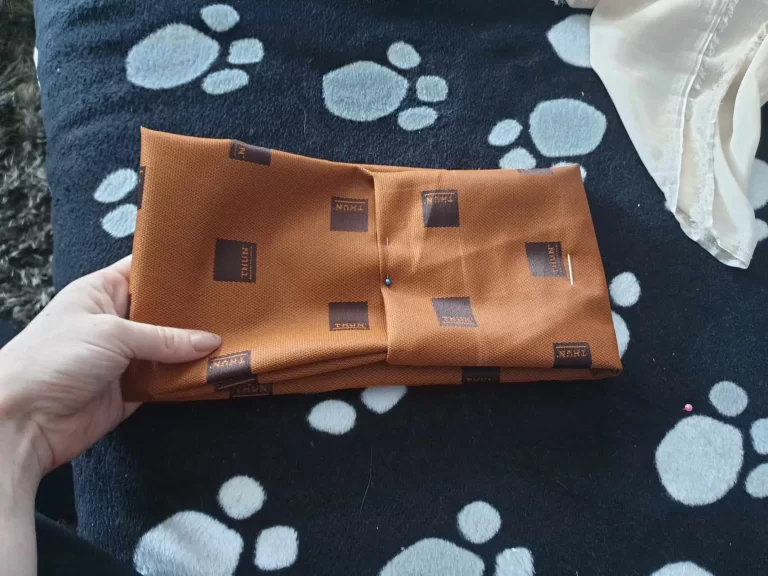
For the Obi, I used a jacquard fabric, which was hard enough to create the sturdy texture and shape of the Obi belt. The most accurate pattern I could find was a squared one but the color was off.
To change the base color I used Cadence paint, several bottles of them, and dyed the material. The series of the brand has multipurpose and covers the dark fabric completely after a few coats.
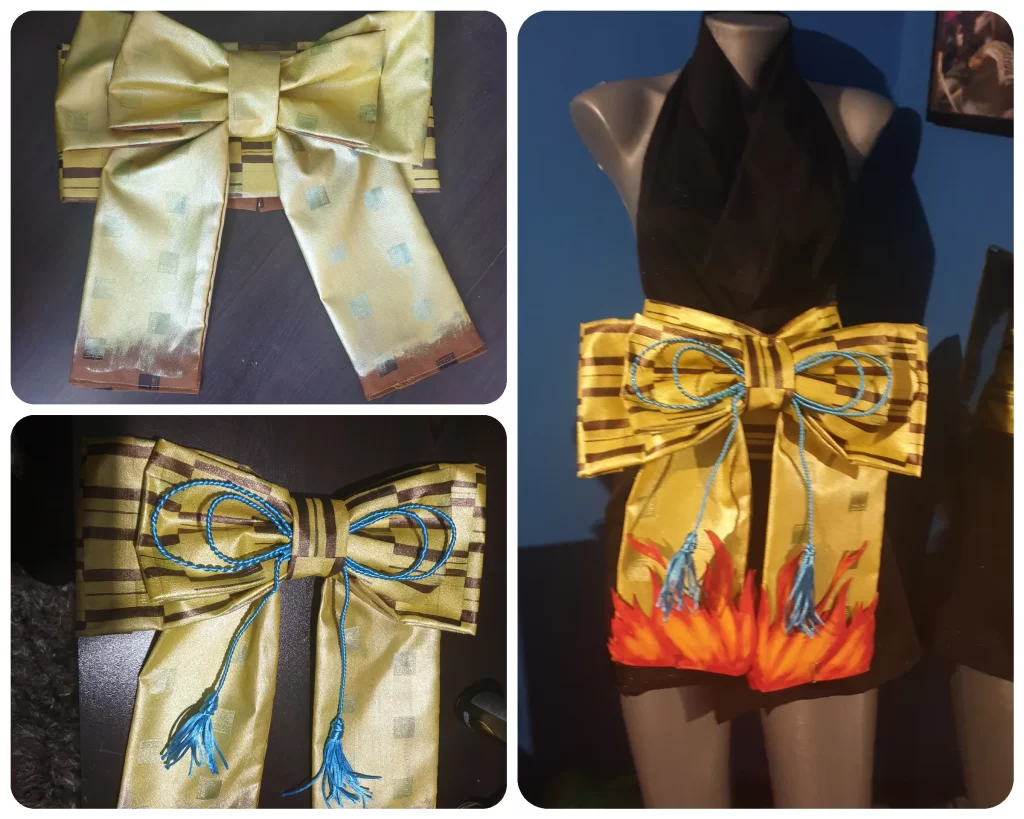
Once the base was done – I had to line out the pattern of the design. I used the good old pencil and ruler to mark down the pattern. Then I used Cadence Chokolata to fill out the needed squares. The Bow and the base of the Obi are detachable for ease of transportation. The Obi is connected with corset buttons at the back and the Obi bow attaches with the same mechanism.
For the Flame accessories, I used the same 0.1 cm EVA foam. I similarly created the flames for the head accessories. In total, there are 4 flames – 2 front and 2 at the back of the bow. They are glued down to the fabric for extra hold and security.
For the blue bow and tassels, I used a similar color wire and satin cord. I twisted tightly the cord over the wire and styled it in the desired shape. The tassels are also made from the same material.
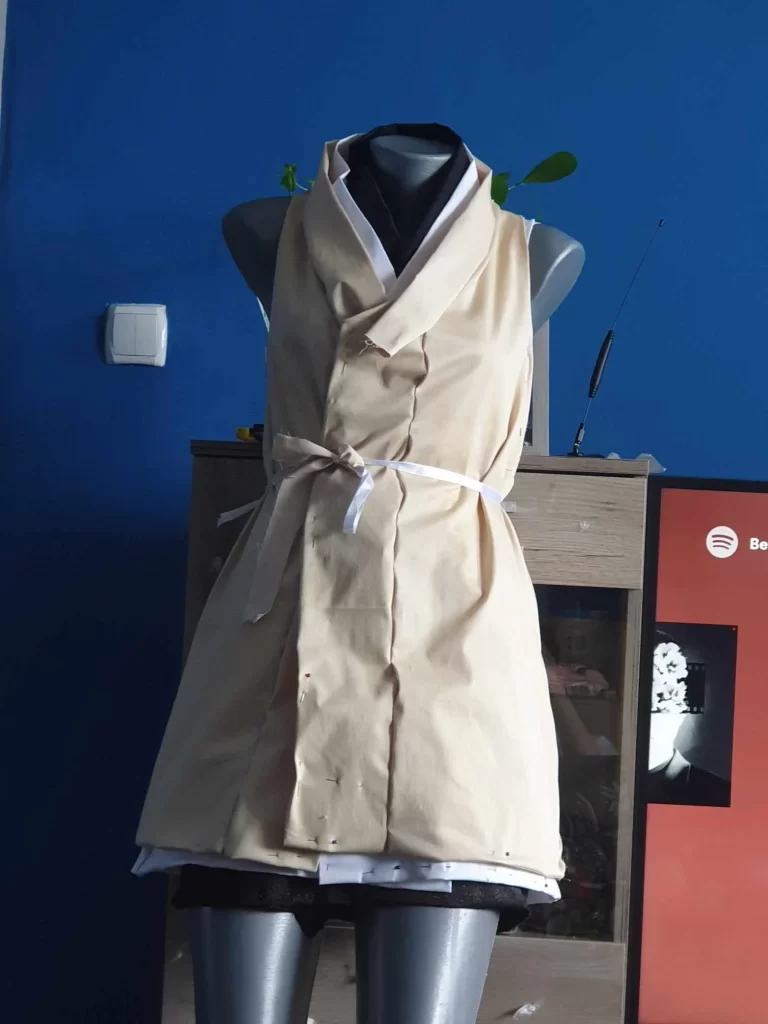
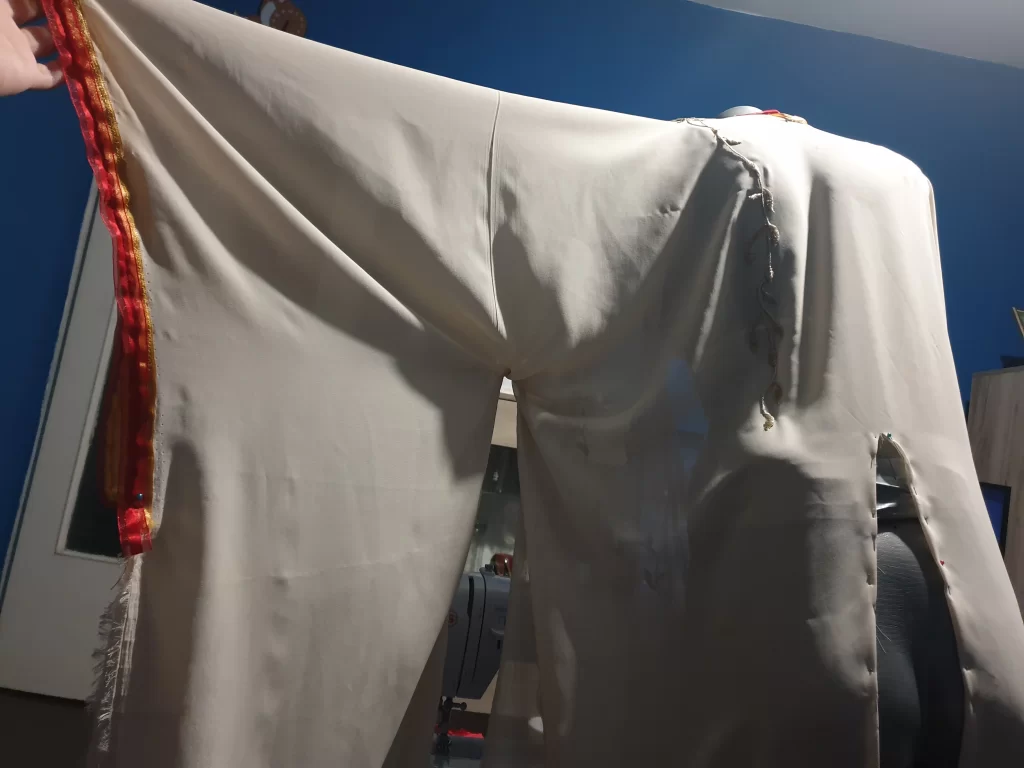
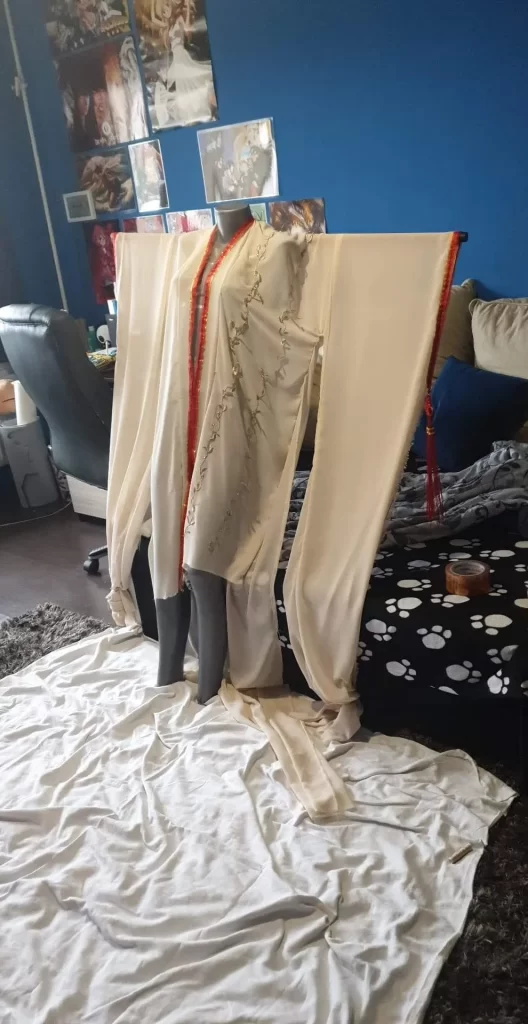
Haori
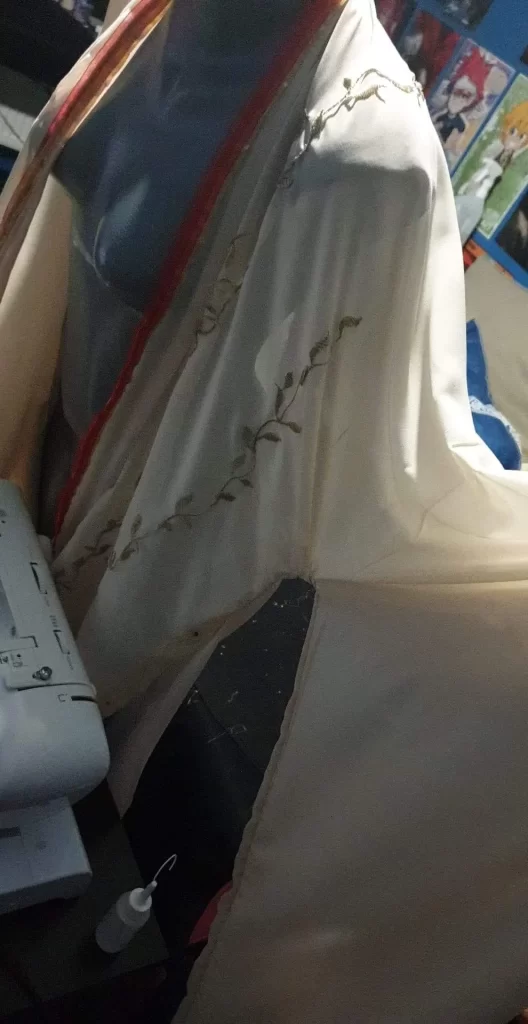
For the top kimono / haori I used the pattern of an old kimono of mine which I created for ICL 2018. I used a transparent beige chiffon as material. I traced all of the panels and cut them out of the main fabric. The only alteration I made was for the sleeves as they needed to be longer and in different shapes at the bottom.
Then I pinned everything together (inverted side). I sewed down the color to the front panels by hand, for the sleeves I used the sewing machine with a straight stitch. The lining is made from satin lace, and 2 chiffon/satin laces, which I sewed on with the help of the sewing machine and a zig-zag stitch.
The accessories on the sleeves are pre-bought charms from a Chinese store. I removed everything that was attached to them, made a small hole in the sleeve, and attached the charm.
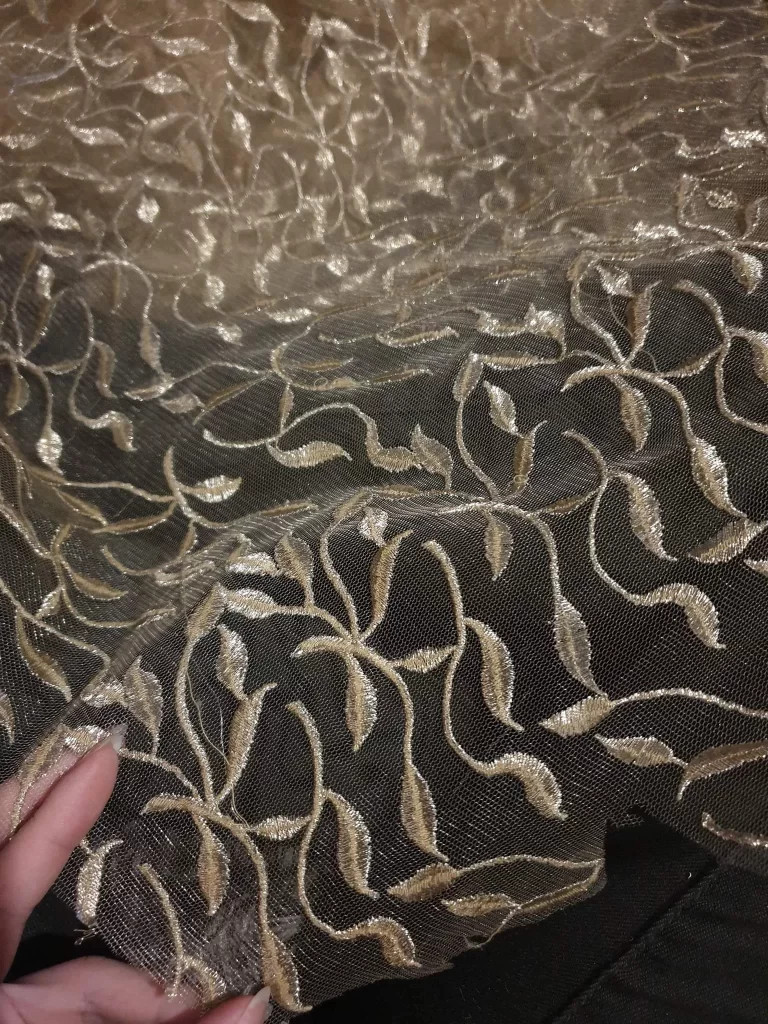
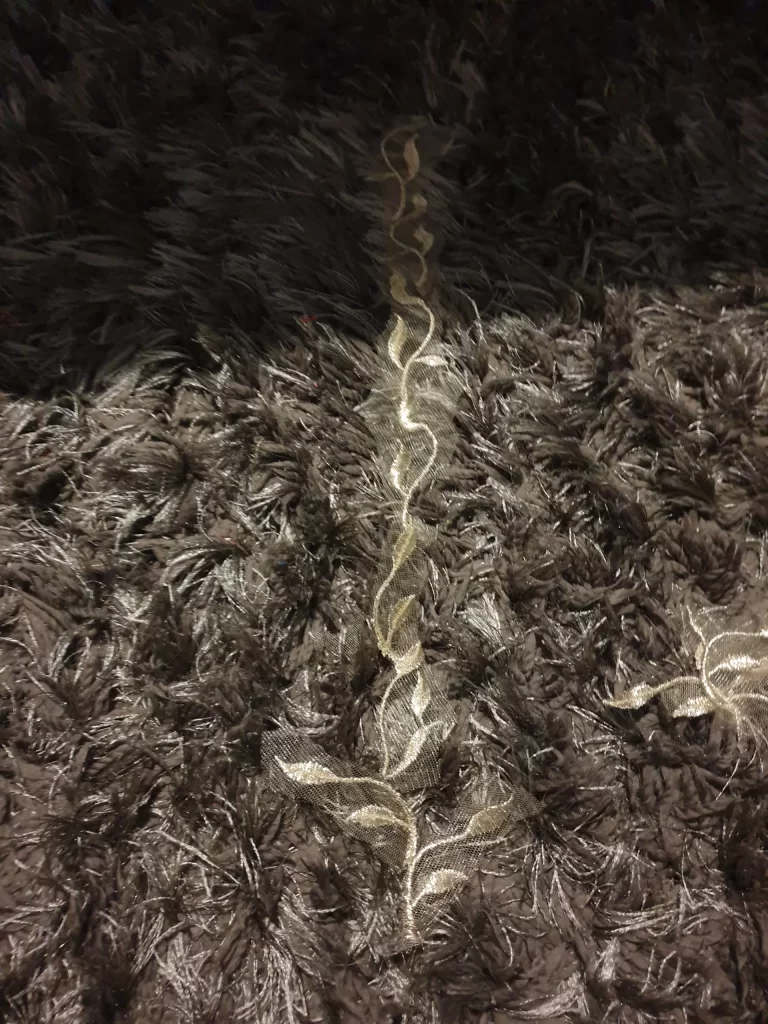
For the leaf pattern that is on the fabric, I had to buy a lace that was similar in pattern to the original design. Then I had to cut each leaf and adjust everything manually. This was the most time-consuming part and the most expensive fabric used on this costume. Each leaf was cut out from the fabric sheet with a scissor and then glued in lines to the haori with transparent fabric glue.
The fan sleeves I made with 4 different shades of organza lace. Since I had to con-crunch really hard, I did not have time to make photos to show.