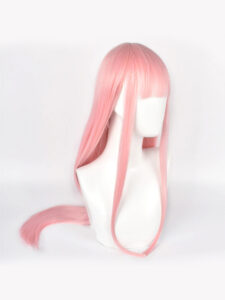
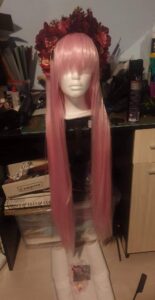
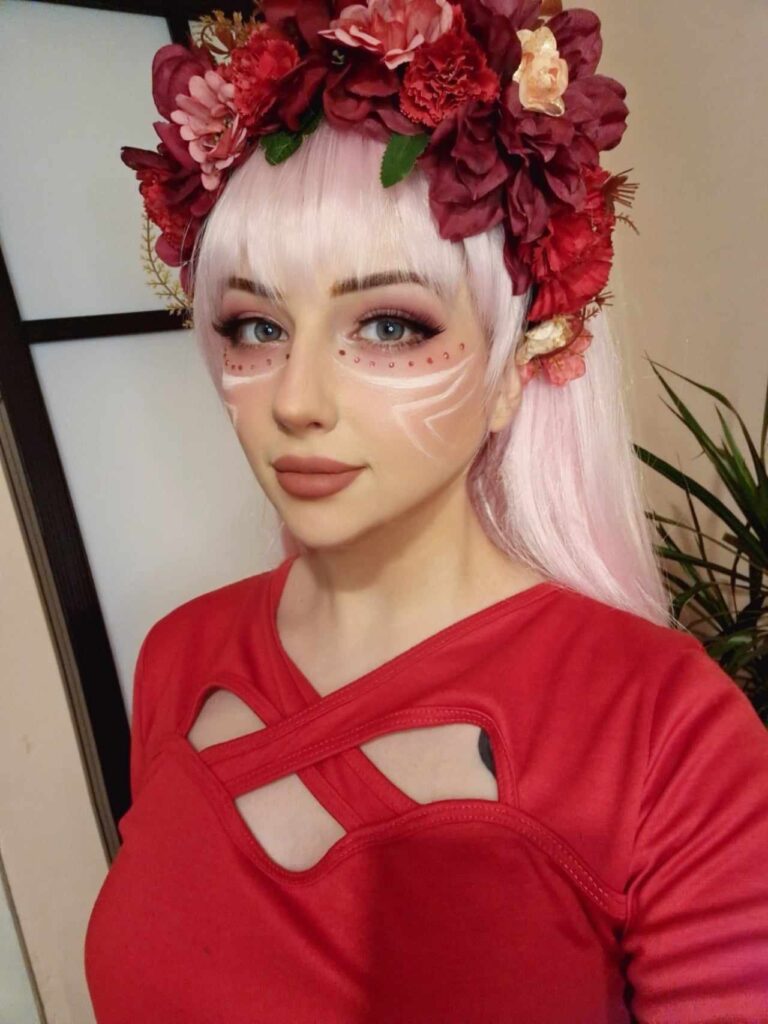
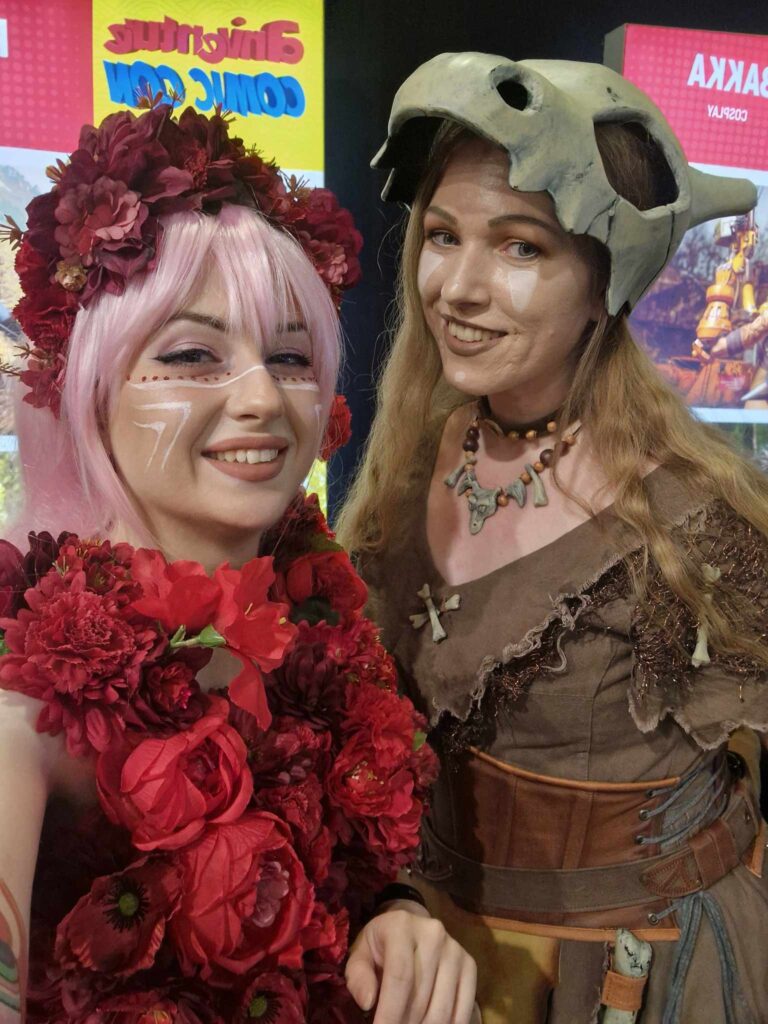
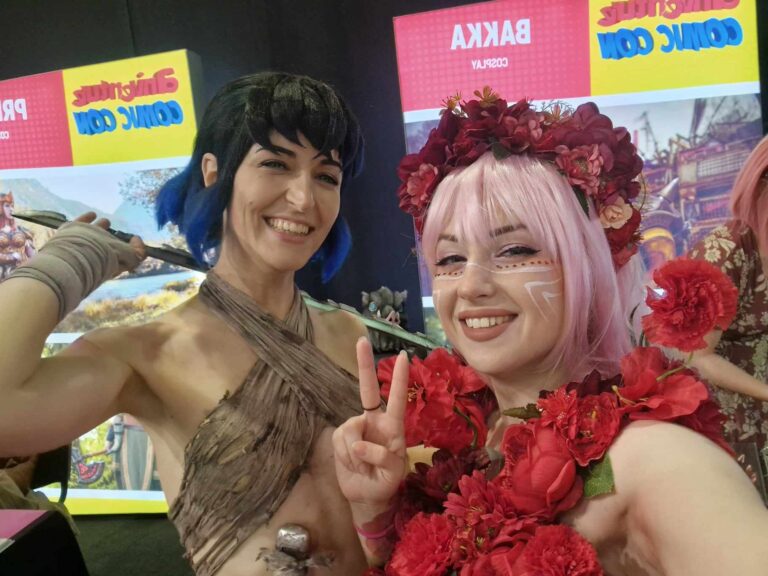
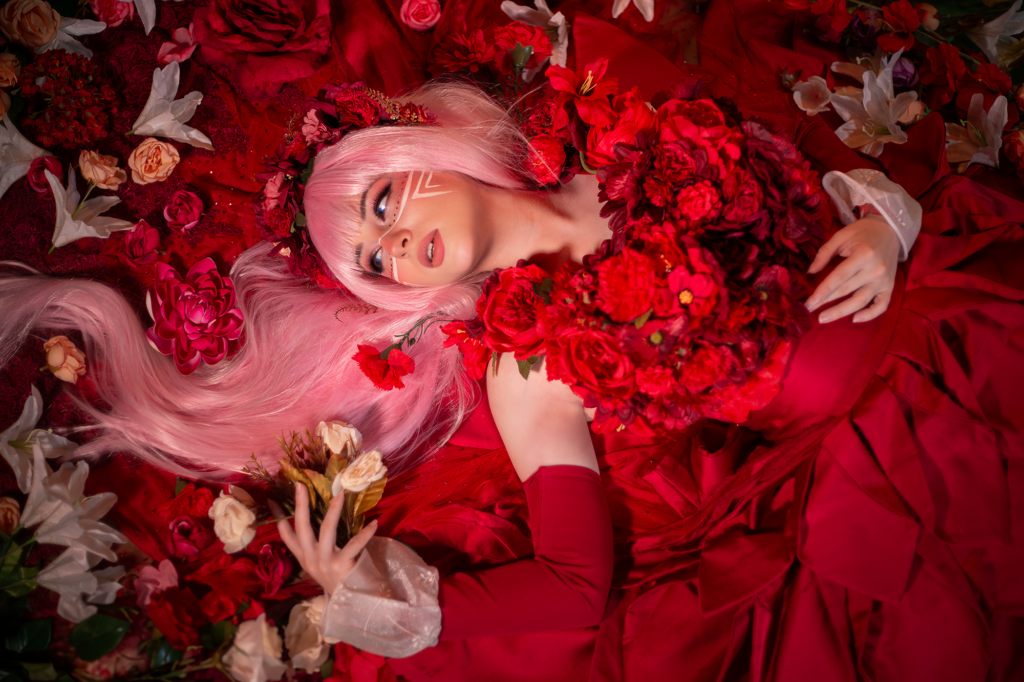
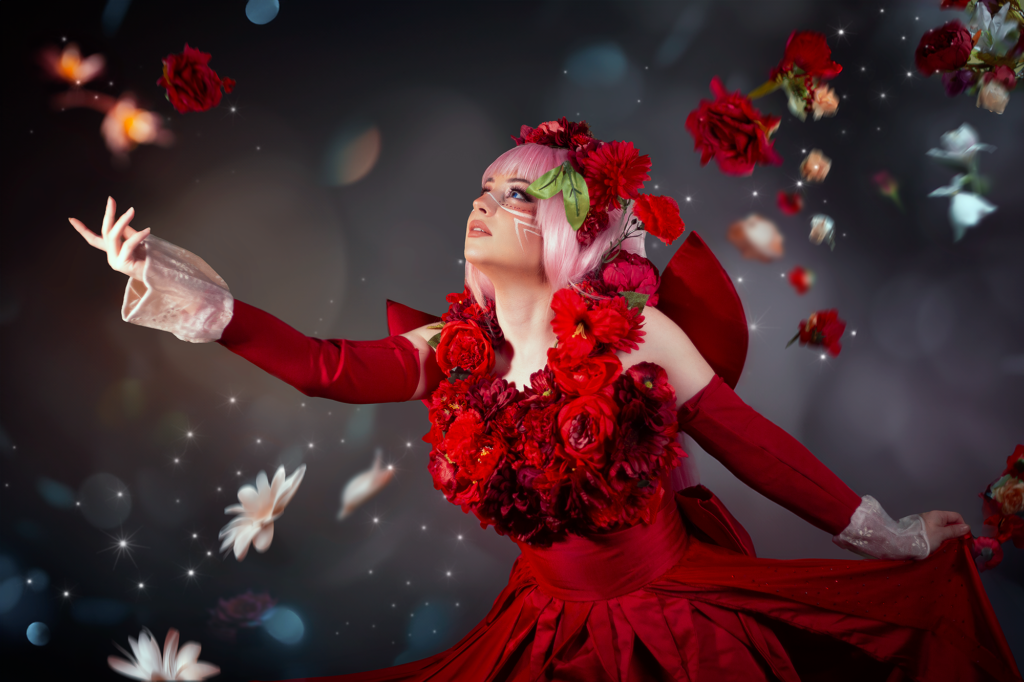
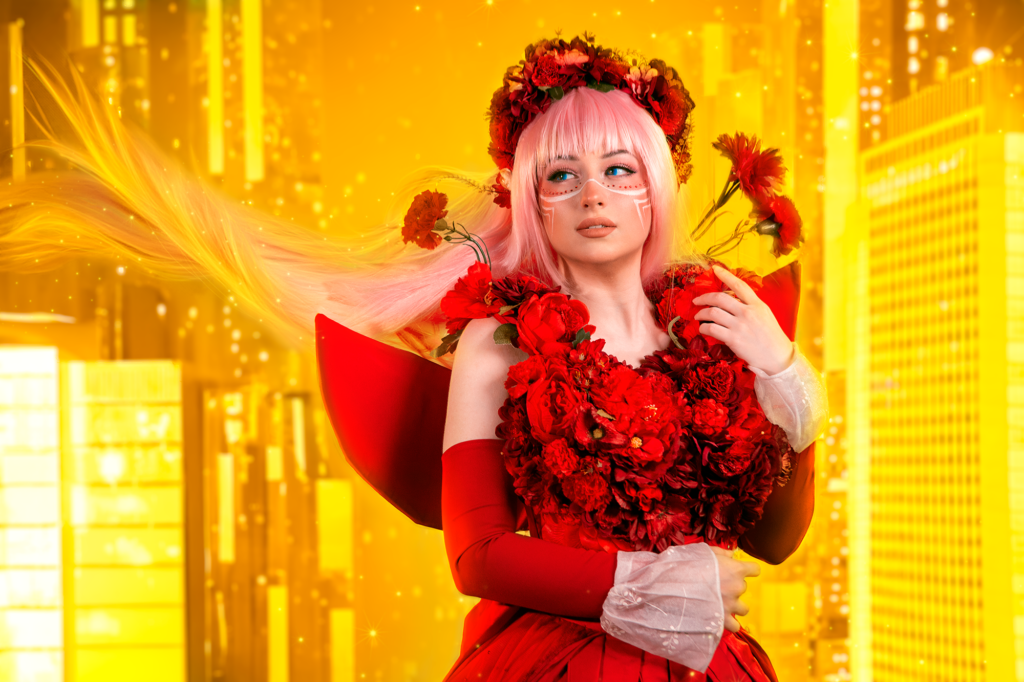
The wig I used is marketed as suitable for Zero Two. Since I liked the pink nuance and the length of the wig, I decided to stick with it and try it.
First I teased all of the top layers, sprayed some got2b hair spray, and straightened the frizzy bits. This way I gave more volume at the top for a more natural look.
The fringe does not have the typical side bangs, instead, it is stylized as a more normal Disney-like haircut. I teased the hairs at the base and cut the fringe into shape. Then I used a whole can of hairspray to fix the look and a bit of blow drying to set it.
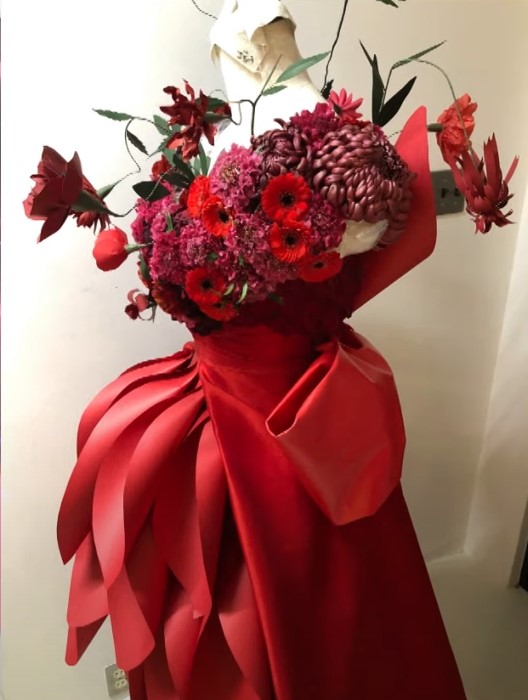
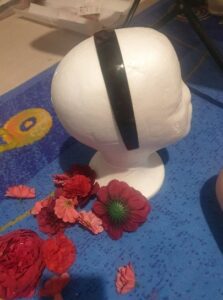
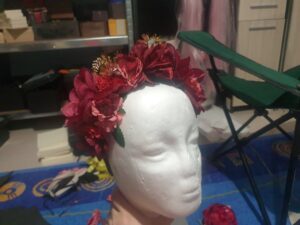
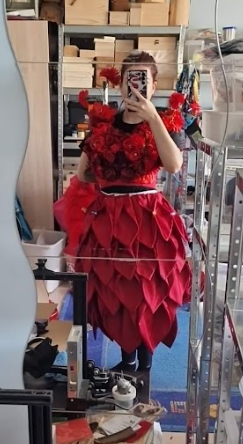
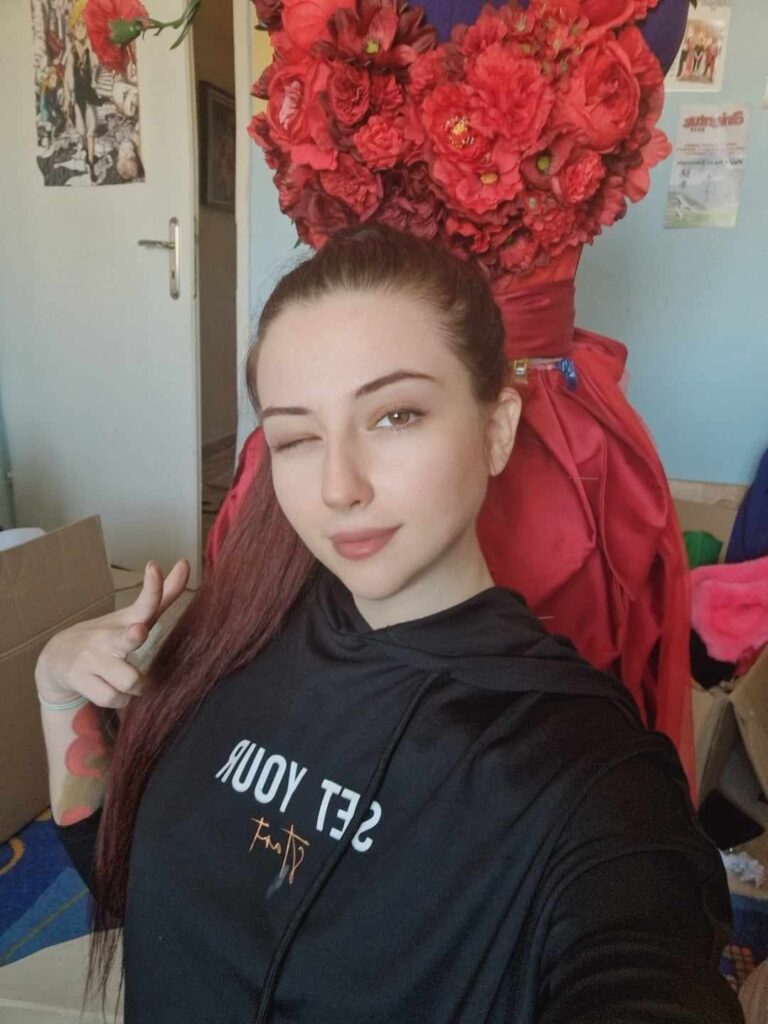
I used a plastic headband as a base. Unfortunately, it was lacquered, so I had to sand the shiny layer down. Once the surface was clear, I hot-glued all of the flowers. I arranged them to match the dress and then edited the flowers’ color to be a bit more on the red side.
Make up
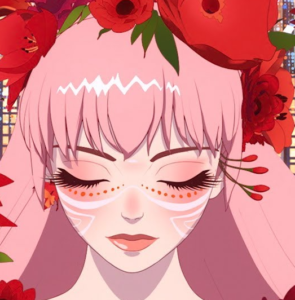
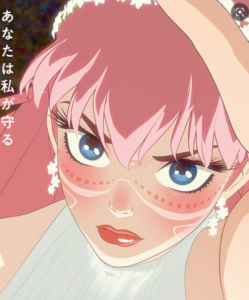
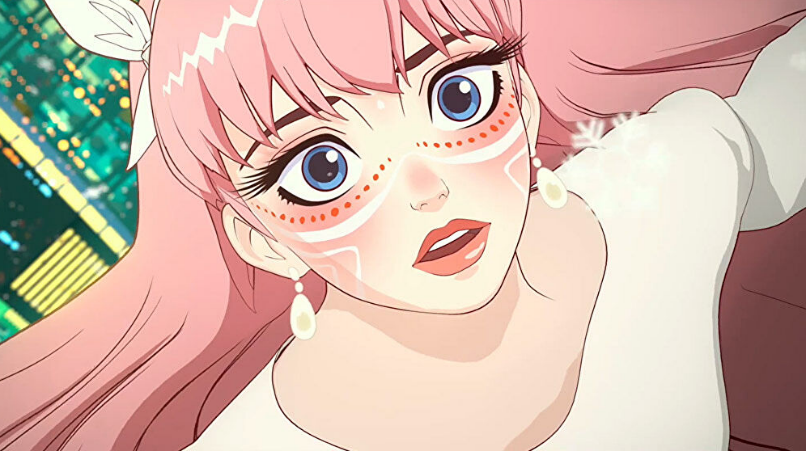
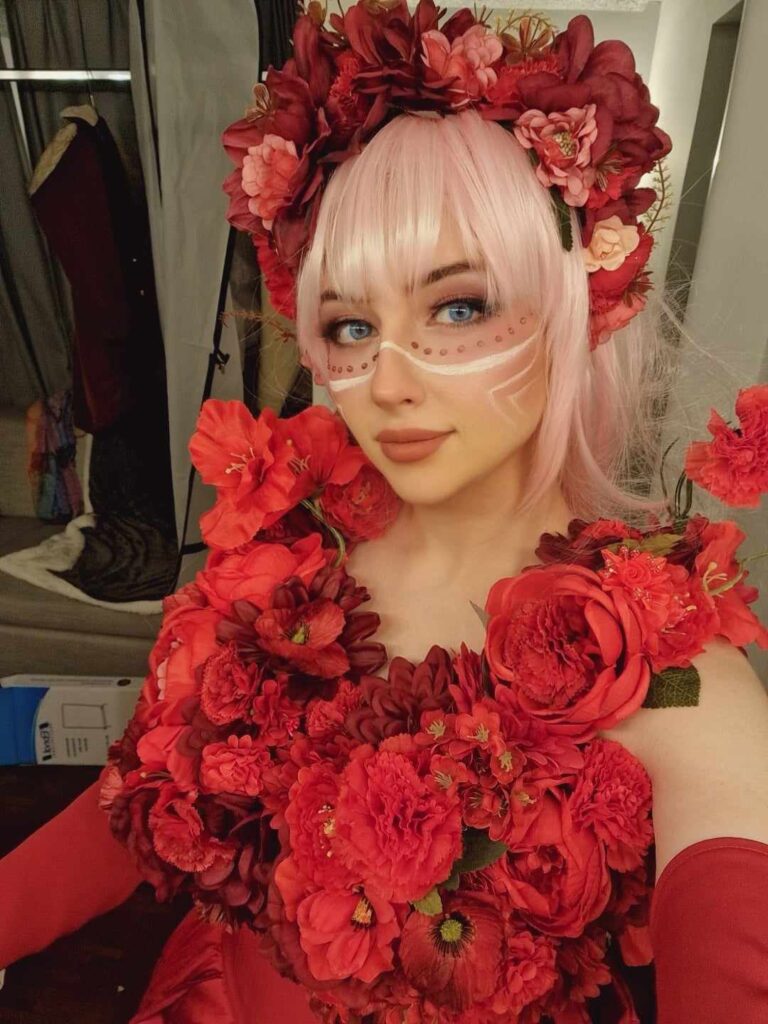
I used several different palettes for her makeup. She has this super futuristic and pretty design and a few unconventional details.
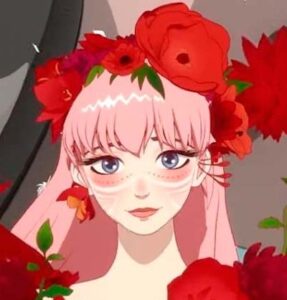
Belle is bullied because of her freckles, as this feature is considered a flaw in japan. In her design, they are illustrated as red dots/gems.
I implemented small rhinestones in my makeup, which I glued onto the skin with Kryolan spirit gum. I also used Kryolan’s Supra color in white for her distinctive face marks.
I did my makeup in the following order: eyes > brows > rhinestones > foundation > white marks > lips > fixation.
The contacts used are ColorVue in Solar blue.
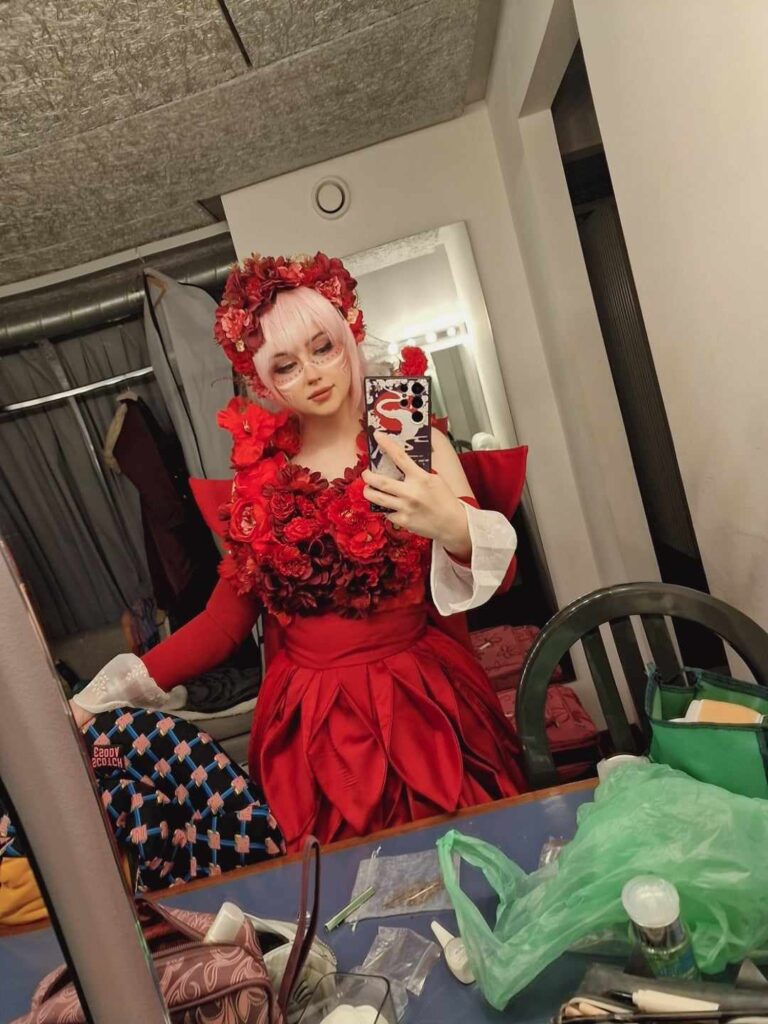
The dress
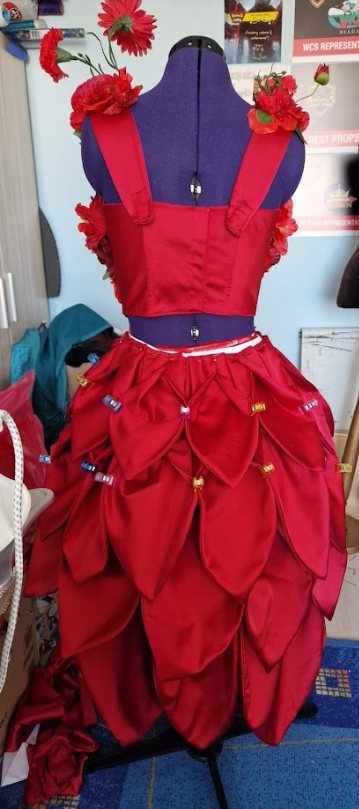
The dress consist of 4 parts - top, sleeves, skirt and a petticoat
Top
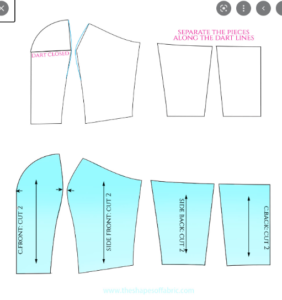
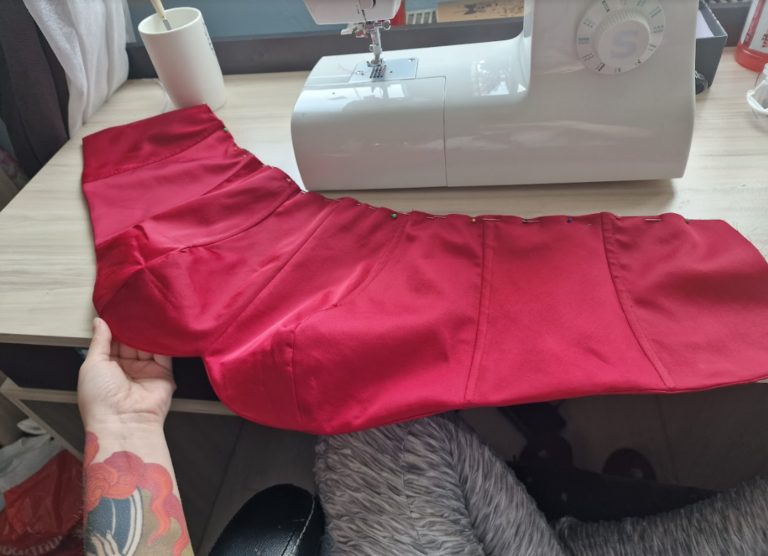
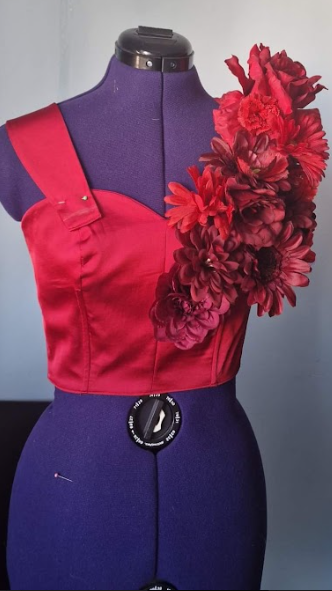
For the top I used a simple sweetheart bodice pattern that I found on Pinterest. I sized it to fit.
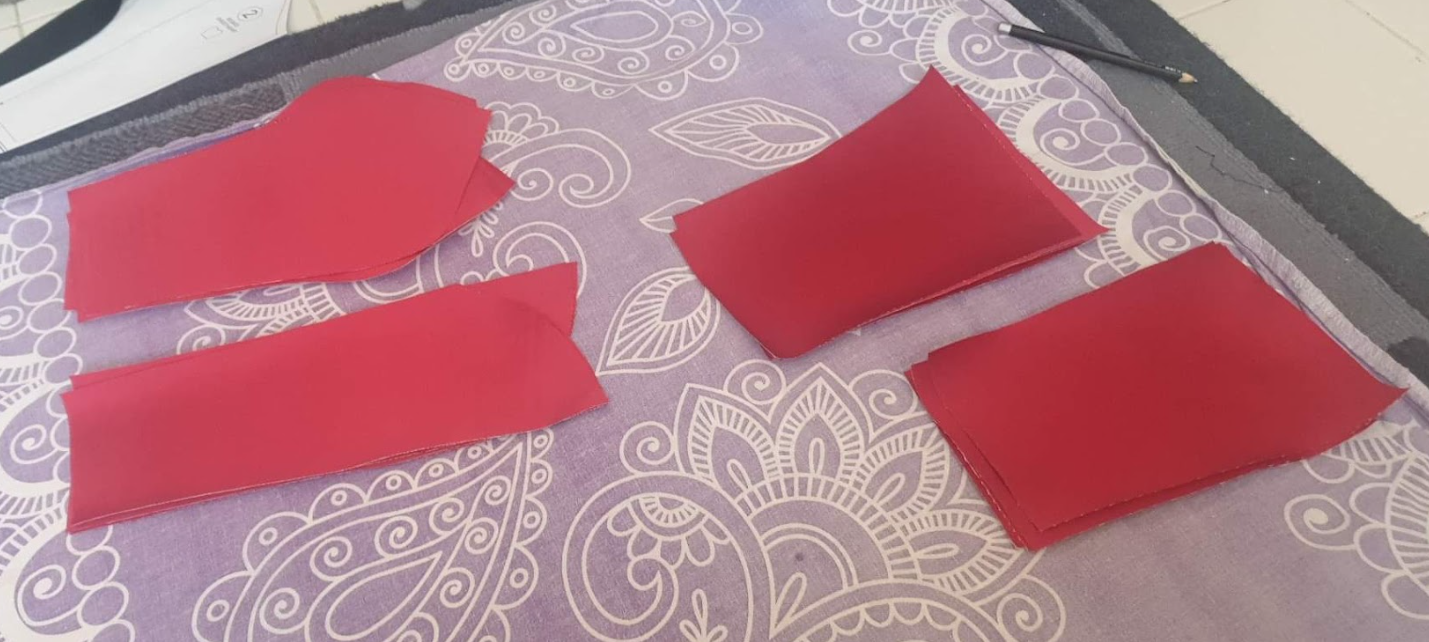
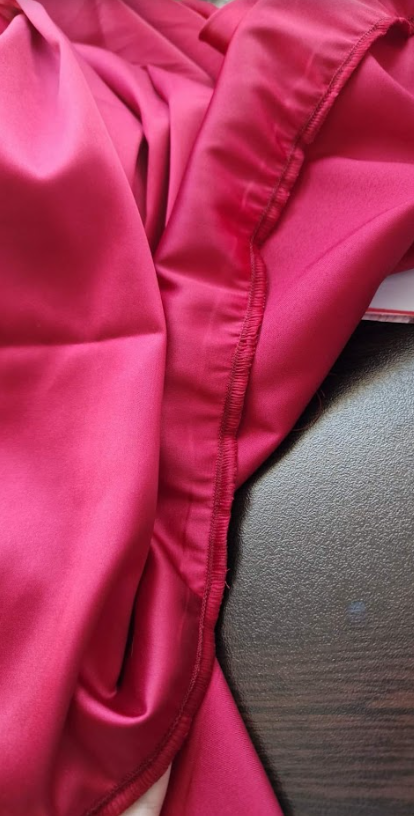
Then I traced all of the parts on the interfacing and cut all of them out. Once done, I glued them onto the backside of the satin fabric with an iron. The iron had to be at a max temperature so both of the fabrics could stick to one another. Then I cut the satin pieces and ironed the front side for a clean finish.
After each piece was carefully ironed, I began the sewing part.
I used a straight stitch for the whole bodice. I left some space for the boning, as I wanted to give my bodice a fitted shape.
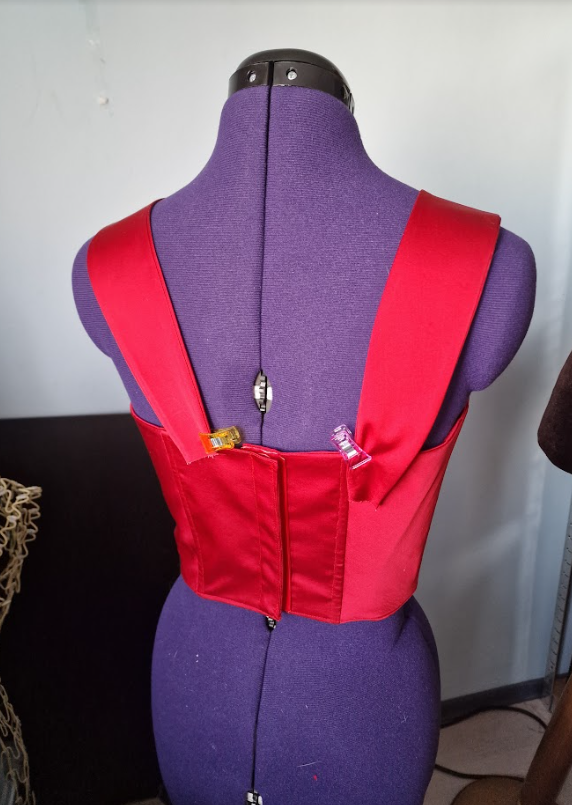
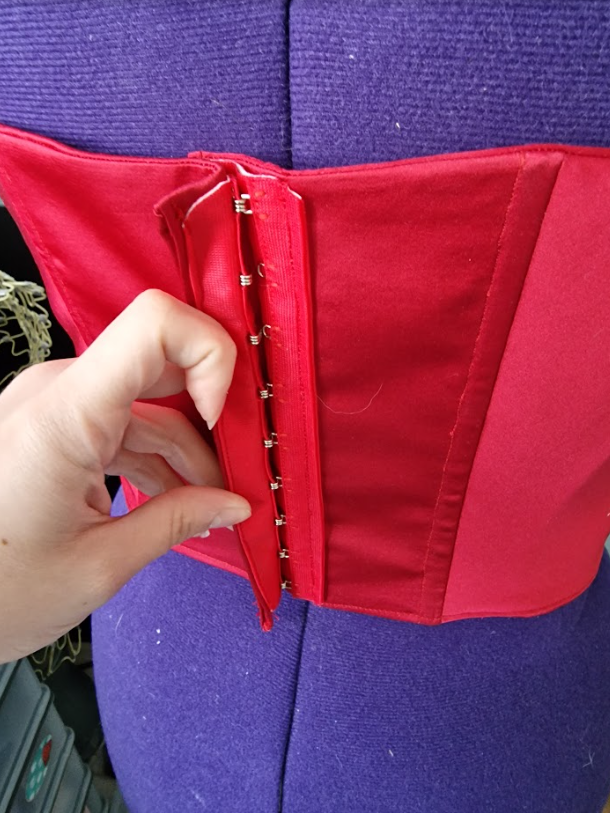
I sewed corset buttons at the back of the bodice for a firmer hold.
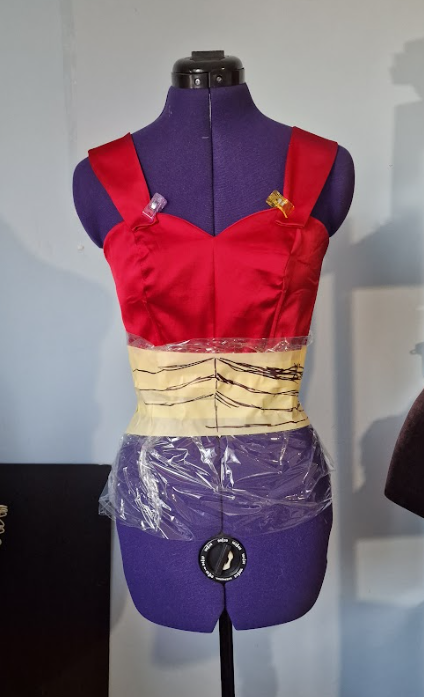
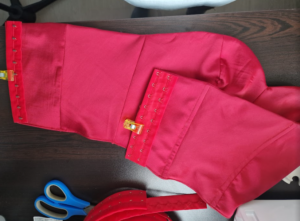
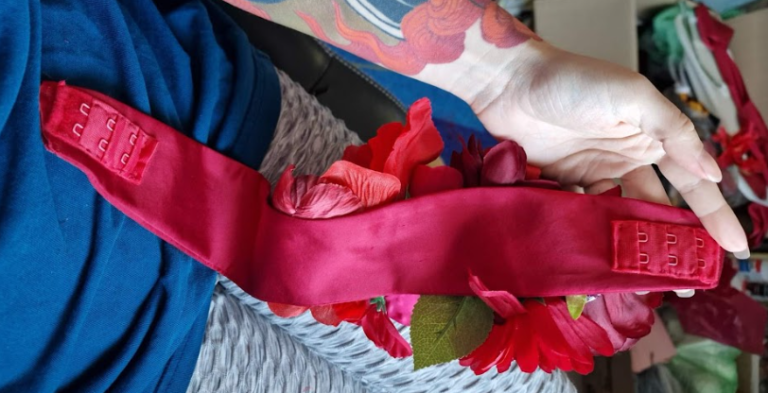
The straps are detachable for ease of transportation. They attach to the bodice with bra buttons, which I hand-stitched on the garments.
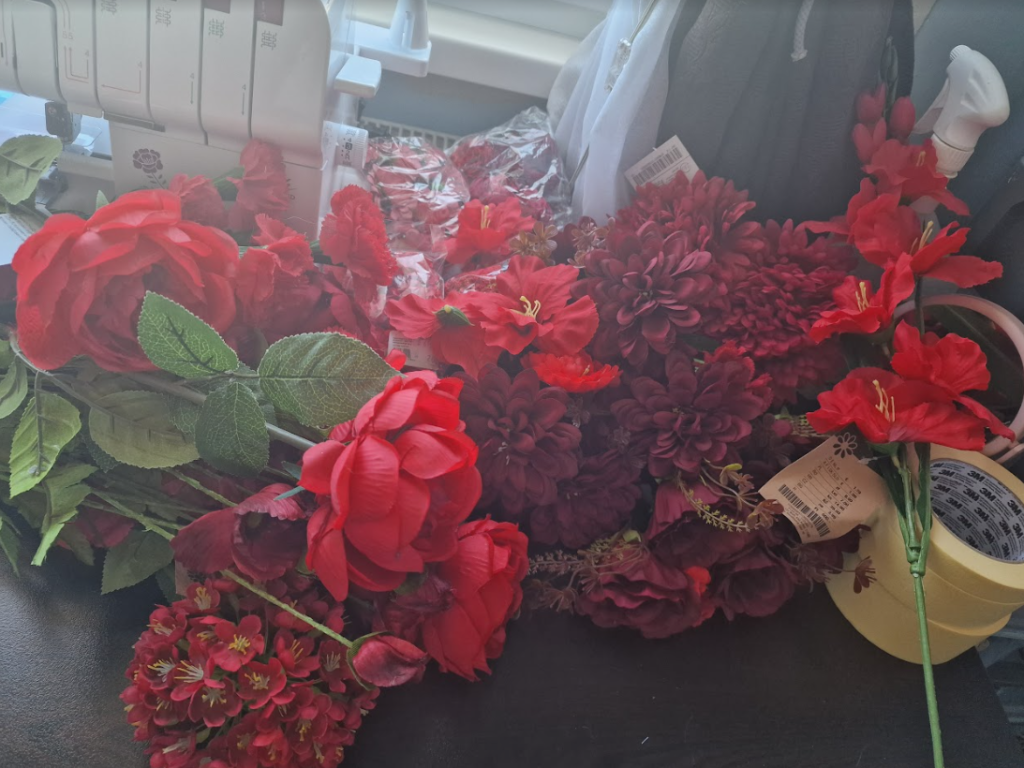
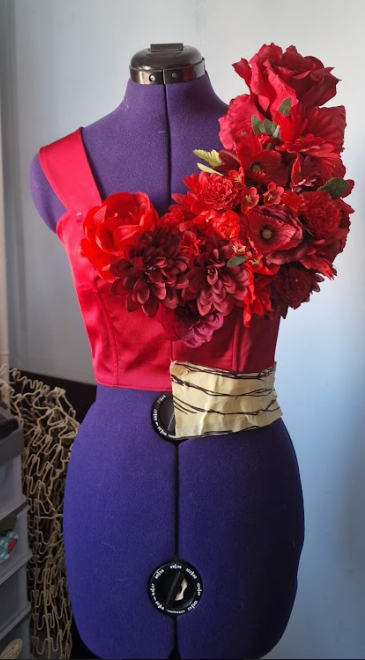
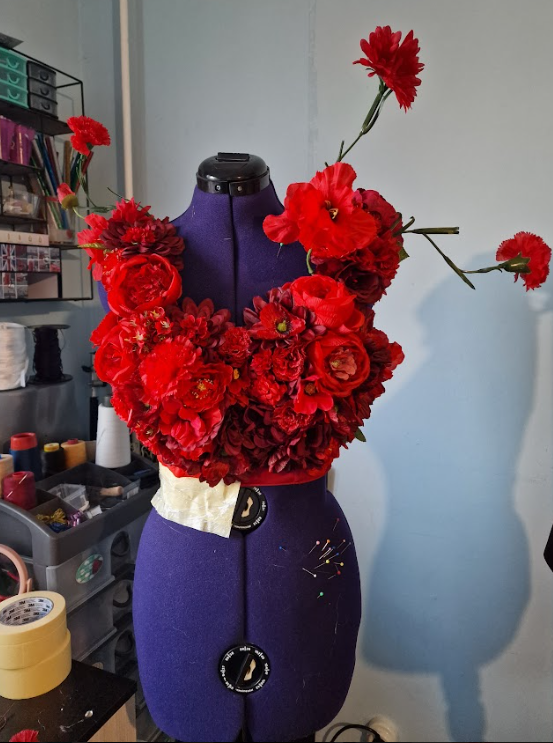
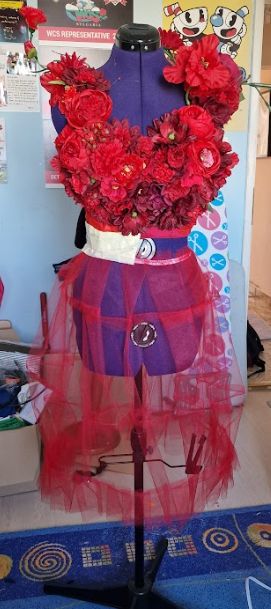
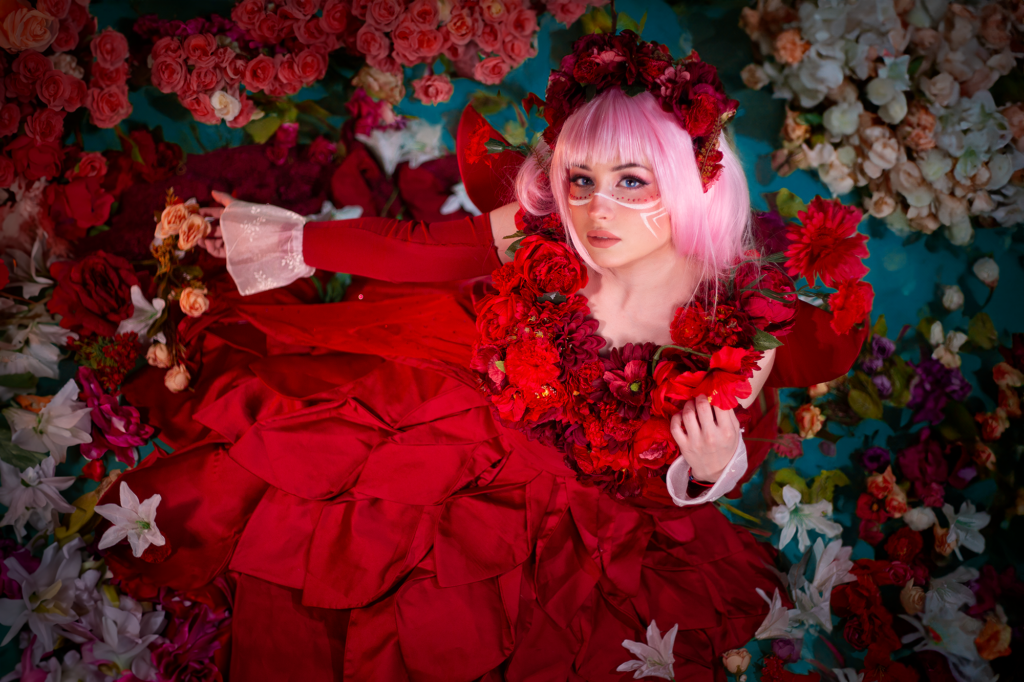
Then I had to arrange all of the flowers. I used around 100 fake flowers.
The original design has several shades of red and most of the dark flowers are placed at the bottom. I noticed that Shinozaki-san still made it look like a bodice with a defined breast area and a slim waist. This is why I also approached the arrangement this way- most of the flowers are heavily placed on the chest and as I played with the flowers I managed to make a depth that defines the curves. All of the flowers are glued with hot glue on the bodice. It does create a strong bond, which holds everything in place.
The skirt
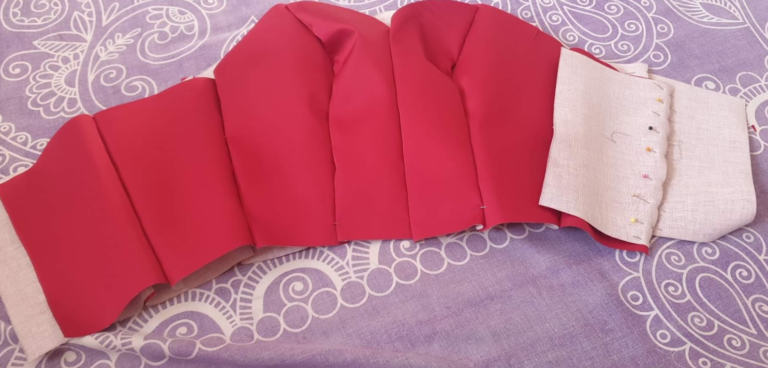
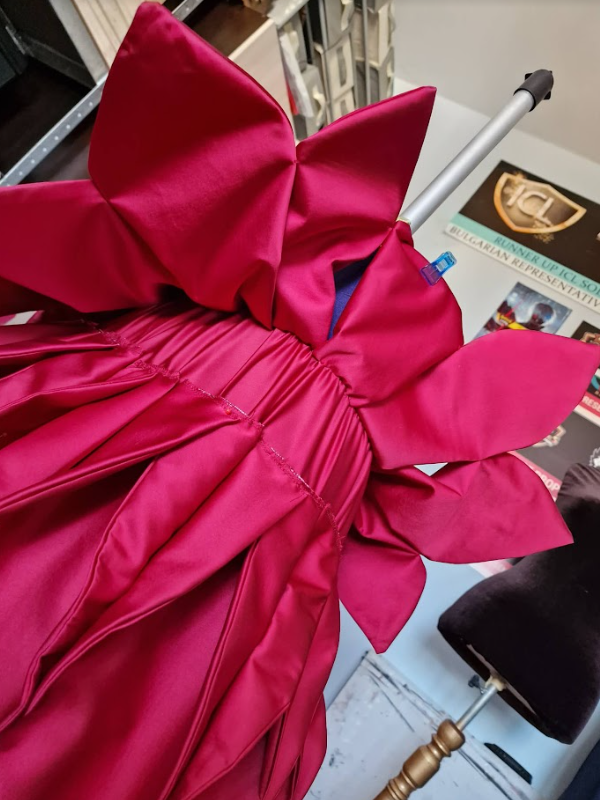
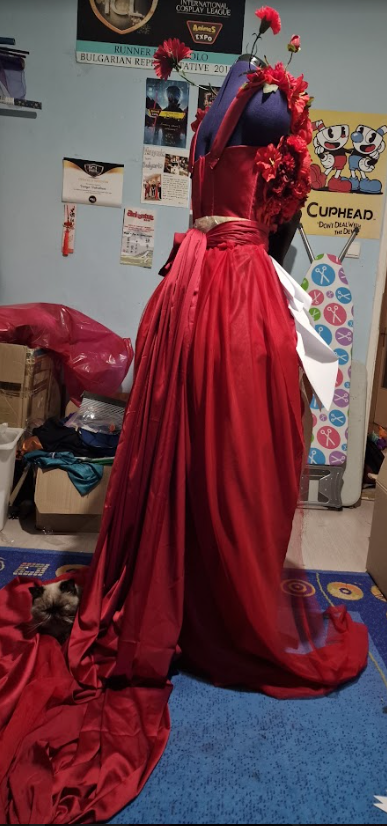
The skirt was the most difficult and time-consuming part for me. It has 3 different parts – underskirt, the skirt with the petals and the pretty skirt train at the back.
The original design has an odd shape that imitates a teardrop. The widest part is in the middle of the skirt. I did watch a few cosplayers and how they made the skirt, but none of them paid attention to the overall shape. This is why I approached creating this differently.
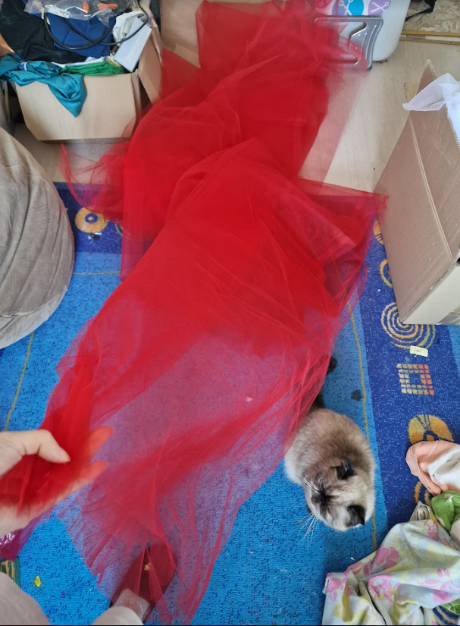
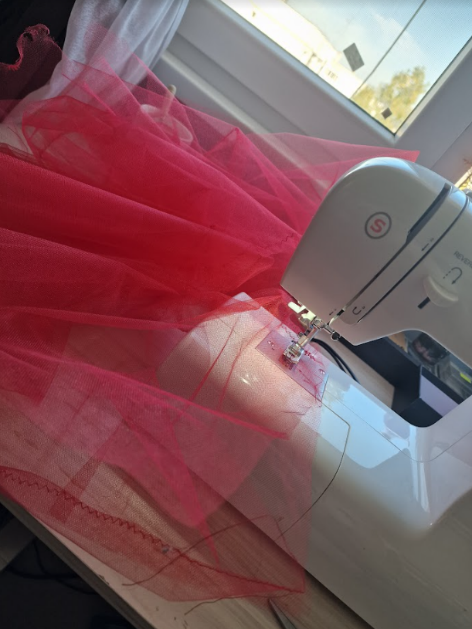
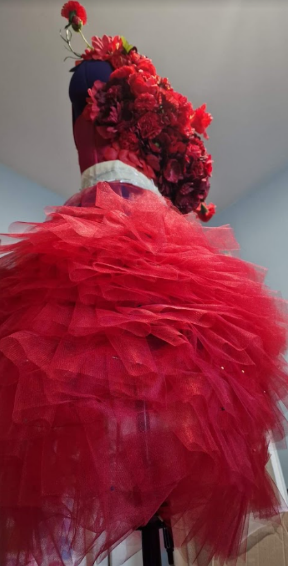
Firstly, I created a petticoat from the hard tulle I bought. I used a total of 6 meters of the tulle.
I made 3 layers as a base, which I sewed together with a zig-zag stitch and a wider seam width. Then I cut out many long strips which I pleated and attached to the base. The largest volume and the most layered part is in the middle of the petticoat. Each layer is hand sewn to the base. Once this was done, I attached the elastic band at the top with a zig-zag stitch.
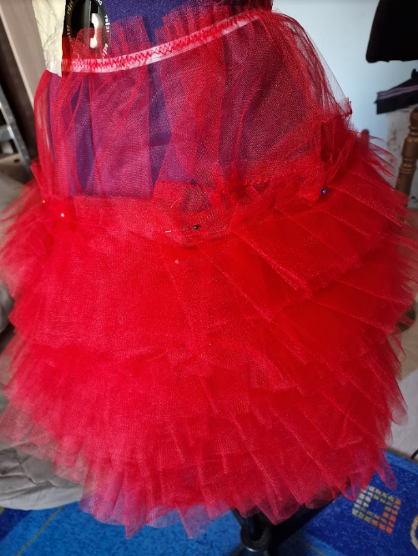
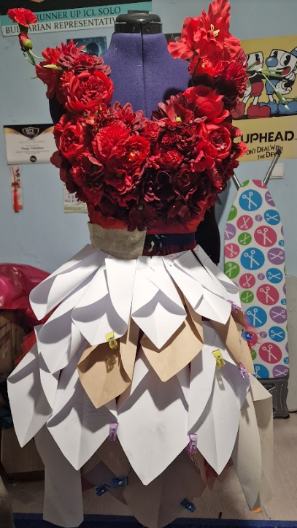
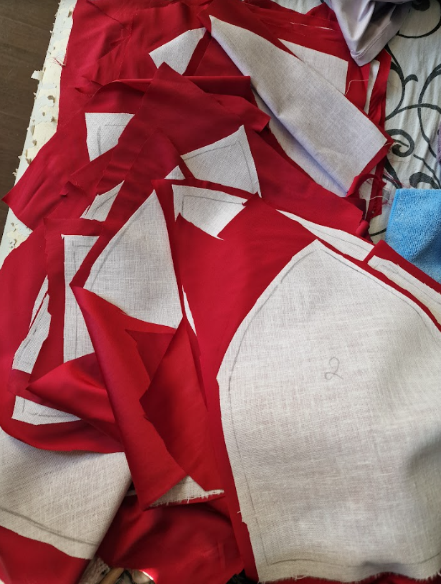
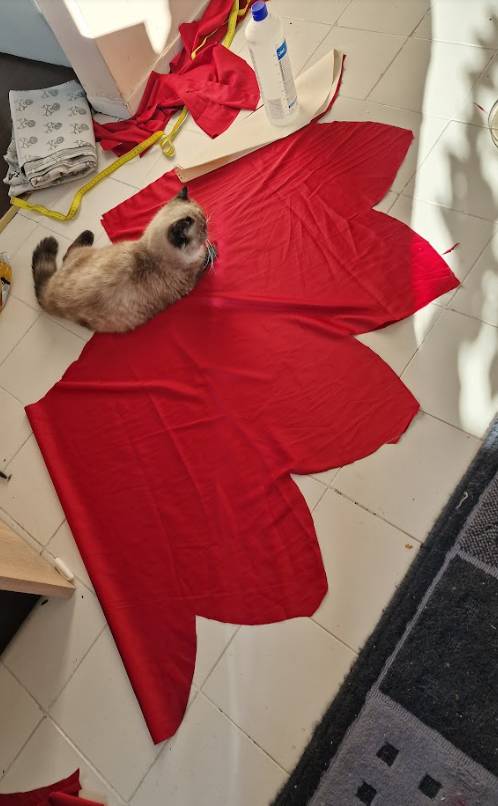
Then I began tracing the “petals”.
I had to make some paper cutouts to get the correct shape. I also tried tracing them in Illustrator and scaling them down to the real size. I decided to use different sizes for each layer, which would create the teardrop shape I was going for.
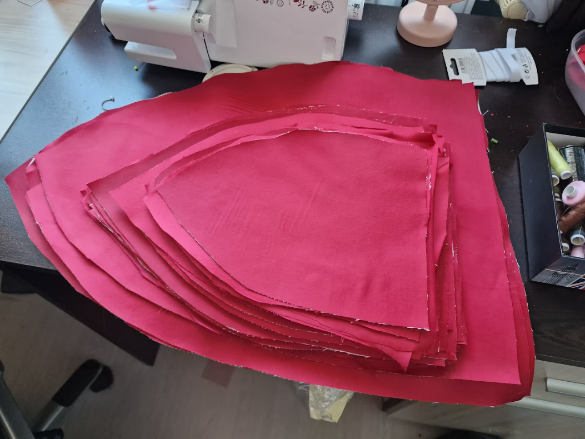
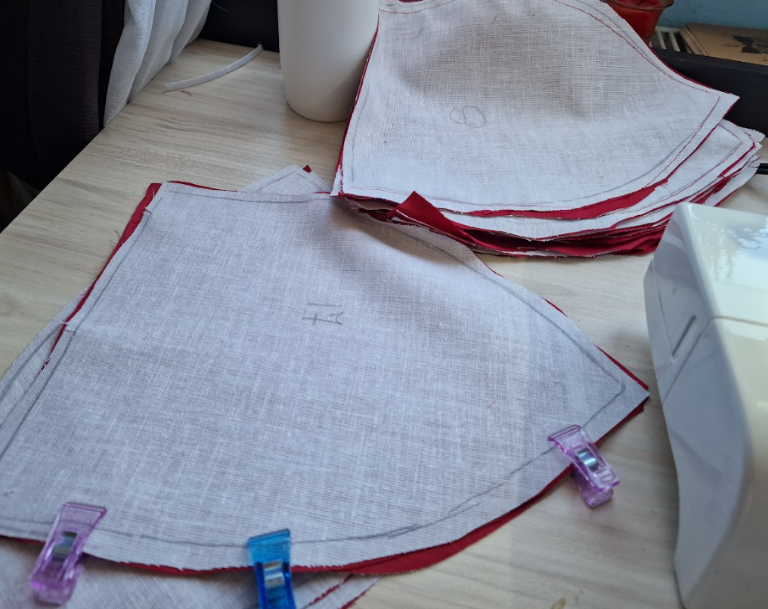
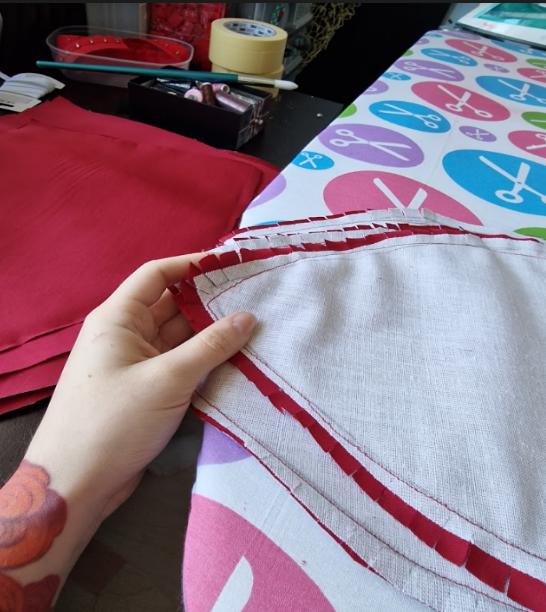
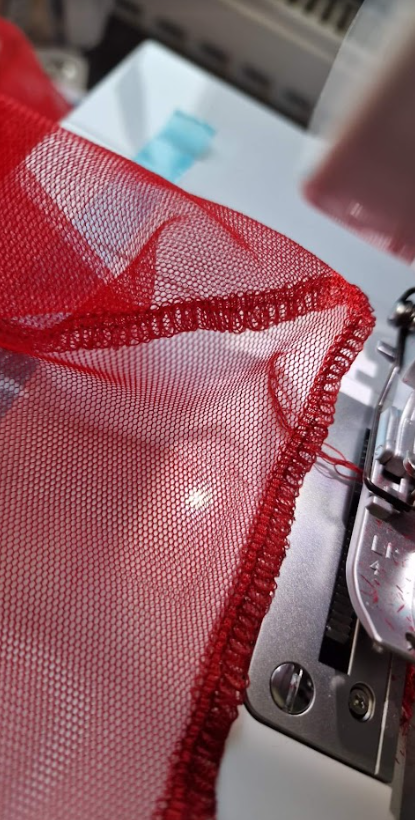
The first layer is the smallest in size and each one forward gets a few centimeters larger. The largest one is at the bottom. I had to make ~80 petals in total. Each petal is double-sided and has interfacing on both sides. The top of the petal is finished with an overlock seam. It took me quite some time to finish all of them, but once I did I moved on to the base garment.
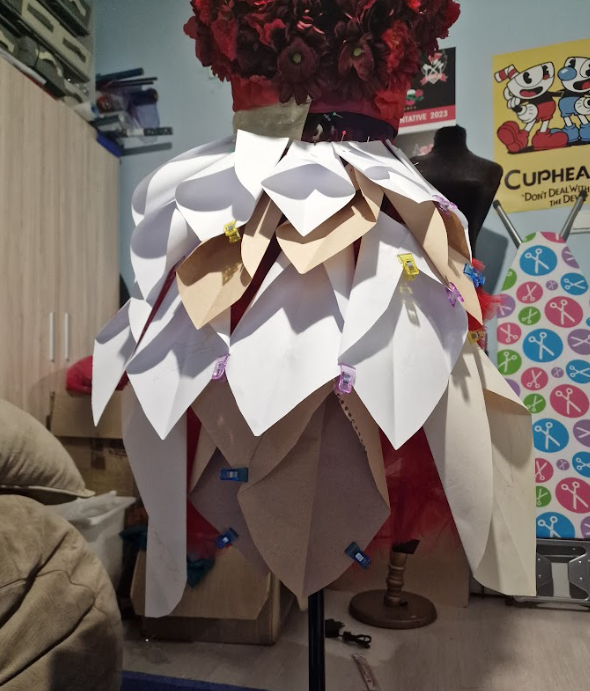
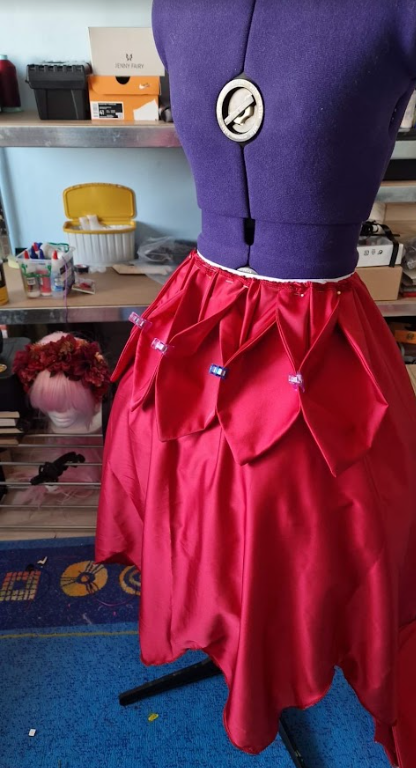
I made a simple half-circle skirt. While I was watching shorts from other cosplayers it came to my attention that all of them used the basic skirt shape. It was odd because once it became visible from any movement it looked like a random piece of fabric that was not supposed to be there.
So I had my Eureka moment and I came up with the idea to trace the last layer of petals onto the bottom of the skirt. This way I would have an extra “petal” layer and will still look natural in case the skirt shows while moving. I finished the edges with the overlock and attached an elastic band at the top of the skirt.
It was finally time to pin each petal to the base and hopefully sew them all. After a while, I realized that I was pretty bad at math and my petals were not enough… so I made some more
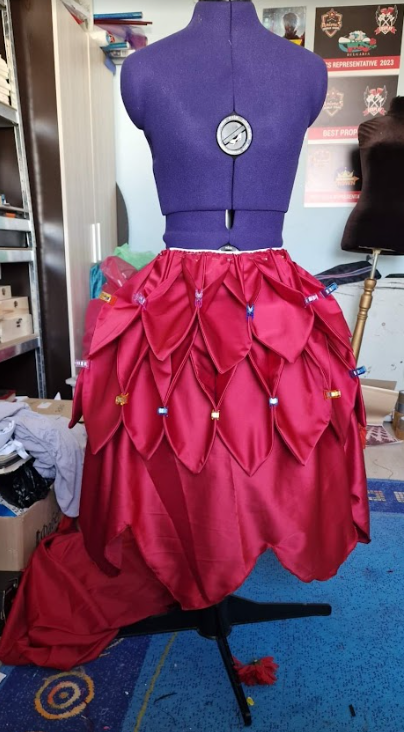
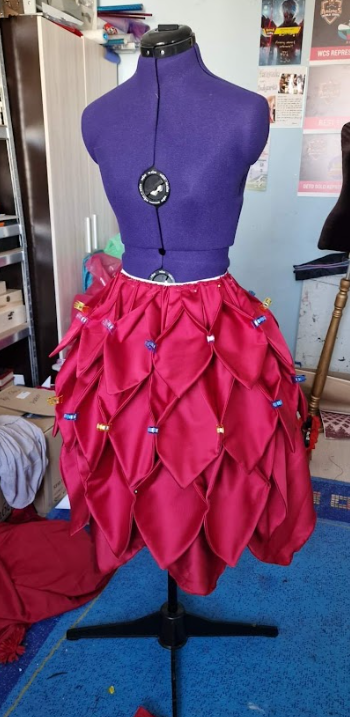
At last, I placed all of them, sewed them all by hand, and stitched them together by their neighbor’s side to hold them in place to avoid them flopping around while moving. The petals are attached both on the front of the dress and the back as well.
I finally got out of the petal hell.
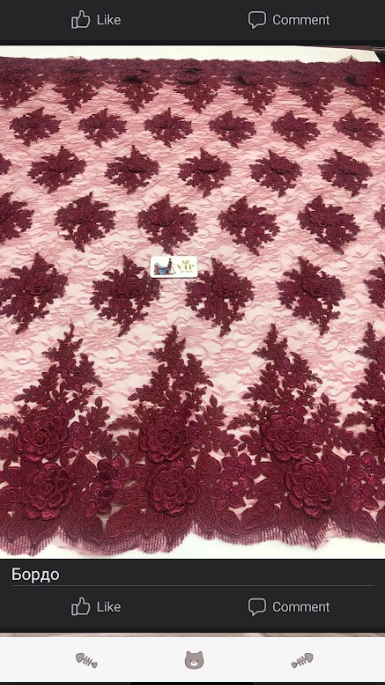
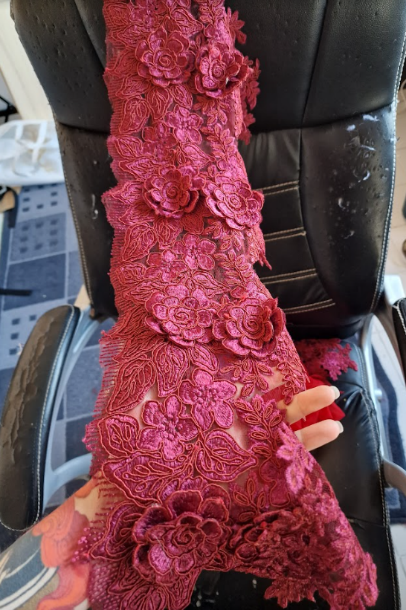
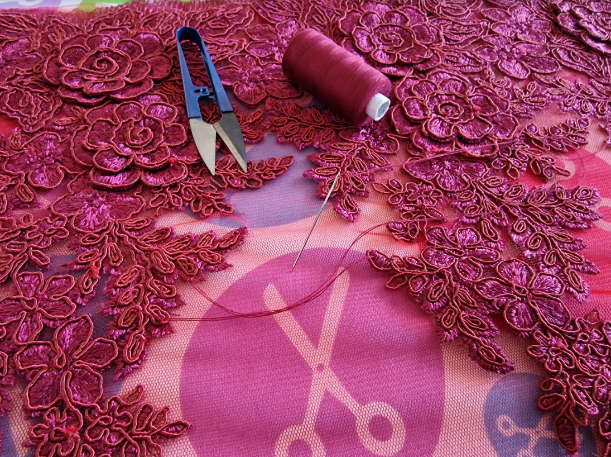
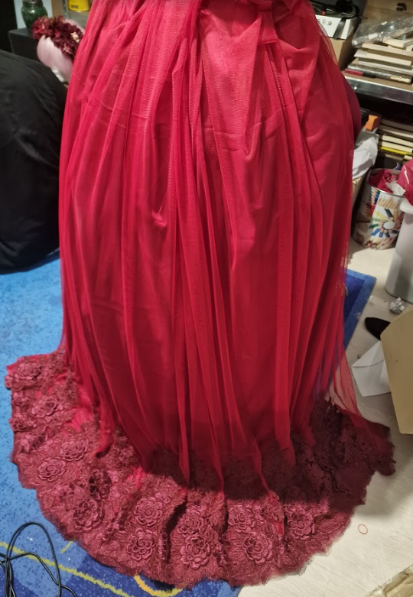
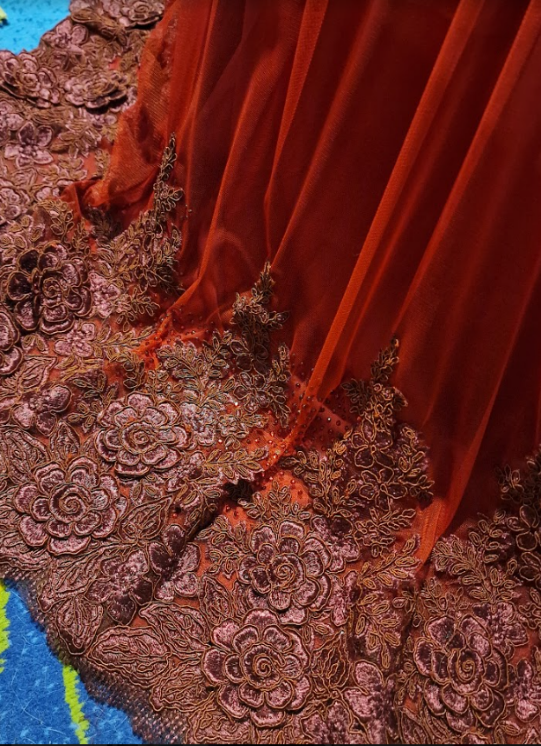
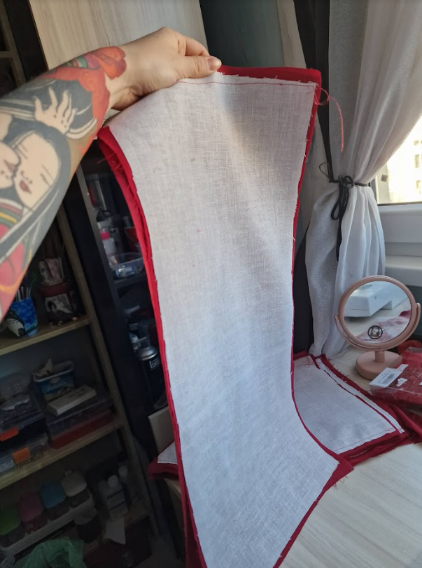
There is also a train at the back of the skirt, which is barely visible in the anime and does not have a real reference to it. I used a satin piece as a base and over the satin, I put a layer of lightweight tulle. It stood a bit empty. You have that massive chest piece, rich front and at the back – absolutely nothing. So I decided to attach a floral lace at the bottom to create a finished feeling and stick with the overall flower motifs. I purchased a French lace which I had to cut piece by piece and then hand stitch to the tulle.
It took me a whole day to do this.
Then I placed the fabric onto the dress and I still didn’t feel it. Again, I decided to add some extra bling and glued small rhinestones onto the fabric. All of them are carefully glued, one by one. I used …I am not sure of the exact number but there are at least 400 grams of rhinestones on the tulle. It took forever as the area was quite a lot to cover. I was finally happy with the back and I attached the pieces to the petal skirt, again, by hand. I could move on to the middle part of the dress.
It is indeed an interesting part of the garment as it imitates the wrapping paper at the bottom of a bouquet. I traced the shape of the belt with masking tape and went through the same process with the interfacing and the satin. Then I sewed the bottom of the belt to the petal skirt’s top part. At the back, you can see another corset attachment for a tighter fit.
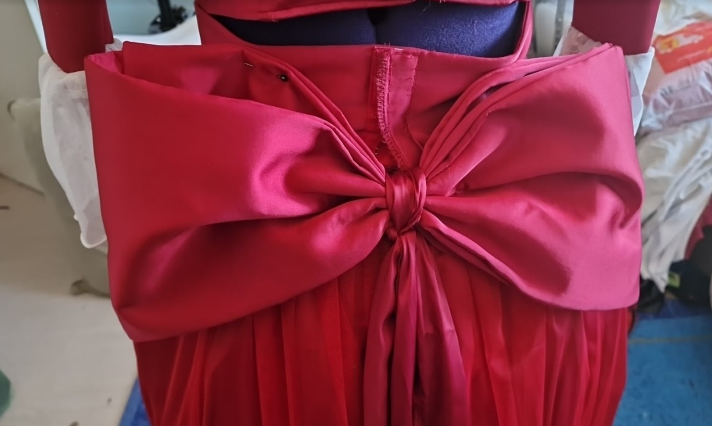
The bow
For the bow, I used 4 rectangles of fabric which I stitched together. Then I wrapped a satin lace over the squares. This way the middle part got cinched and the bow was created
On the reference art the bow looks pointy and firm, but on Shinozaki’s dress you can see that is looser and a bit falling out of place. I strived to achieve the happy middle with both of the designs. I sewed the bow to the skirt by hand, and pinned the tips to the belt with safety pins to achieve the pointy position.
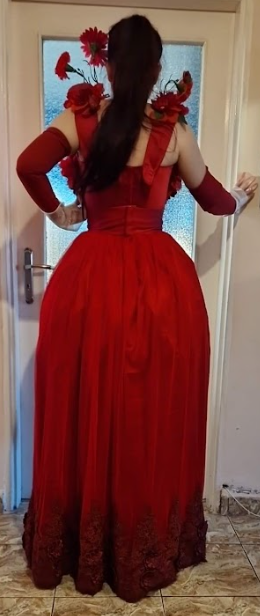
The wings
For the wings I used sketch paper to trace out the basic shape. Then I patterned the shape on 3 mm EVA foam to create the base.
They have to look the same as the dress, material wise, so I traced the pattern again on the interfaces cotton and stitched it together, leaving only the middle as an opening for the base. Once done I inserted the EVA base into the fabric and made a hole in the middle for the attachment mechanism. I used a big hairpin, which I clipped onto the wings, and used magnets at the tips of the wings which connect at the back part of the bodice’s straps.
The sleeves
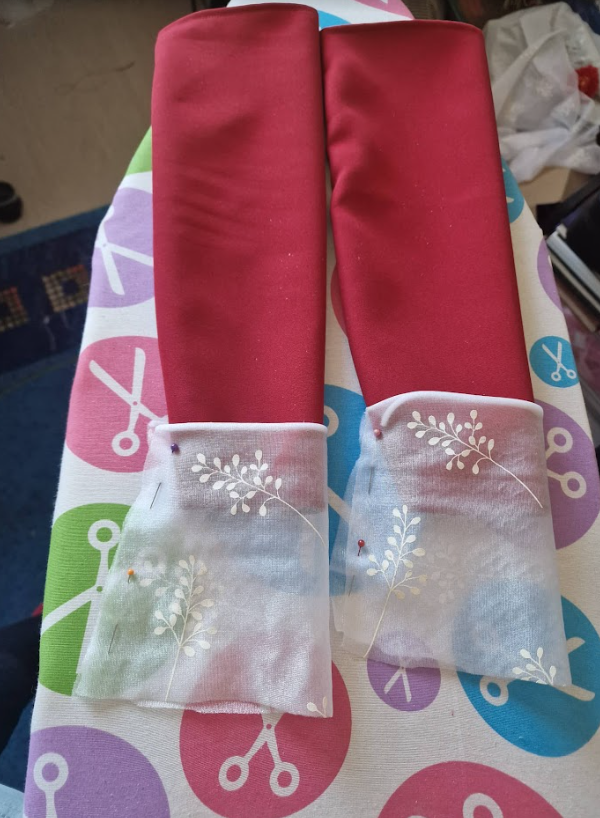
For the sleeves, I was lucky enough to find a similar color stretchy satin that has cotton in it. I got my hand measurements and drew them over to the fabric. It is a 4-way stretch so I didn’t have to worry about any ill-fitting places. I finished all of the edges with the overlock.
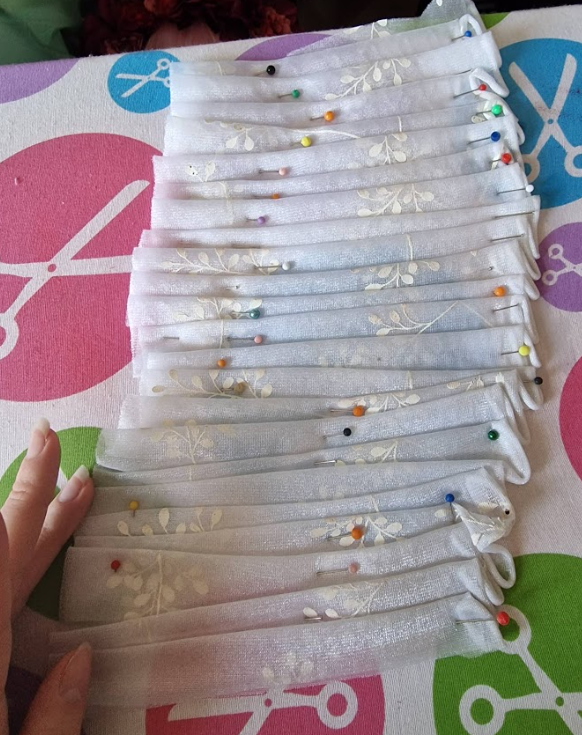
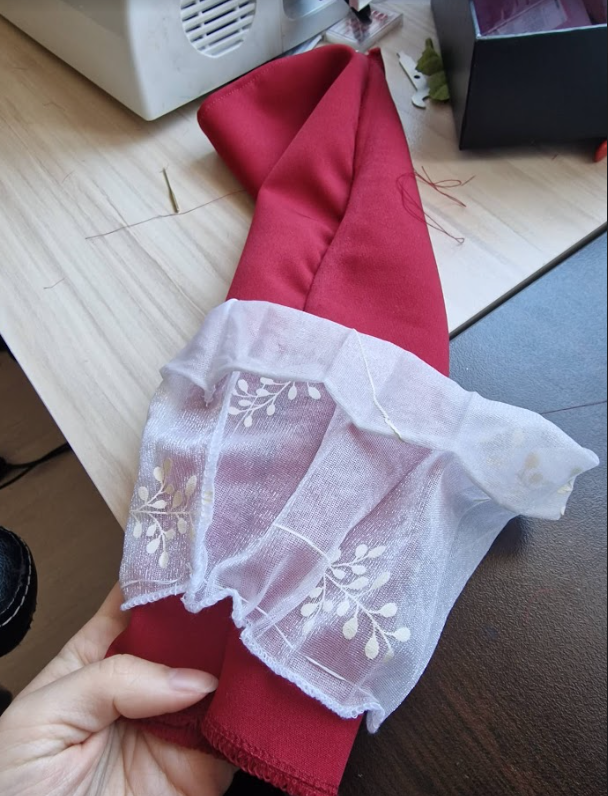
Then I began working on the small white detail on the sleeves. I bought a fabric with no labels from the fabric store with a huge discount, since it was a leftover. It has a cute floral motif which gives the sleeve some nice extra detail.
The only thing that was bothering me was the texture. I really wanted to create a puffy feeling as I think it will go really nice with the dress. To create some ruffles I pleated the fabric and pinned it down to the ironing board. I ironed the piece with lots of steam and a low-temperature setting to avoid melting the fabric. Once done, I cut the needed length and stitched it together. The edges of the white fabric are also finished with the overlock machine and the whole piece is hand-stitched to the sleeve
The shoes
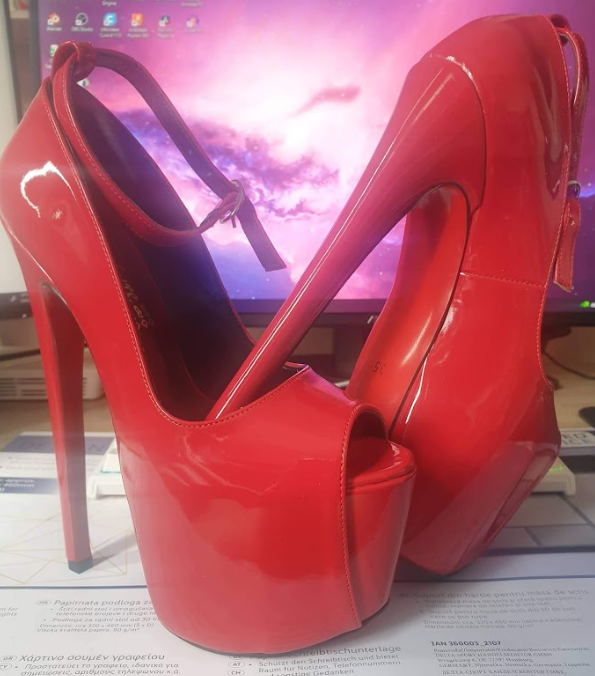
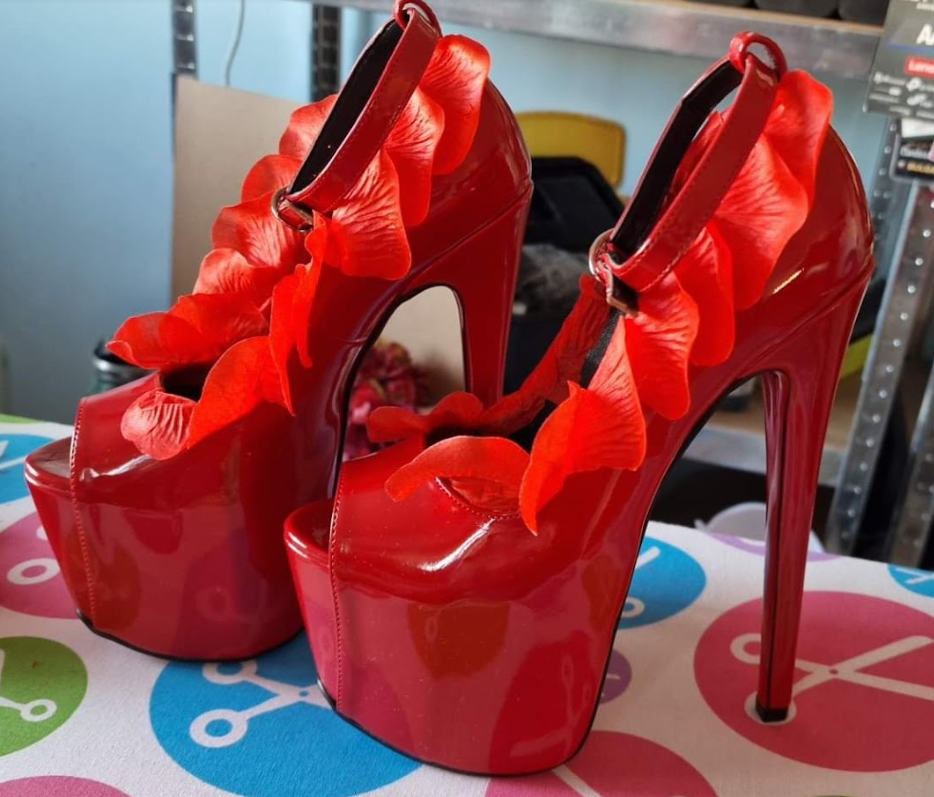
For the shoes, I used leather high heels. Since Belle is generally taller than me, I decided to stick with the highest heels I could find on the market. I glued some petals with a special glue, designed especially for leather shoes, and arranged them over the edges to match the reference