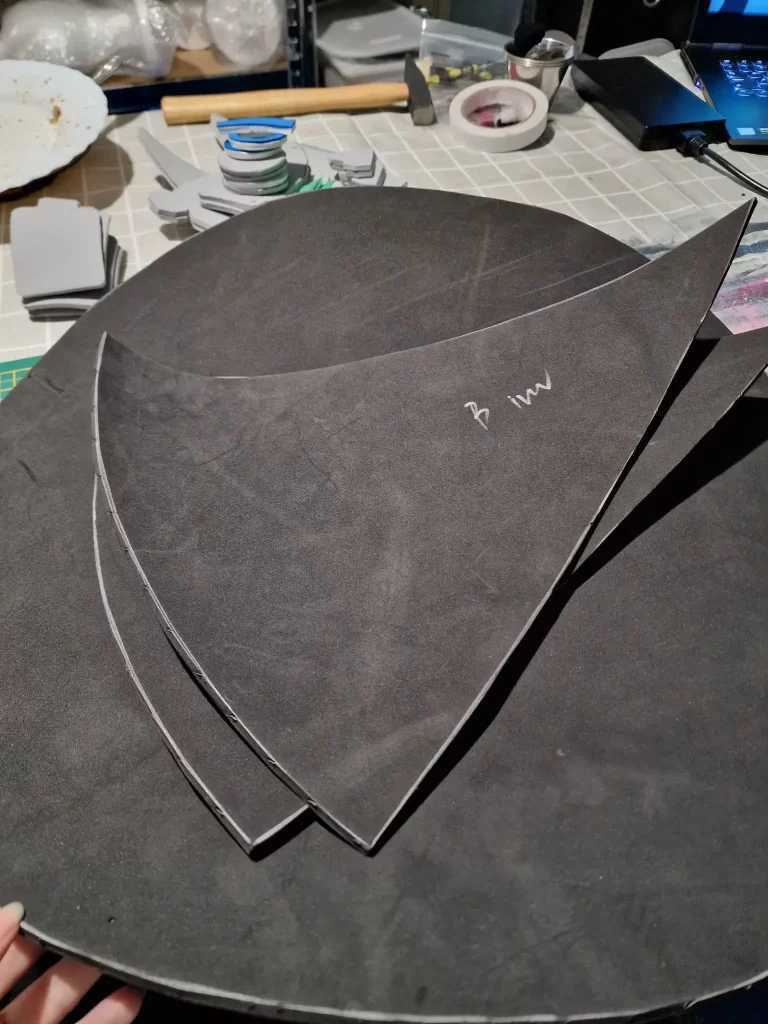
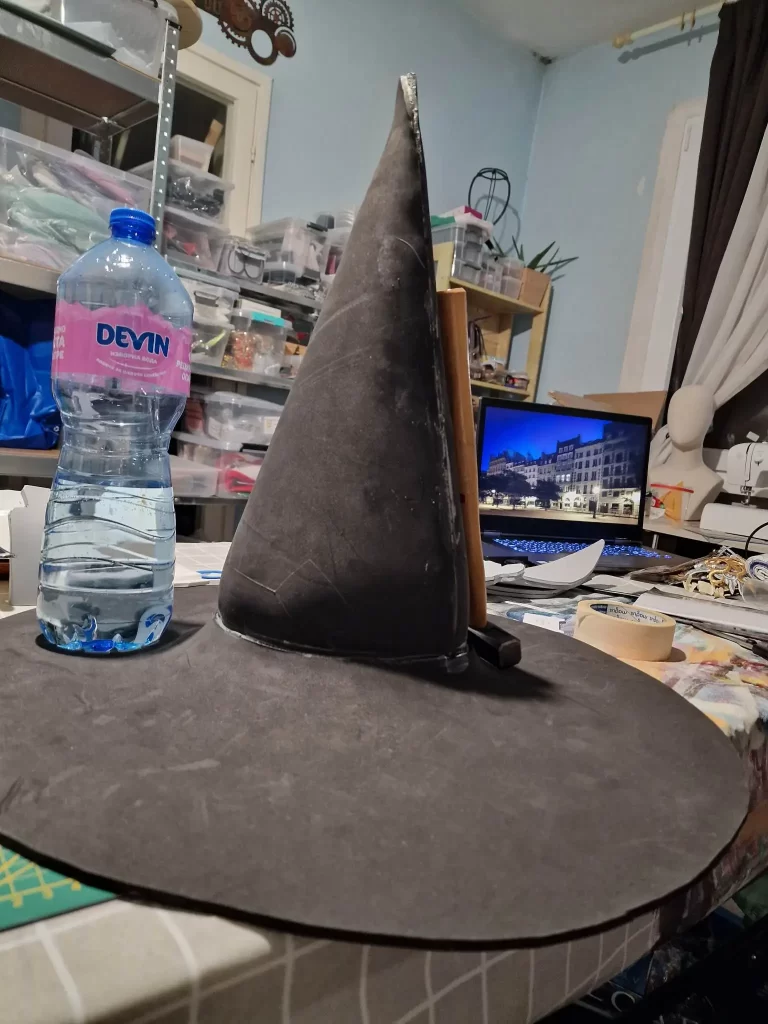
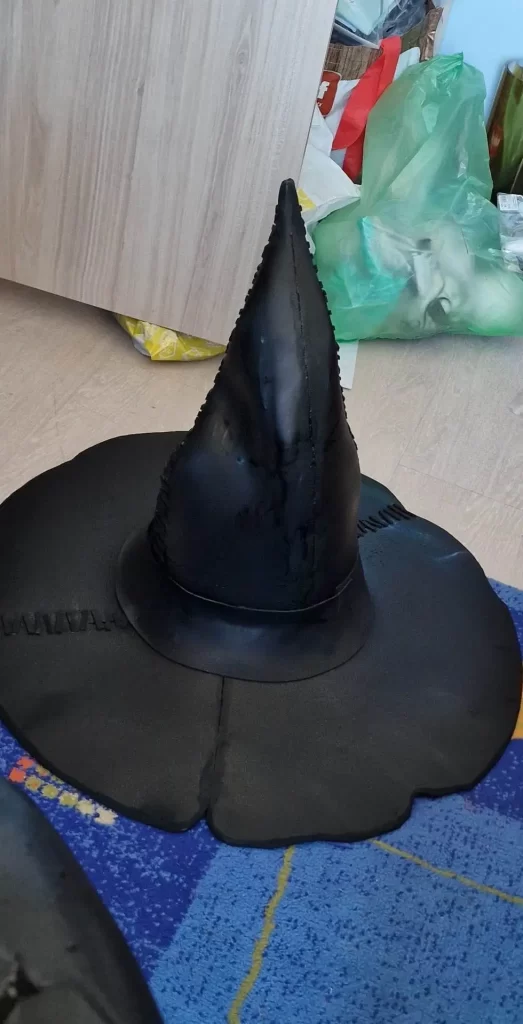
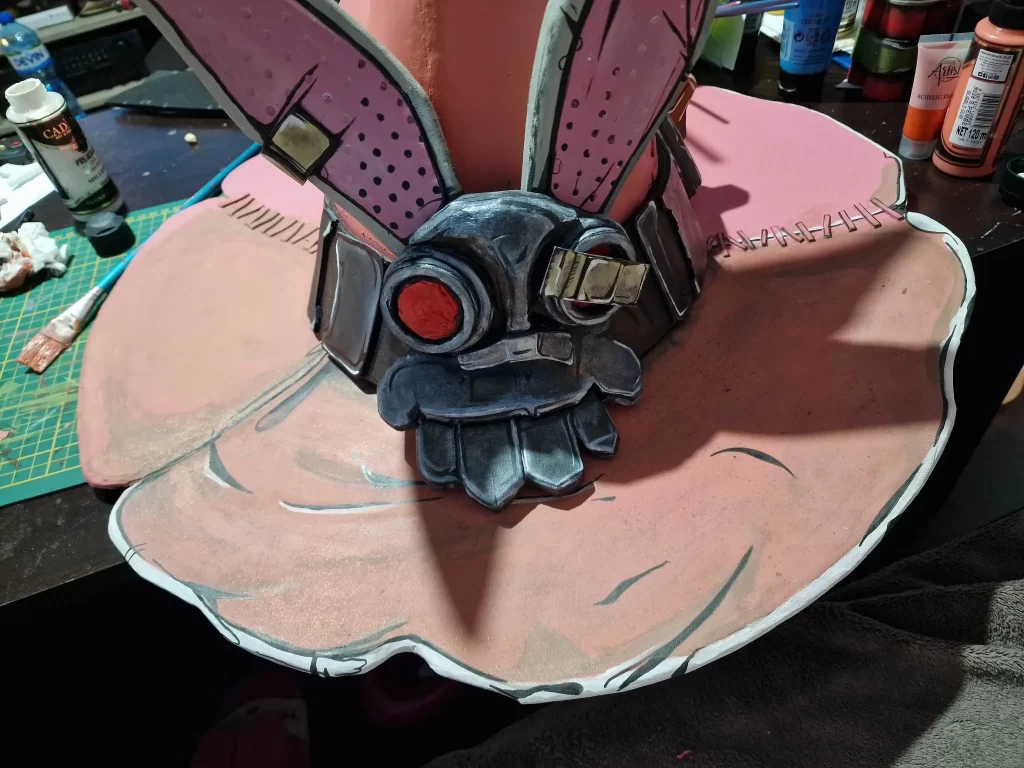
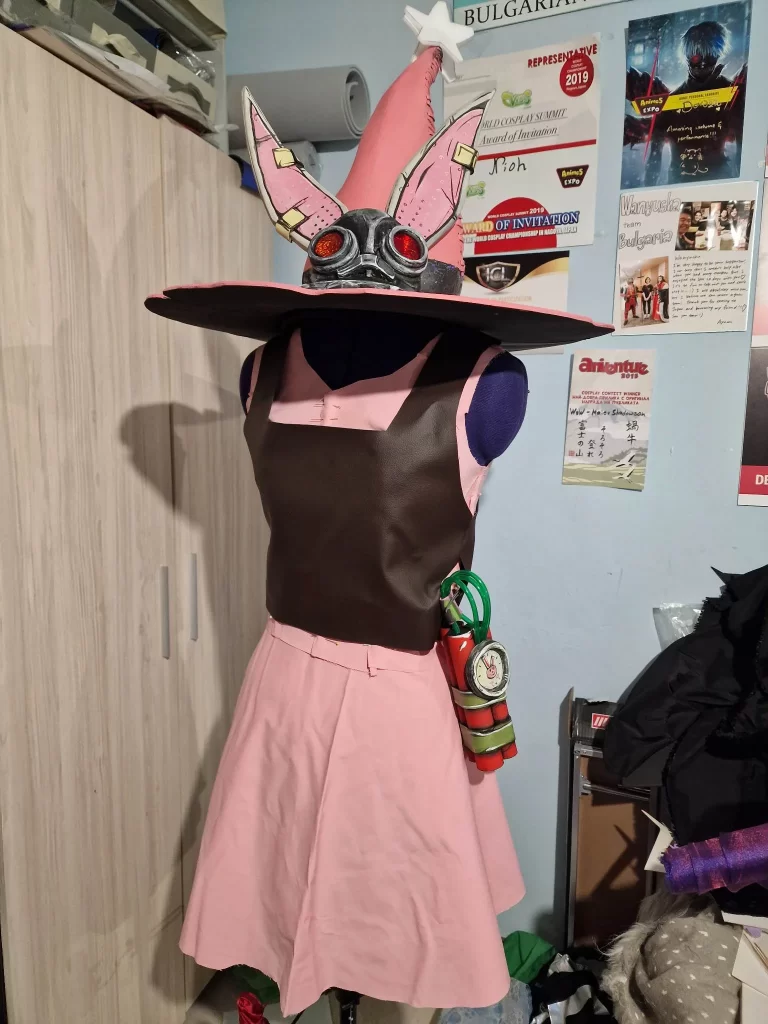
1. For the base of the hat, I used a ready-made hat pattern, which I modified later. I used 5mm eva for the whole base, gluing the two parts together with contact glue. I cut out all the decorative elements on the brim of the hat with a model knife to give it the cartoon look of Tina. I then got to work on all the little patches that were made with 2mm EVA foam. I don’t know how many there are, but it took me about 2 hours to cut out all the elements. I then sprayed with Plastidip and applied the base color.
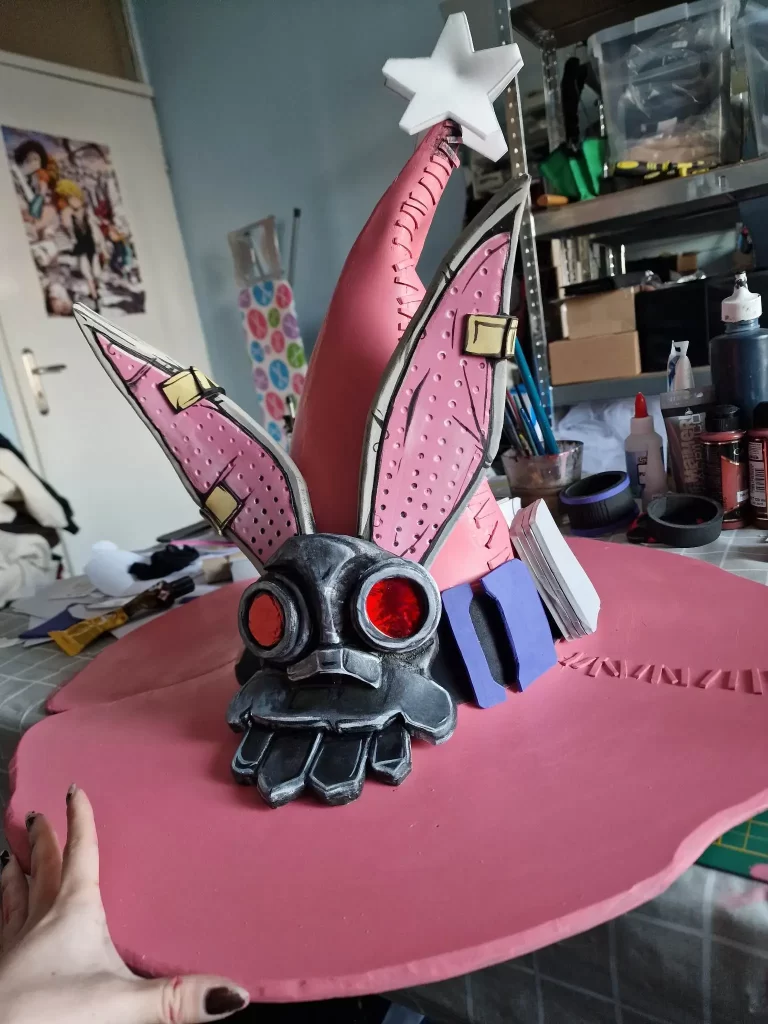
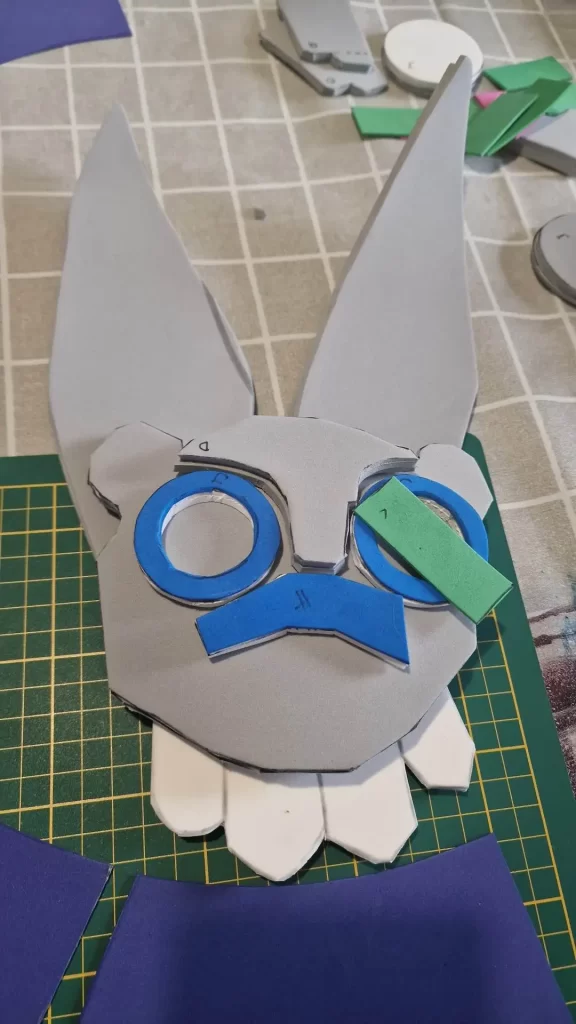
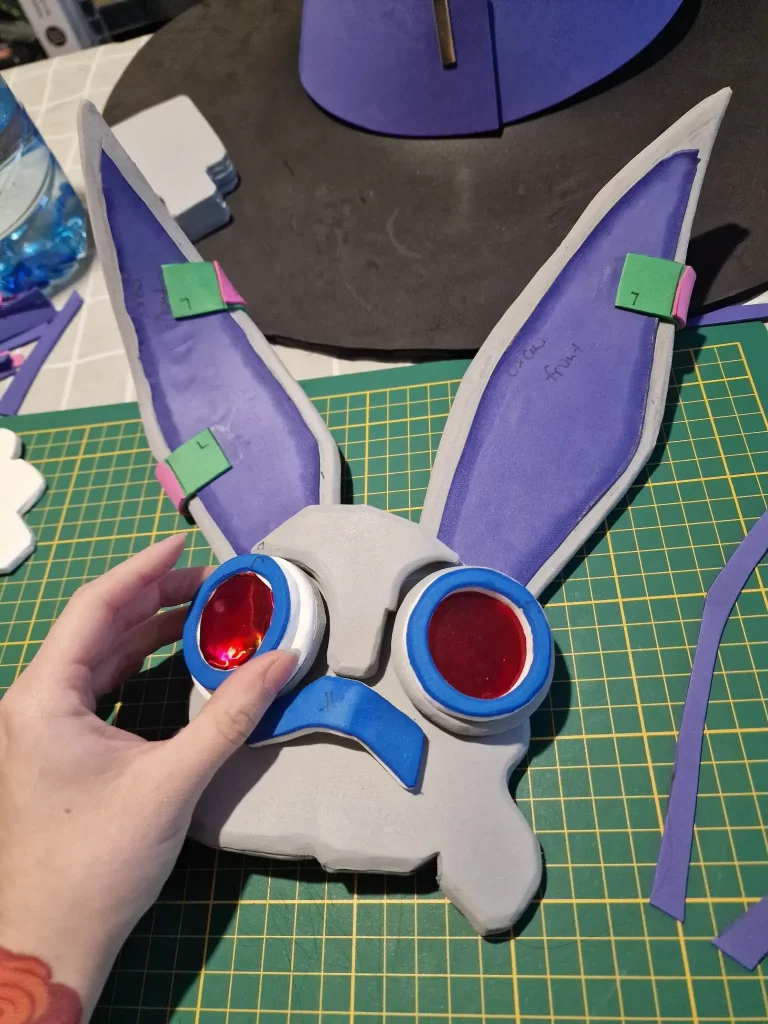
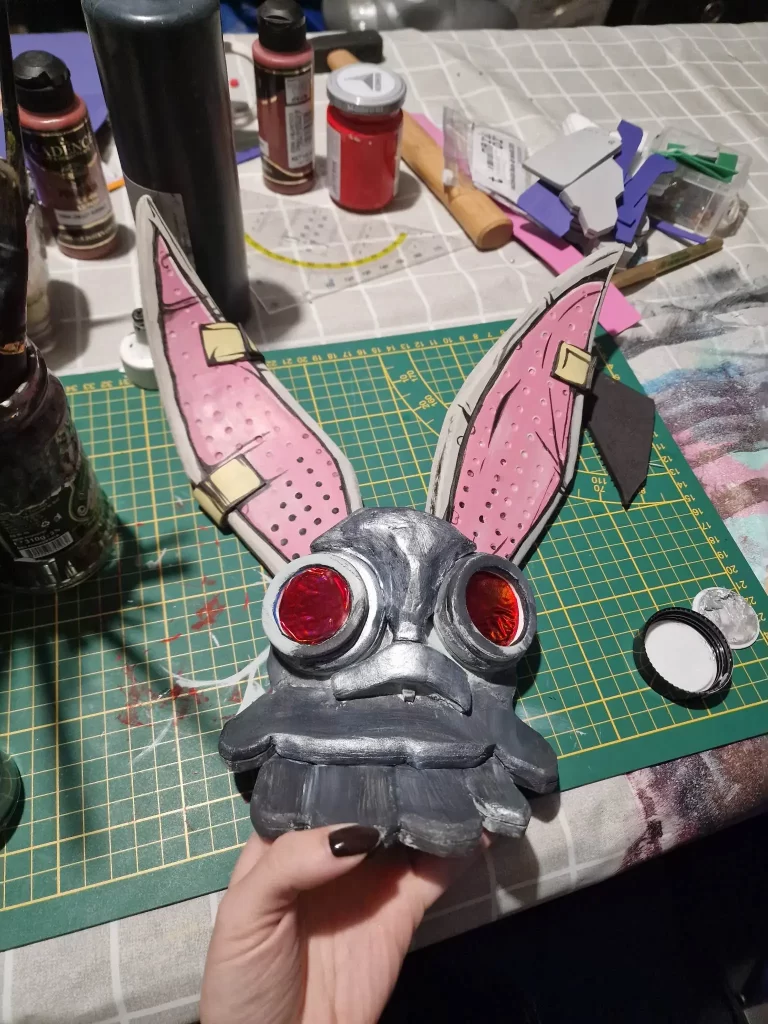
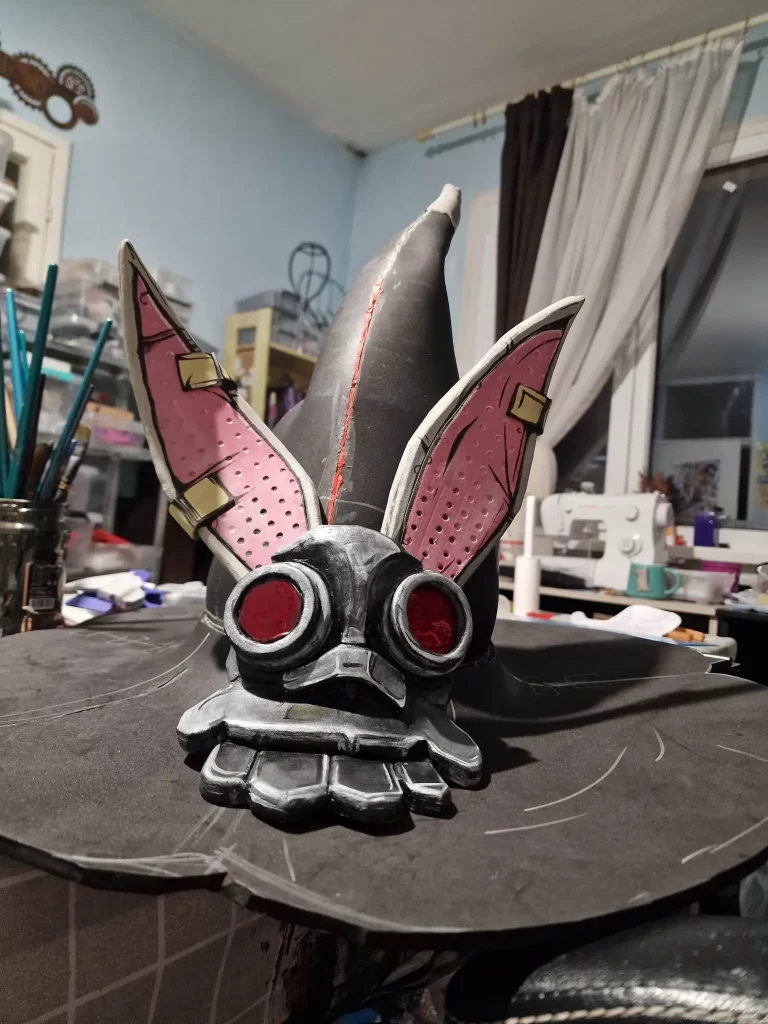
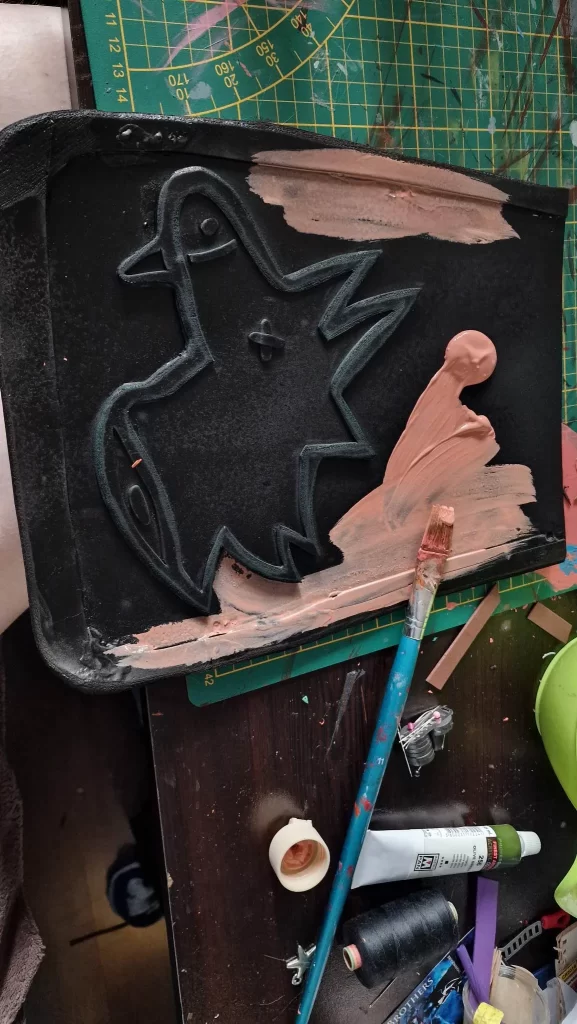
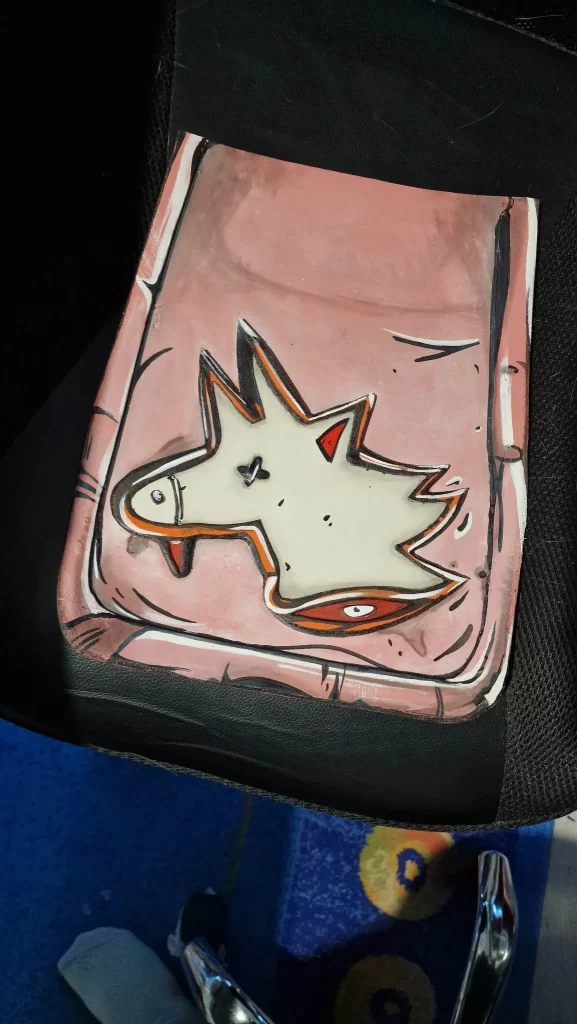
Then I moved on to the rabbit. It’s constructed of several parts, and I used different thicknesses of EVA to recreate three-dimensionality. After cutting out all the parts I sanded them with a Dremel and glued them to the base of the rabbit head. I then built up “the forehead” with an alternative to clay foam, which we locally have. I sanded it down again to give it a more accurate look. For the red part in the eyes, I used thermal transfer paper I had – a small leftover from another project.
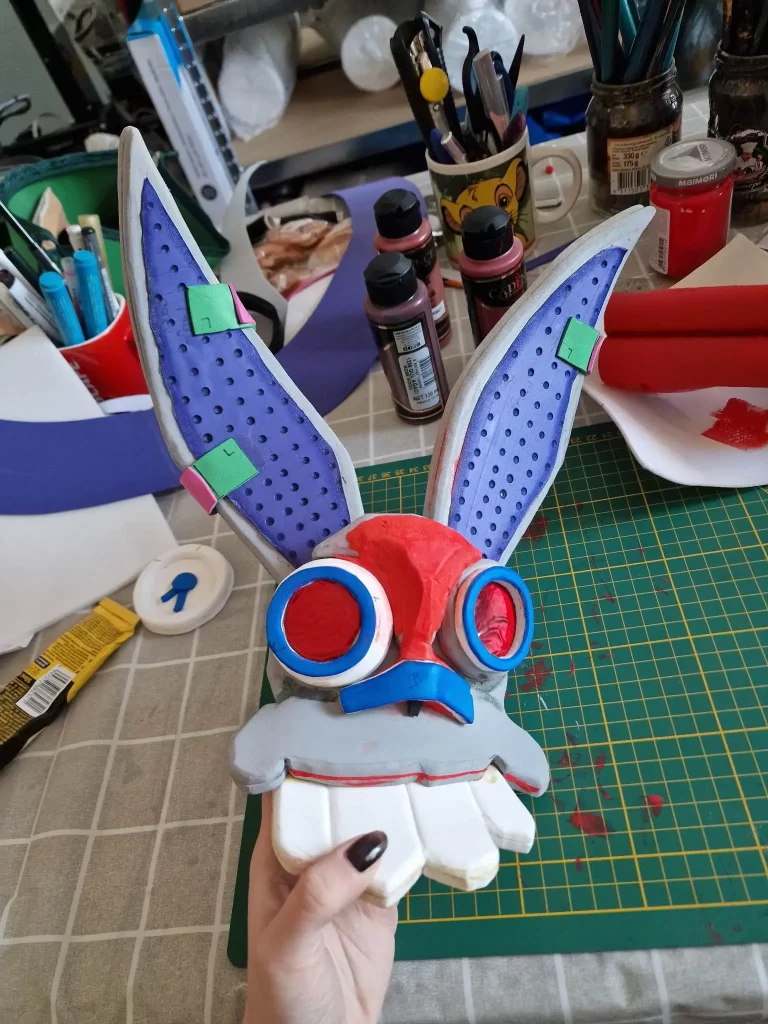
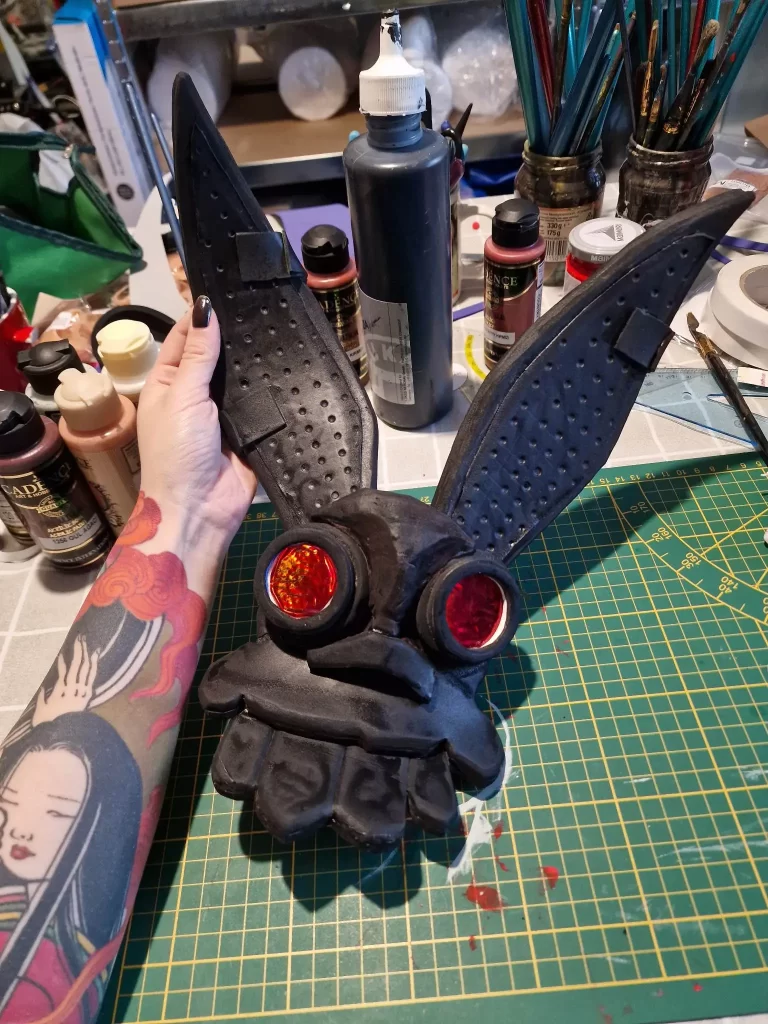
I did the small hole details in the ears with a pyrograph, then sprayed the whole thing with a plasti-dip. When the base was dry I moved on to painting. I used a large range of Cadence paints and had to achieve some of the shades by mixing several paints. For the metallic effect, I used finger wax from the same company.
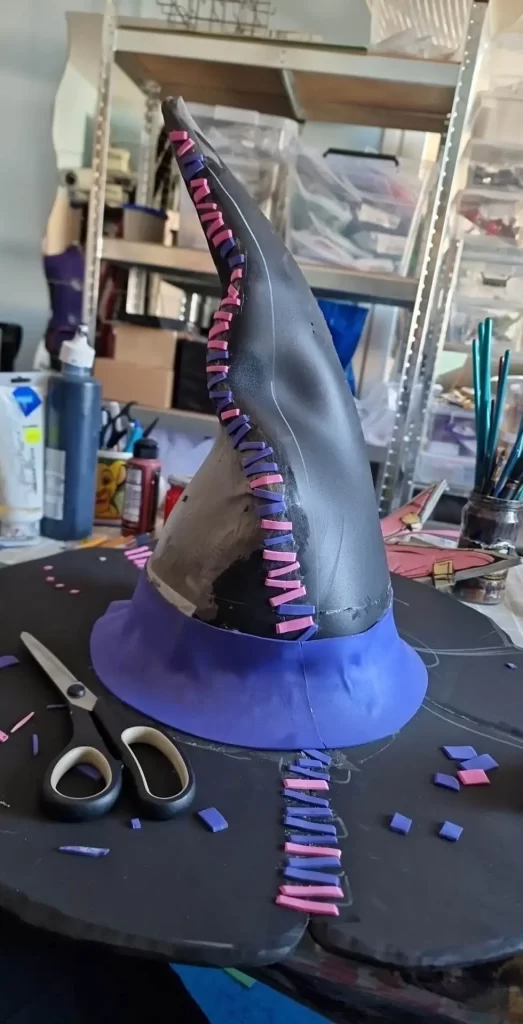
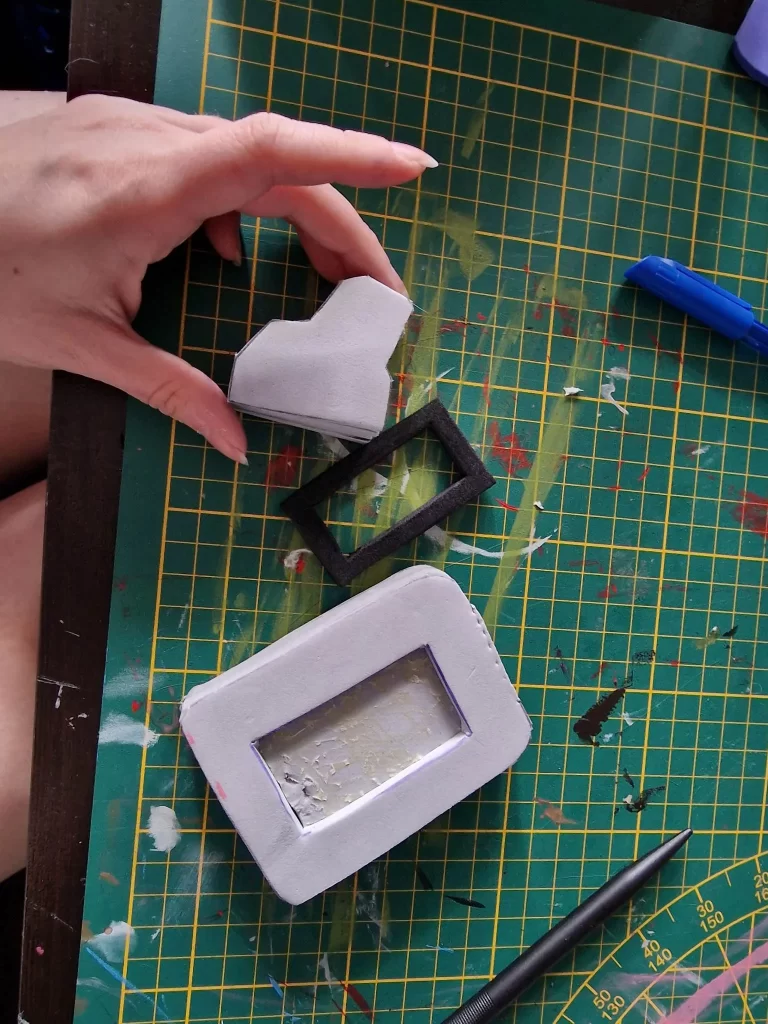
Then I started working on the hatband. Initially, I made it out of 2mm EVA, which after gluing to the base of the hat I realized was too thin. I didn’t like it. So I re-did the piece with 4mm. The rest of the buckle-like elements are 3mm EVA, and the large element is 40mm. After sanding everything I sprayed again with plasti-dip and moved on to painting. I did all the black lines with a permanent marker as the acrylic paint wasn’t black enough to stand out.
The “cables” were made from gardening twine that I glued and primed. Then I attached it to the hat and painted it. As for the star at the top – I used LED foam and a tiny light bulb to illuminate it. It is powered by a battery, connected to a switch for ease of use. The wiring is run inside the „cables“.
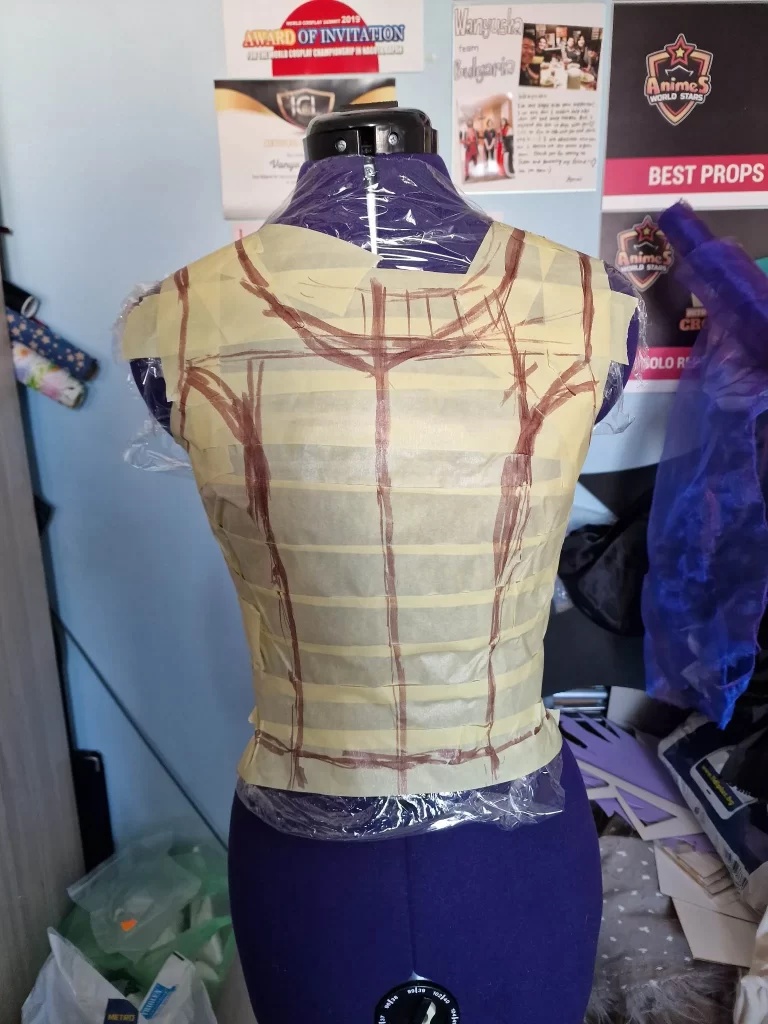
The Dress
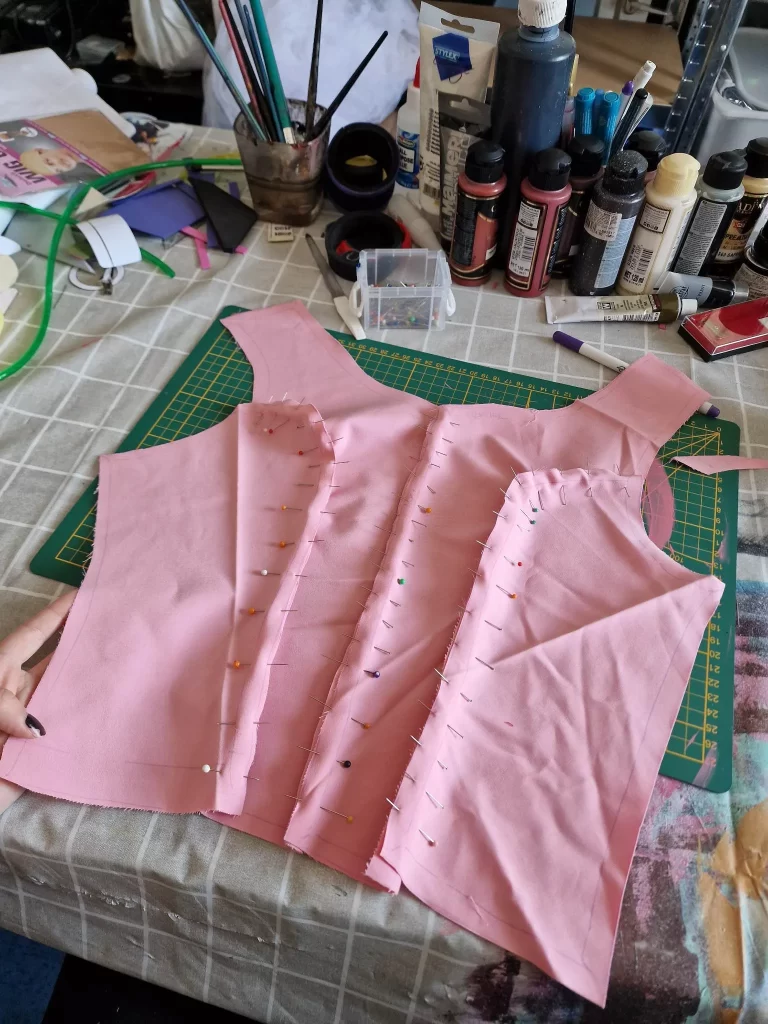
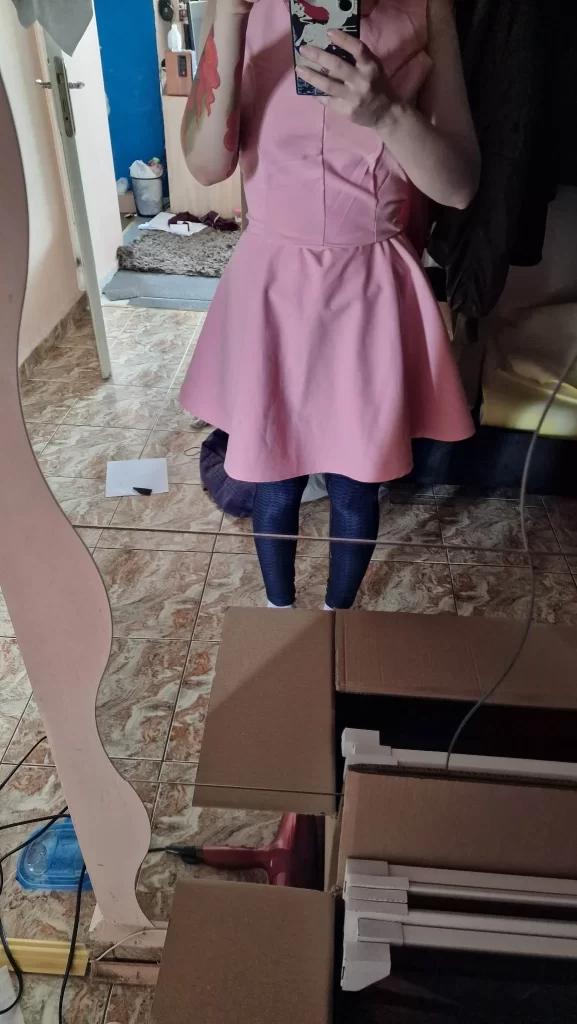
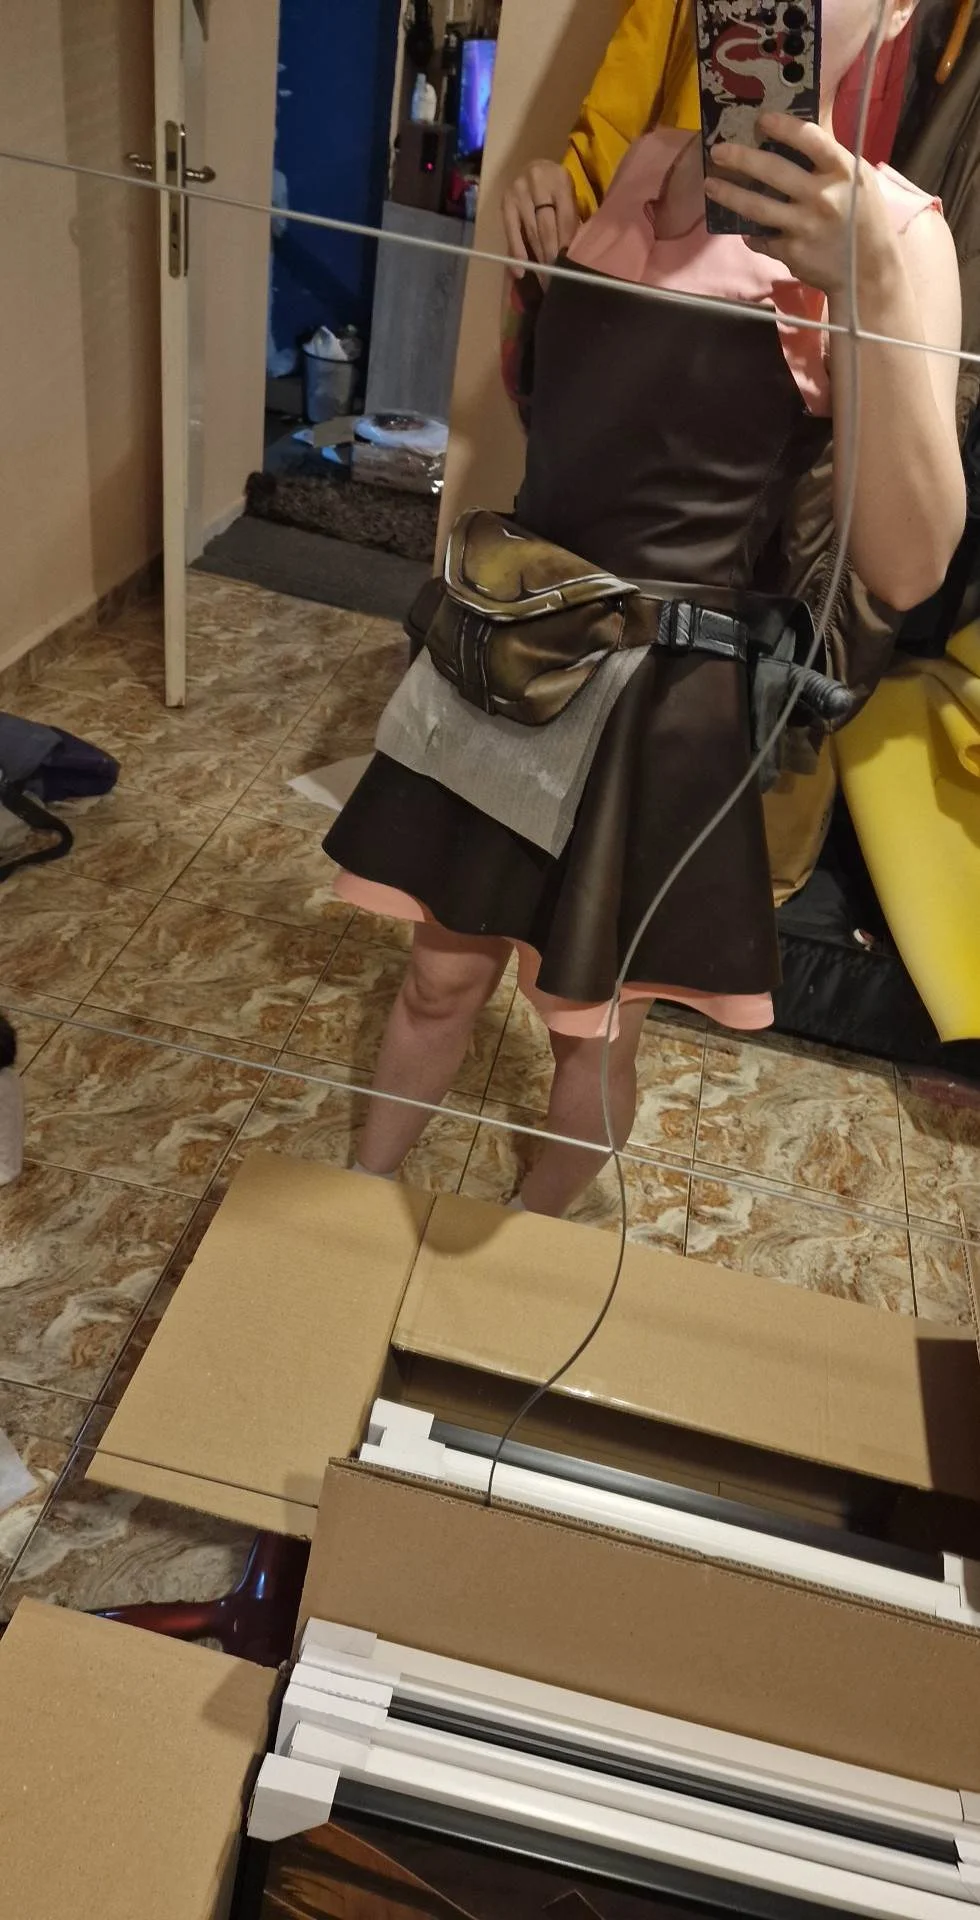
For the dress, I used my mannequin as a base. I adjusted it to size and wrapped it in foil and tape. I then traced the silhouette of the dress to get the basic pattern cut. I then cut out all the shapes and transferred them to the fabric. When all the pieces were cut I connected them with needles and sewed on the sewing machine with a straight stitch. For the skirt, I used a standard round pattern.
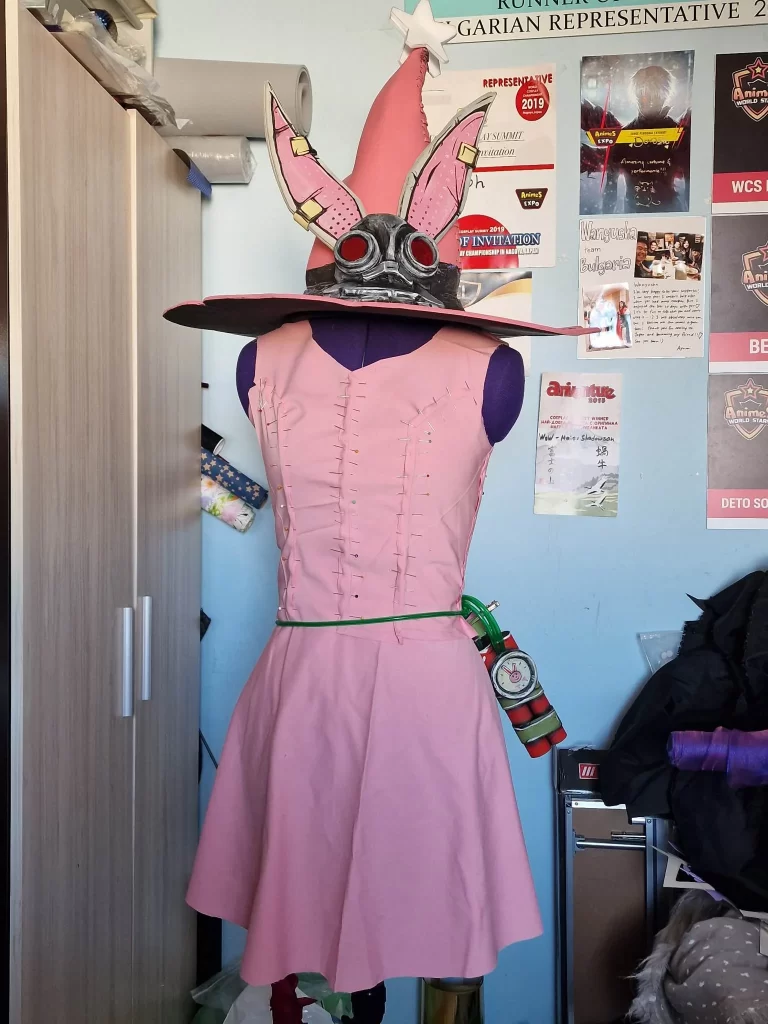
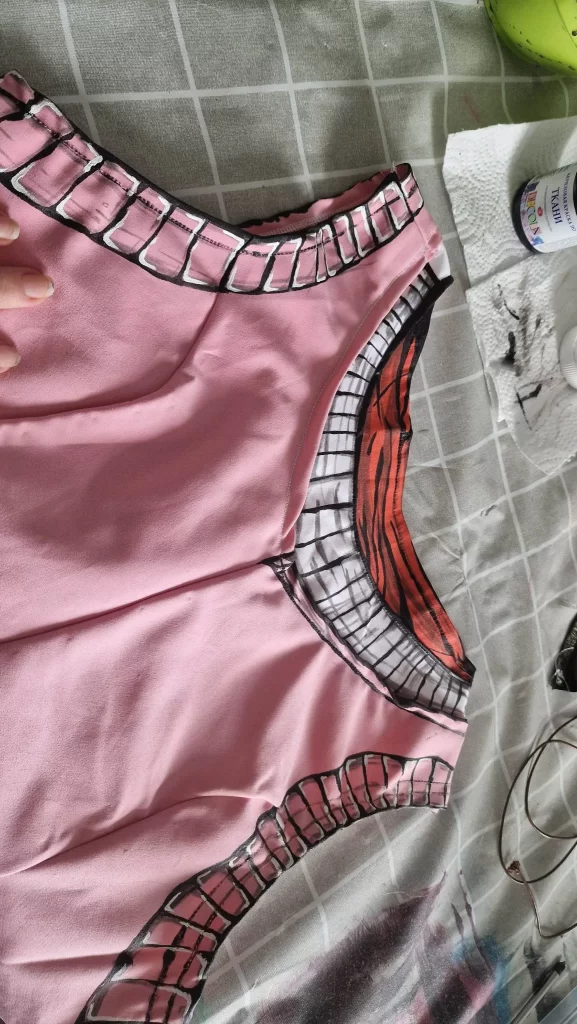
To make the dress sit on my body as it does on Tina I used lily tape which I sewed to the inside of the dress. From there I painted with little color and a lot of water to create the texture of dirt and spills on her dress. For the white detail on her dress I used 3 meters of regular white strip that I bought from the fabric store. I glued it on the dress with textile gluev and made the cell shading to match the rest of the costume.
The Apron
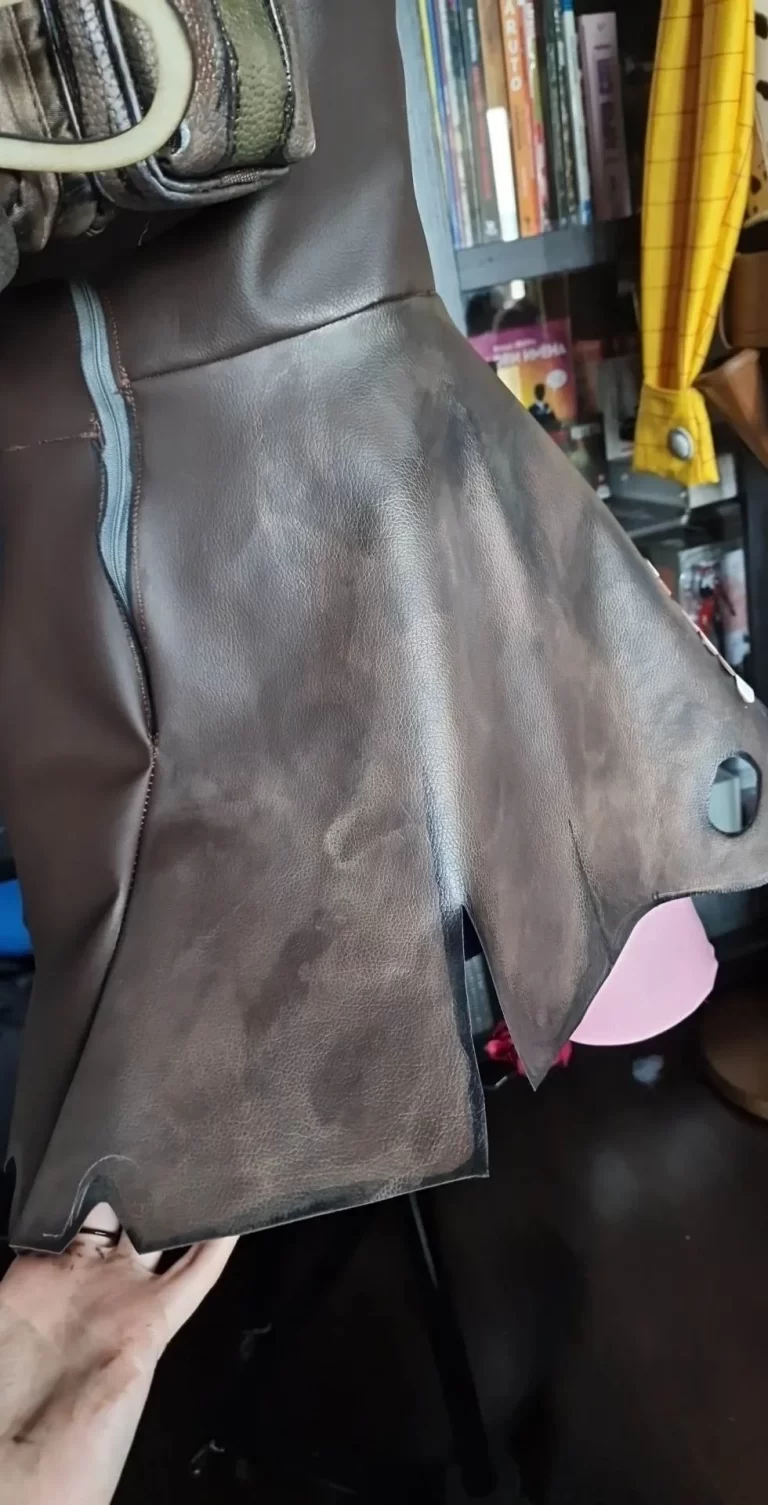
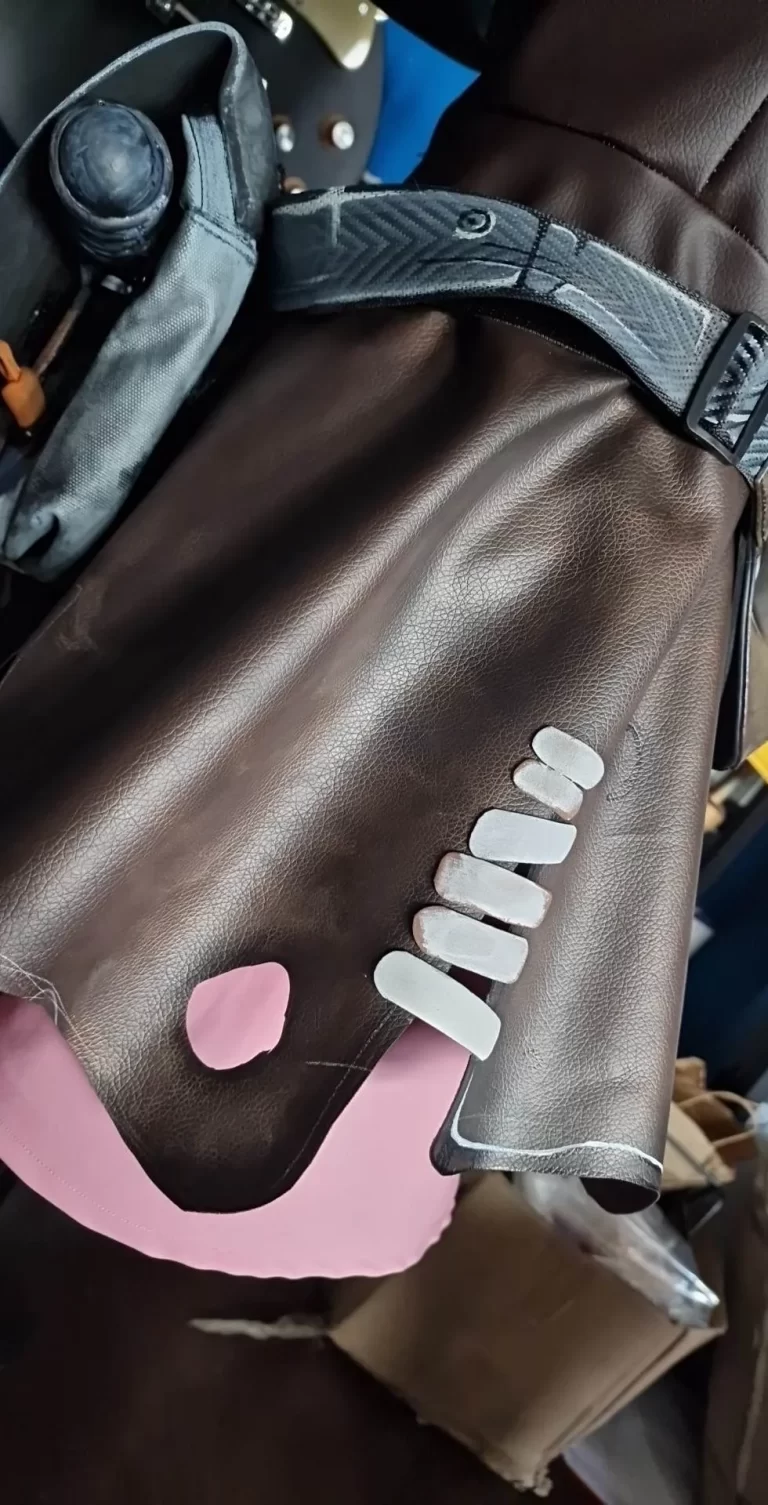
For the appron I apporached it the same way I did the dress, by using my mannequin which I wrapped and cut out all the shapes later on. I made the initial design with shoulder straps, but since it was not sitting well on the overall sillhouete I opted them out. I used a brown faux leather which will appear in other parts of my costume as well.
I proceeded by making all the textures of the dress using a combination of whiteboard markers, textiles, and acrylic paint. Once I had the desired texture I proceeded to make all the “distressed” details of the appron. For the stitches, I used 2mm foam which I glued onto the apron. I painted them white and added a black border to give them that Borderlands feeling.
I wanted to have an easier time putting the dress on and making sure it sits well on my body. For that reason I sewed a zipper on the back to have a fast and easy way to put it on and take it off at all times.
The Pants
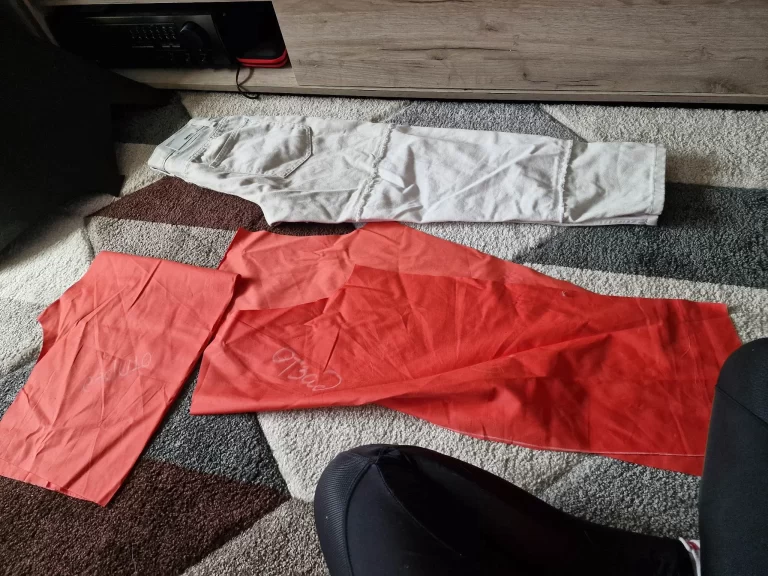
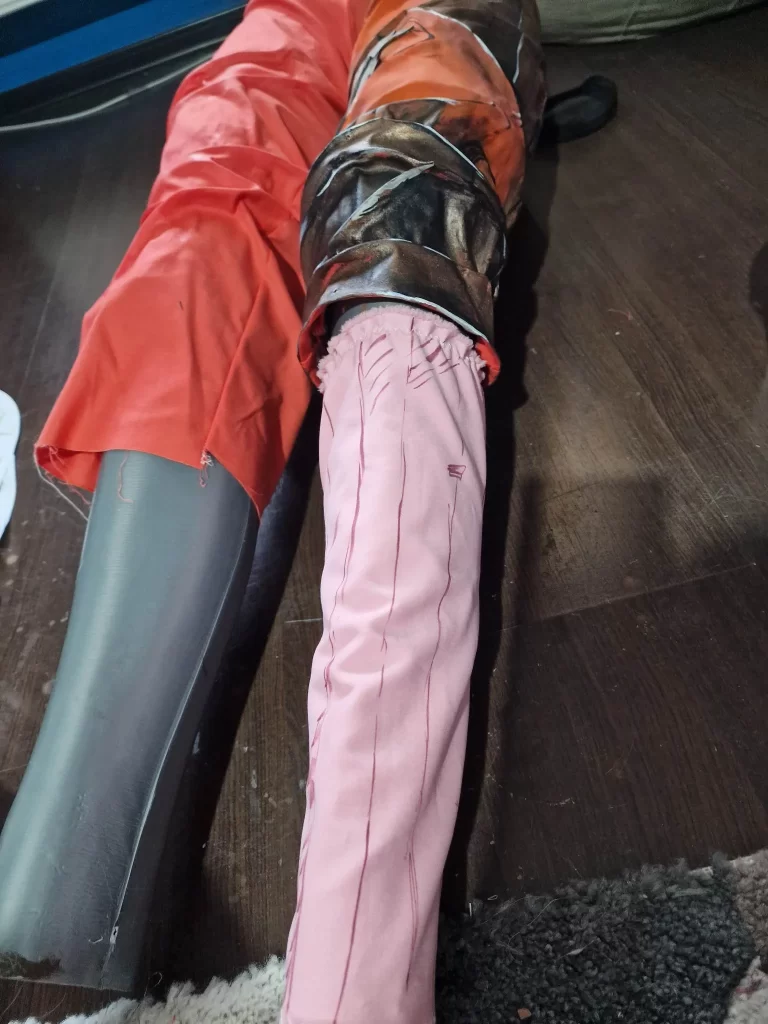
For the pants, I used satin cotton. I put a pair of jeans over the fabric that had a similar shape to get the pattern and cut around them. I then sewed everything together on the overlock and attached an elastic band at the top of the pants.
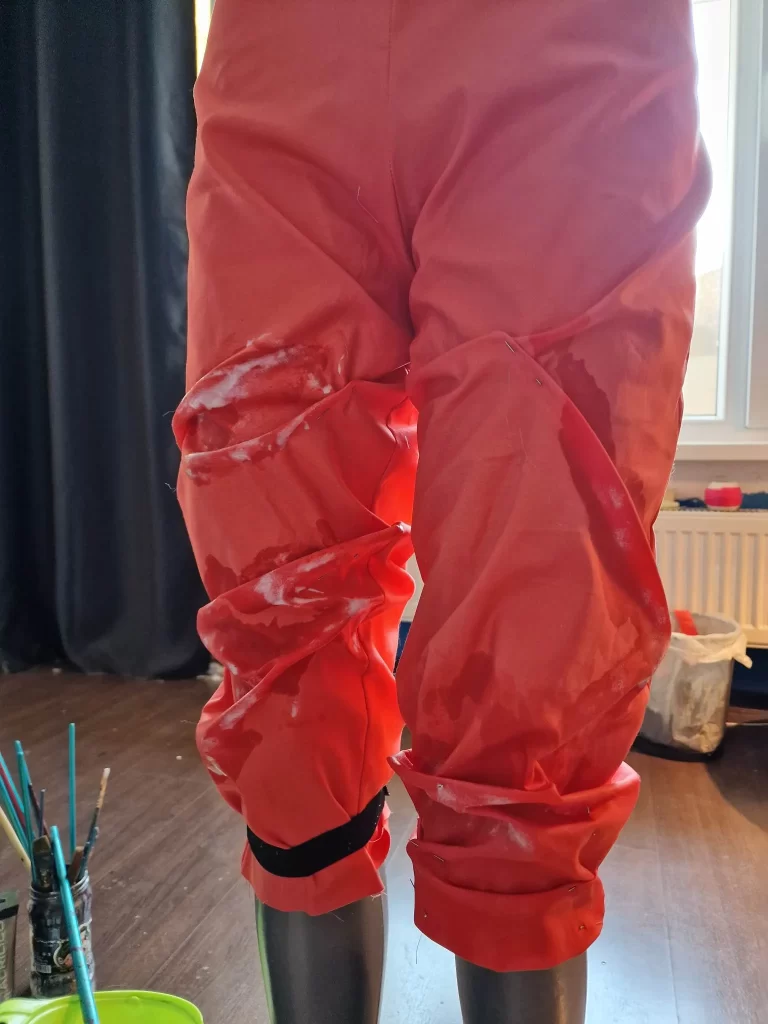
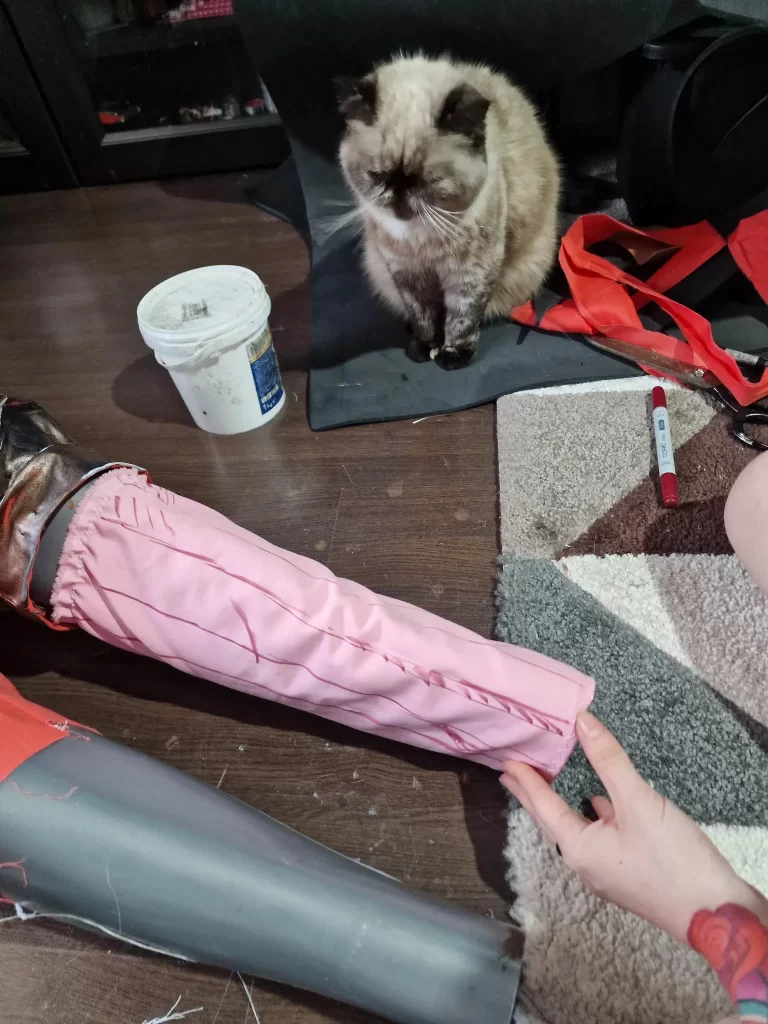
I then put the pants on the mannequin and formed all the creases, using pins. When everything was set I took a brush with c200 glue, watered it down a bit, and started applying it to all the folds to set the fabric in stone. I dried it with a hair dryer and put on another layer of glue.
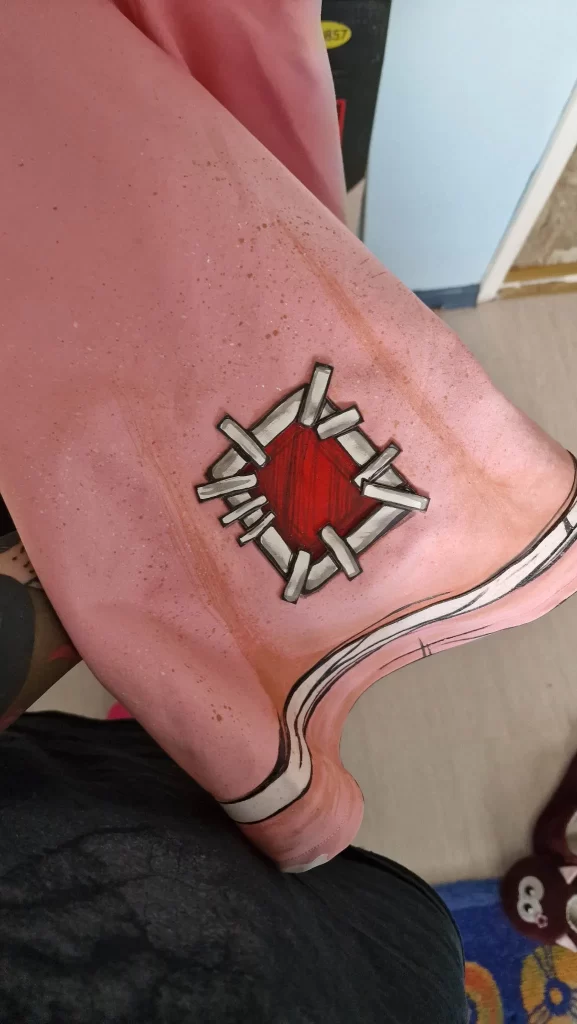
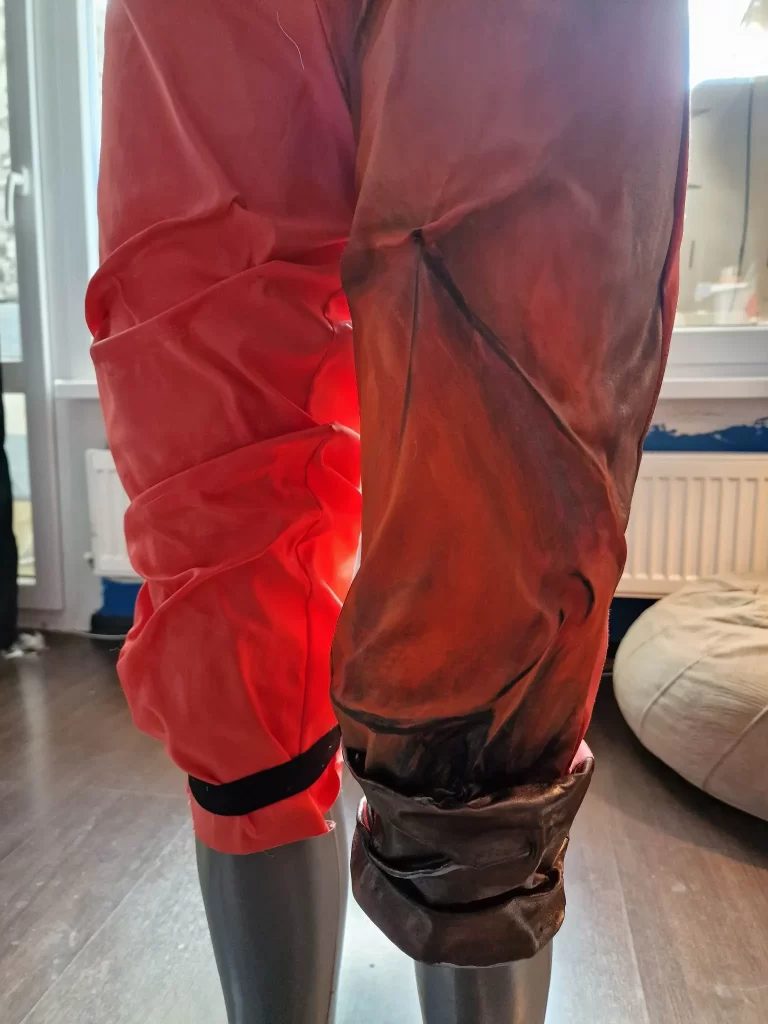
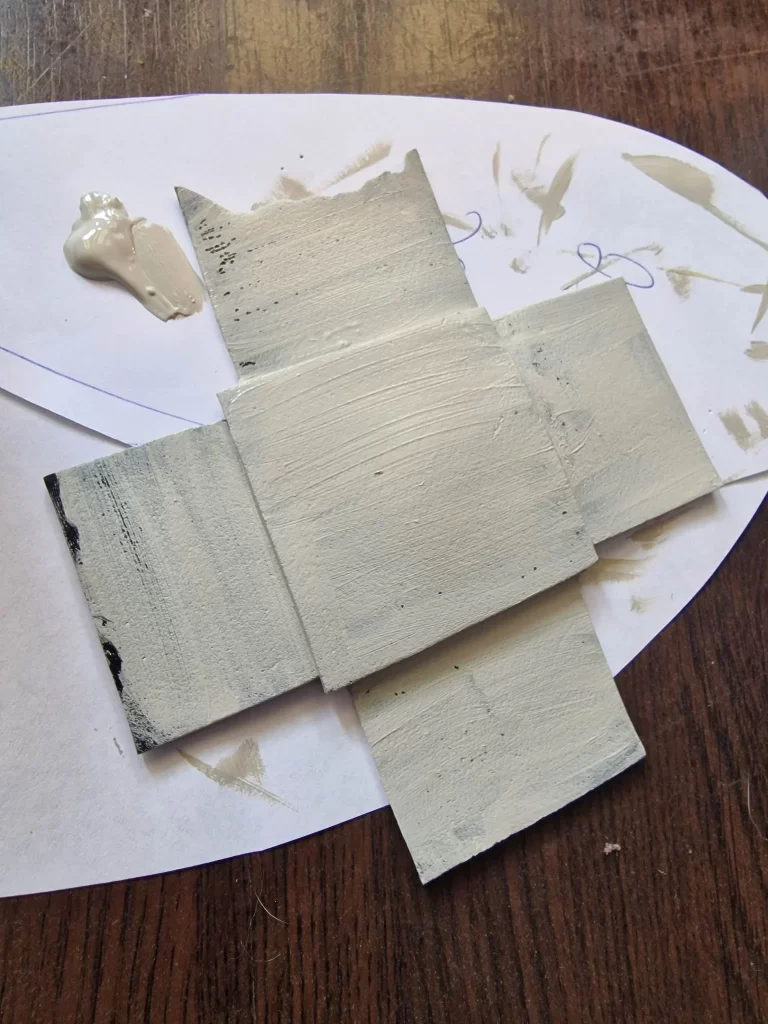
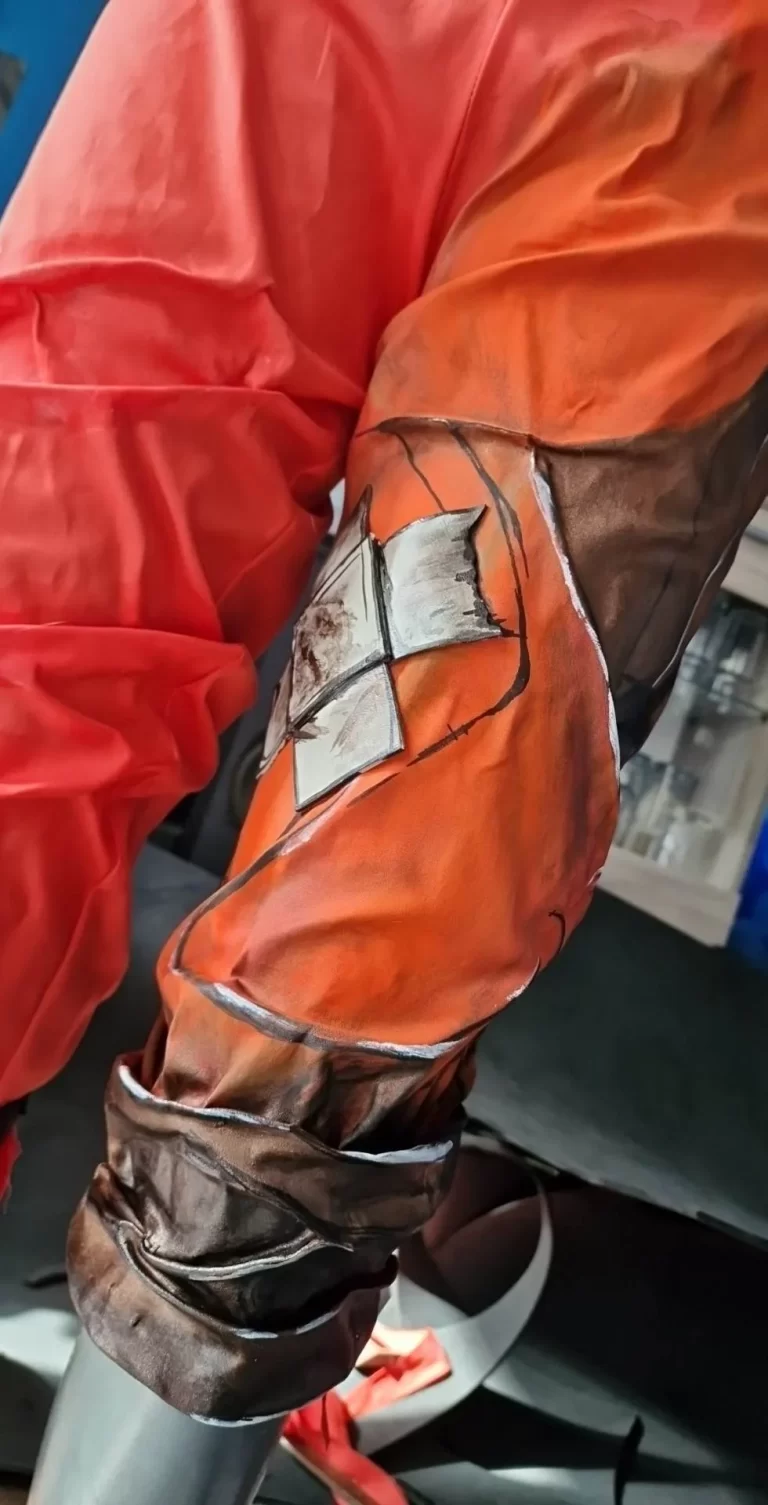
Once I was done with all the shapes, I started painting. I used acrylic paints to further stiffen the fabric and markers to make the black lines stand out more. The small patch element is made from 2mm EVA foam that was primed with plasti-dip and colored with acrylics. I glued the piece to the pants with contact adhesive.
The Socks
Tina is wearing two different socks. For the pink one, I made a standard sock that I just re-colored. For the white one, I used the same technique with the c200 glue that I used for the pants. Both socks have elastic sewn in.
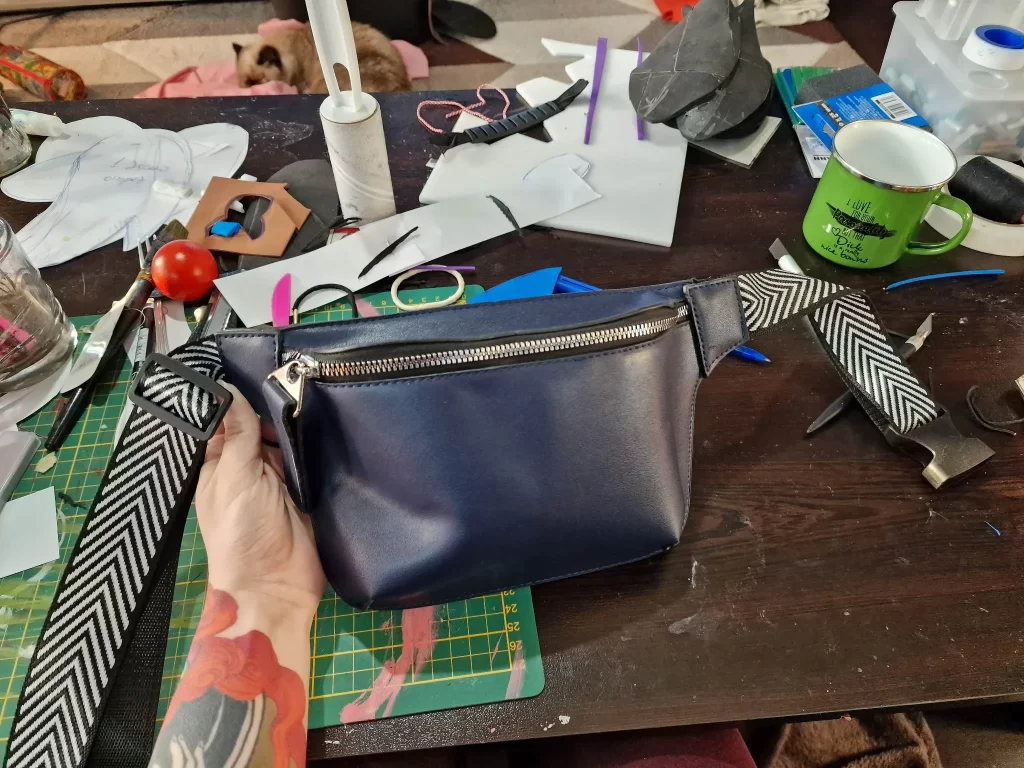
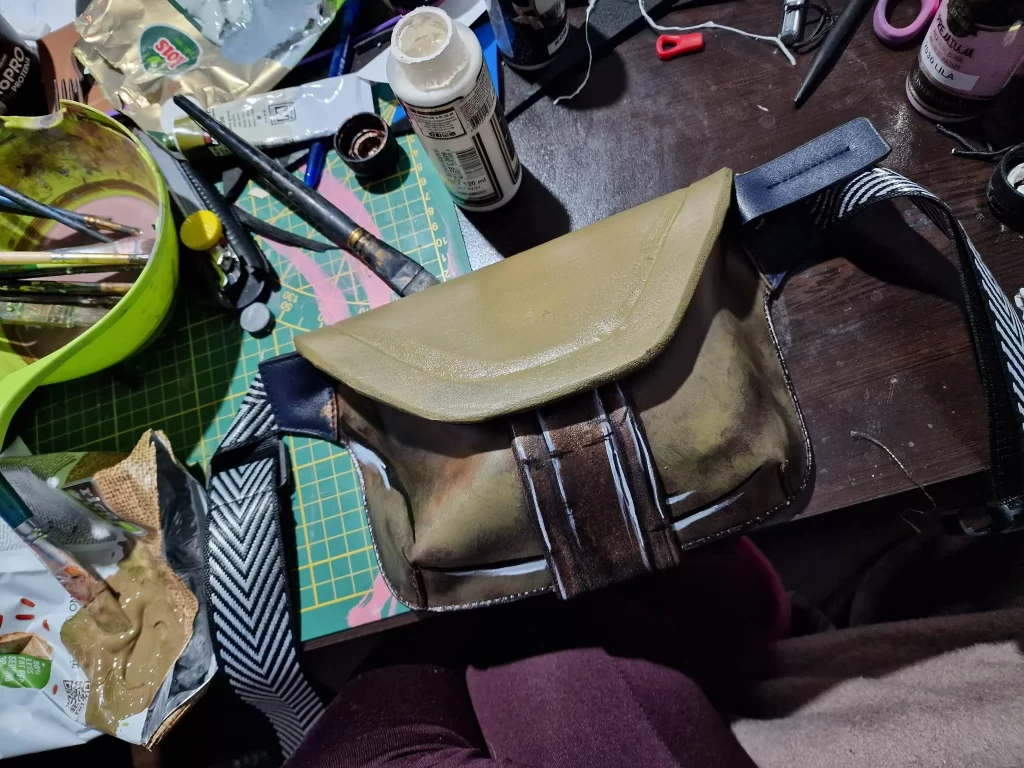
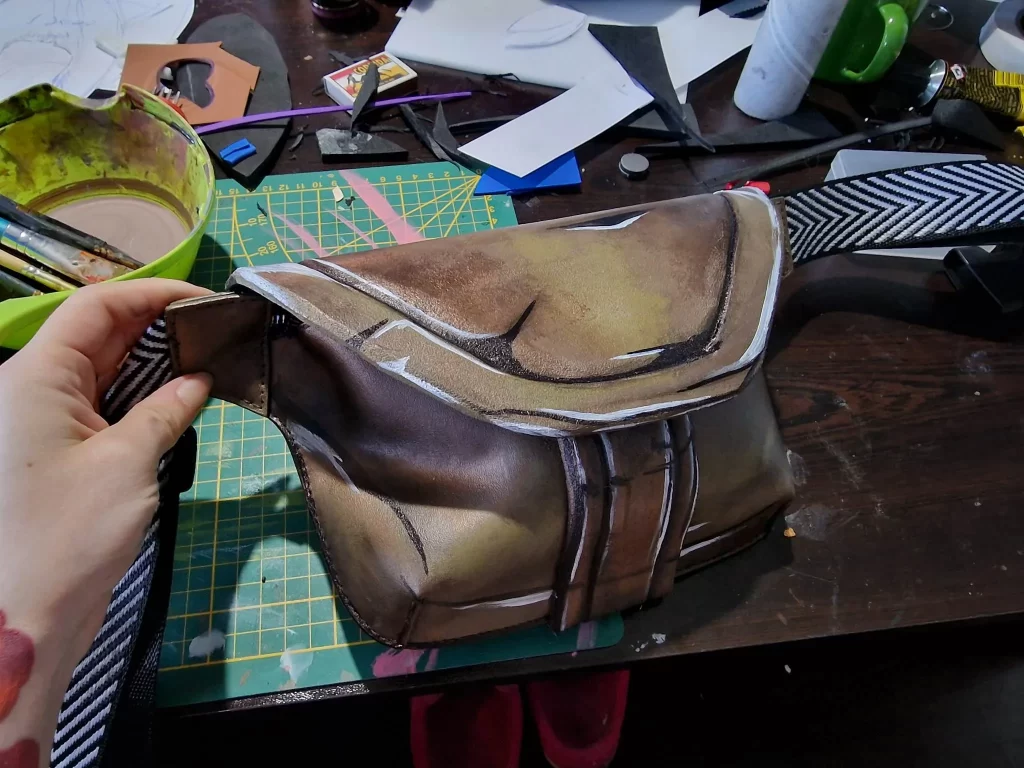
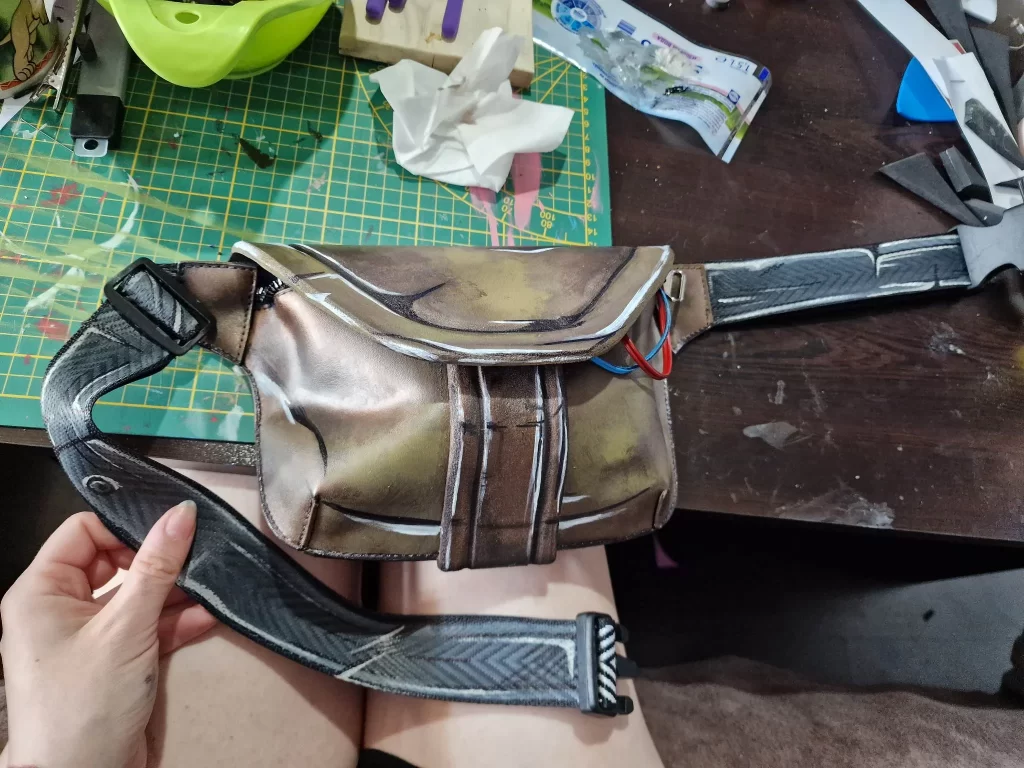
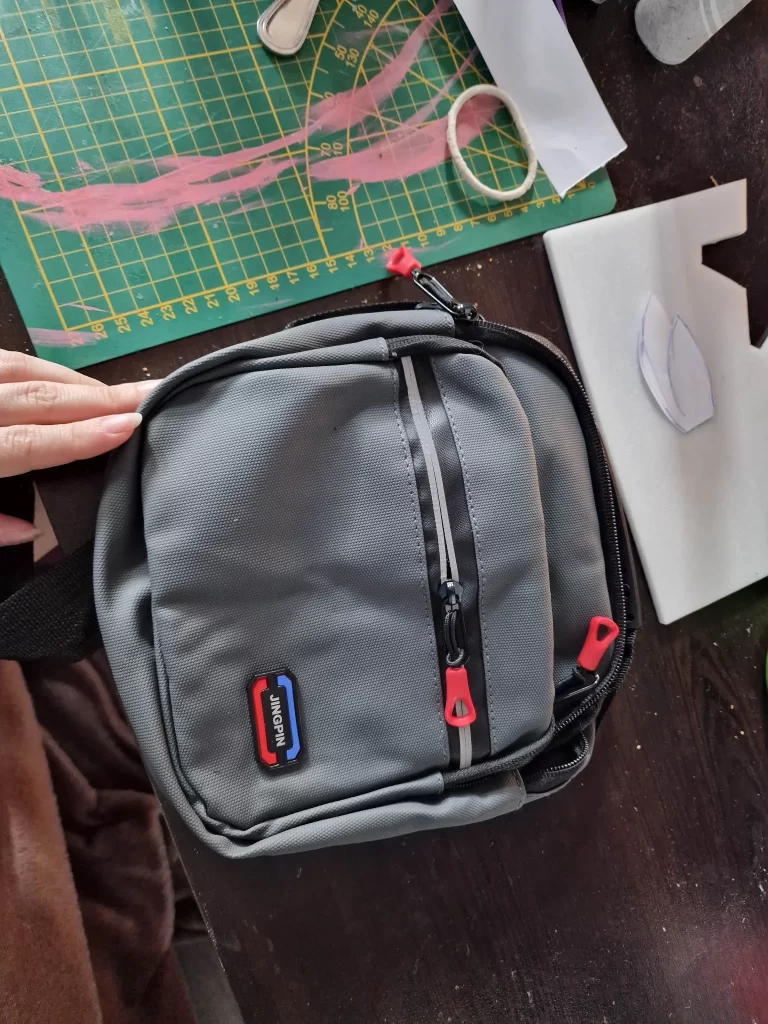
Small Backpack
There are three bags in total. For all of them, I used ready-made bags that I reworked to achieve the desired look.
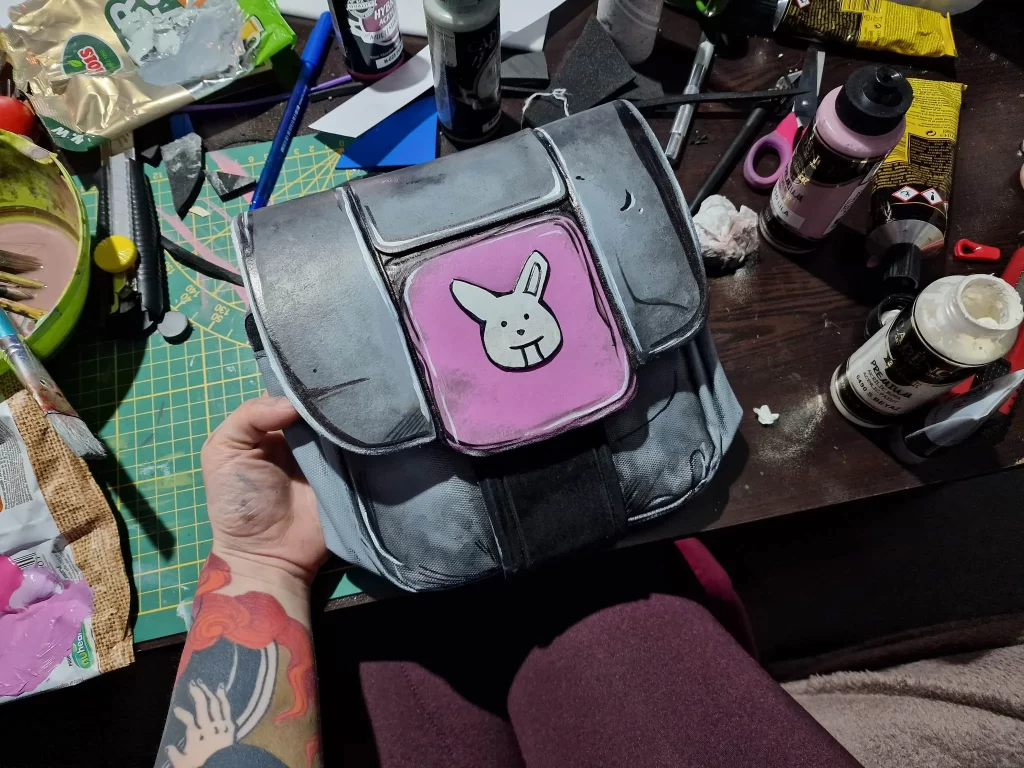
The smallest bag is the one in the front – for this one, I used a 5mm piece, which I glued to the front and cut into the desired shape, and another 5mm strip goes along the bottom, which is also glued with contact glue. There is velcro between the two pieces which keeps the functionality of the pouch. I then sprayed with plasti-dip and painted everything, including the textile part in the style of the title. For the small details, I used leftover wire, which I repainted and glued to the inner part of the pouch
Mid Backpack
For the middle-sized bag, which is at the back, I used a 5mm piece of EVA foam, which I styled according to the original design. I then glued it to the base of the bag. I sprayed everything with plasti-dip and painted it over with acrylic paints. I then moved on to the little details – the odd nail and buttons.
For the nail, I used two 4mm pieces that I cobbled together to taper at one end. For the other end, I used a cardboard tube of kitchen aluminum foil, which I decorated with clay foam. I then joined the two pieces together. Next, I primed with plasti-dip and colored. I added two straps to attach the bag to the belt on the back.
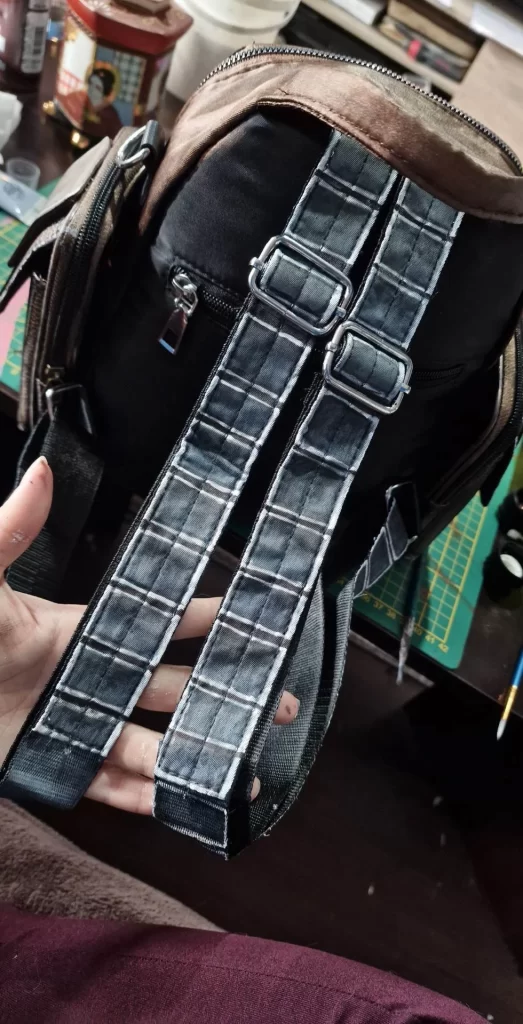
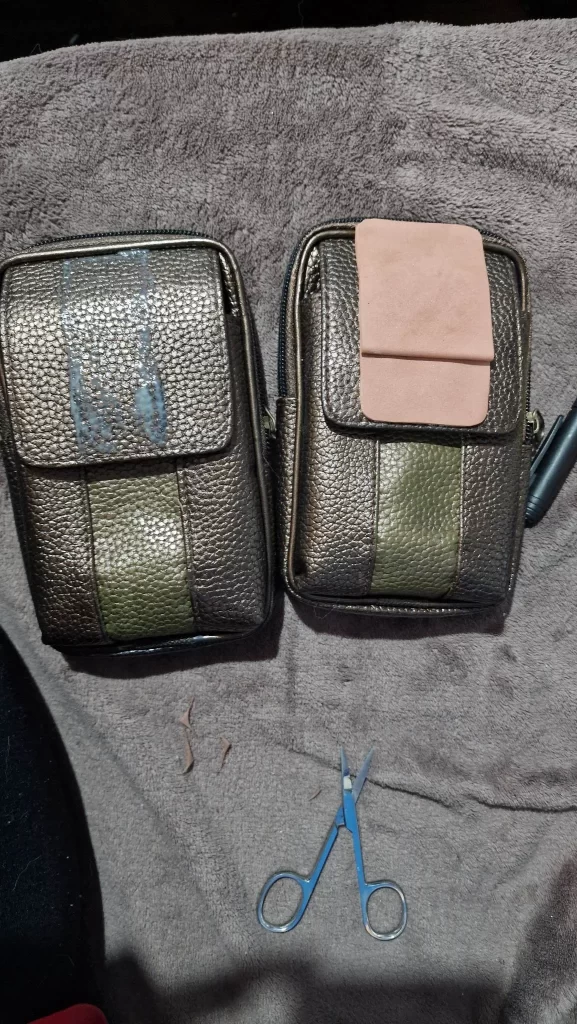
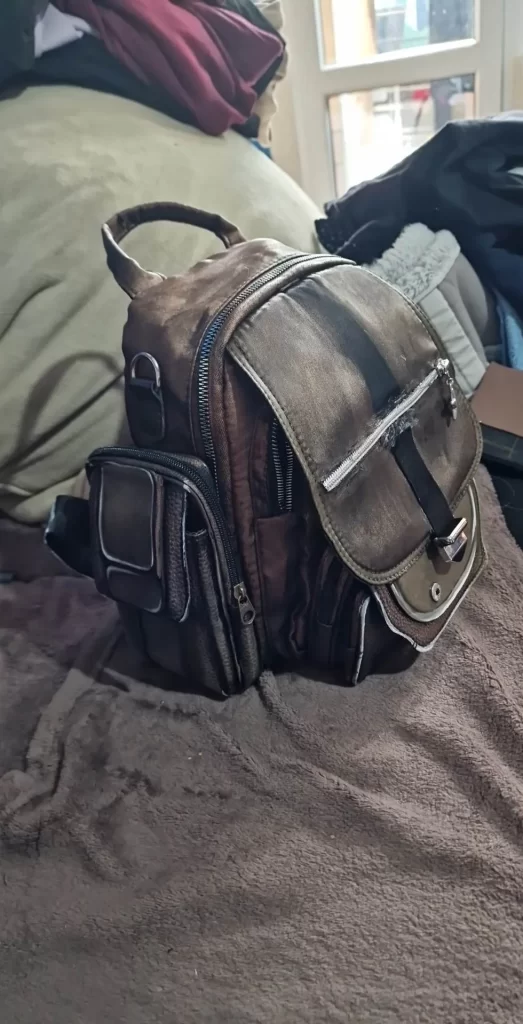
Big Backpack
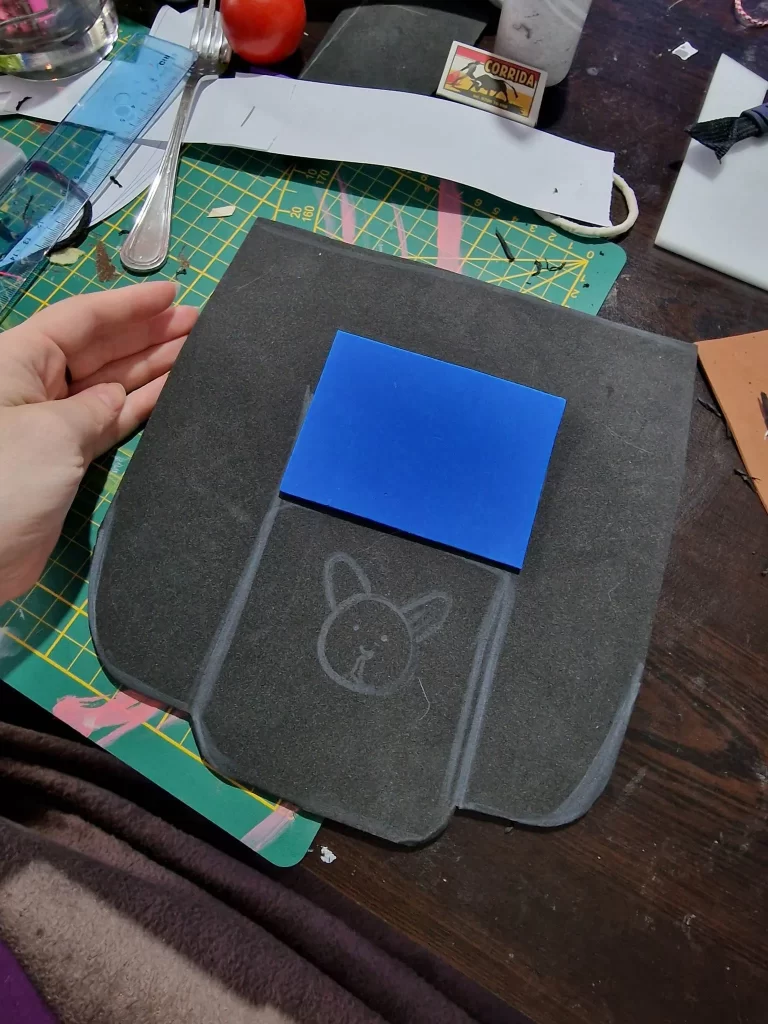
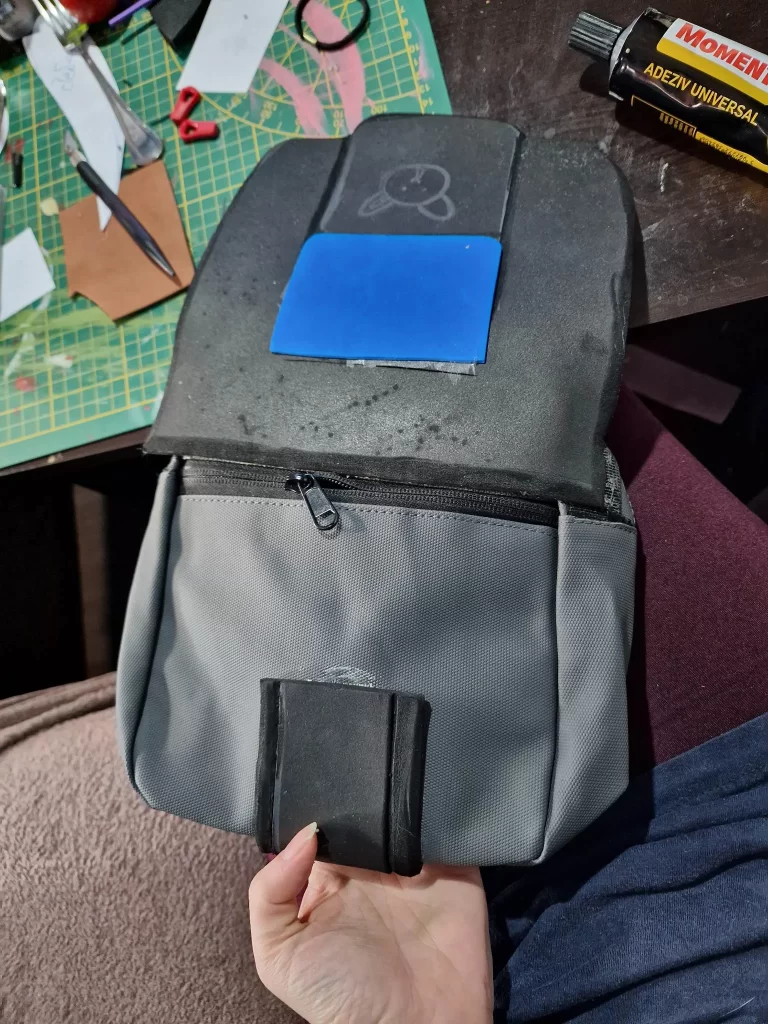
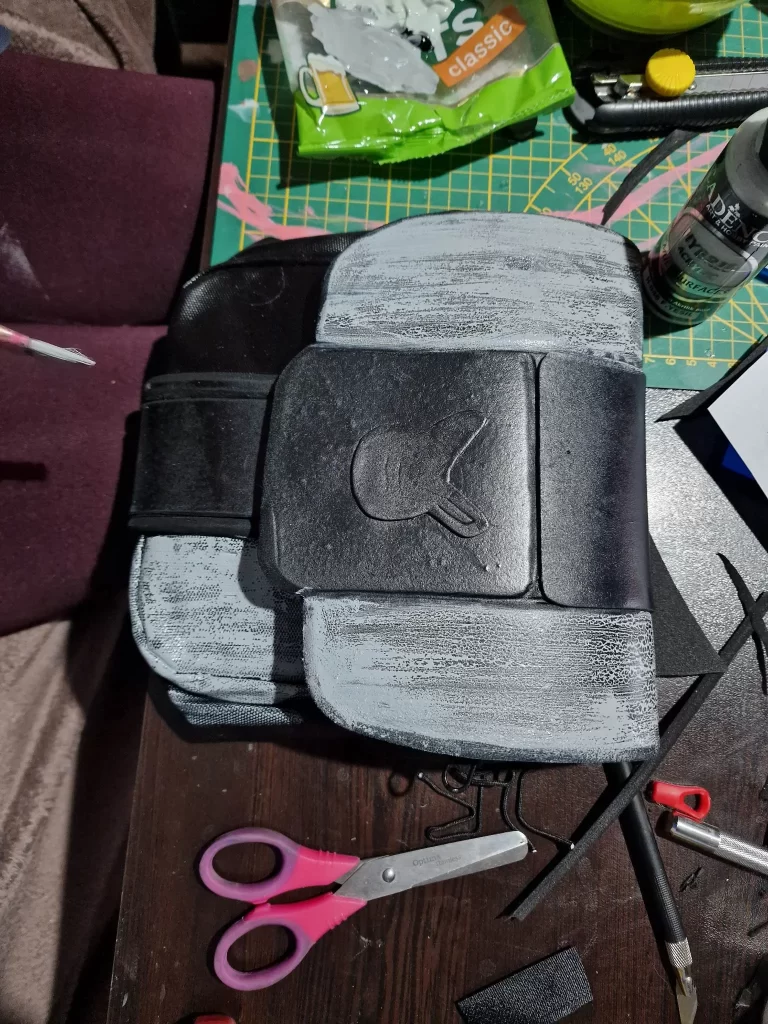
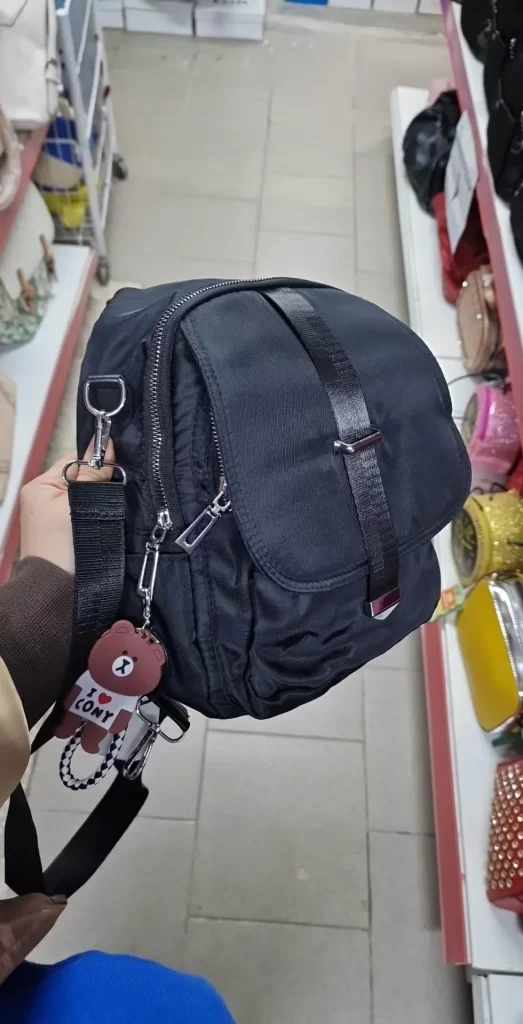
I had to start over with the Backpack because the first one didn’t have the shape I liked. Once I found the perfect design, I removed the unnecessary parts. Then, I painted and shaded the straps, which was a lot of work. I added 2mm foam panels to the pocket flaps and turned two leather phone cases into extra pockets. The phone cases went through the same steps as the backpack itself. Overall the bag was one of the more intricate pieces I tackled , but I am satisfied with the overall look of it.
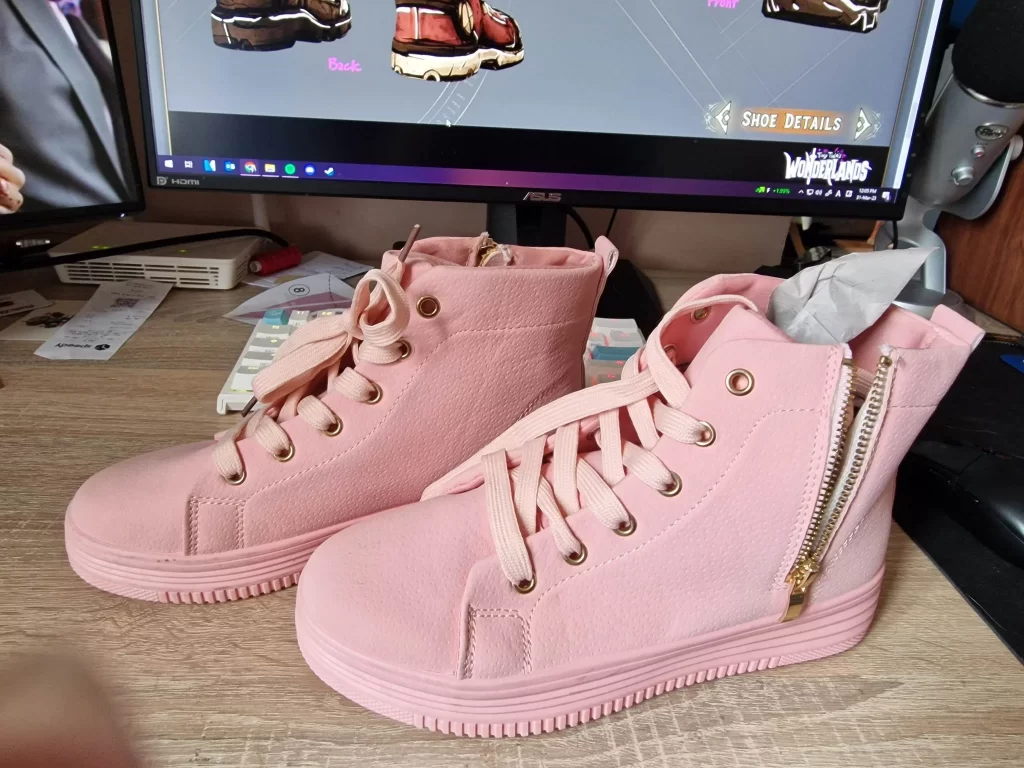
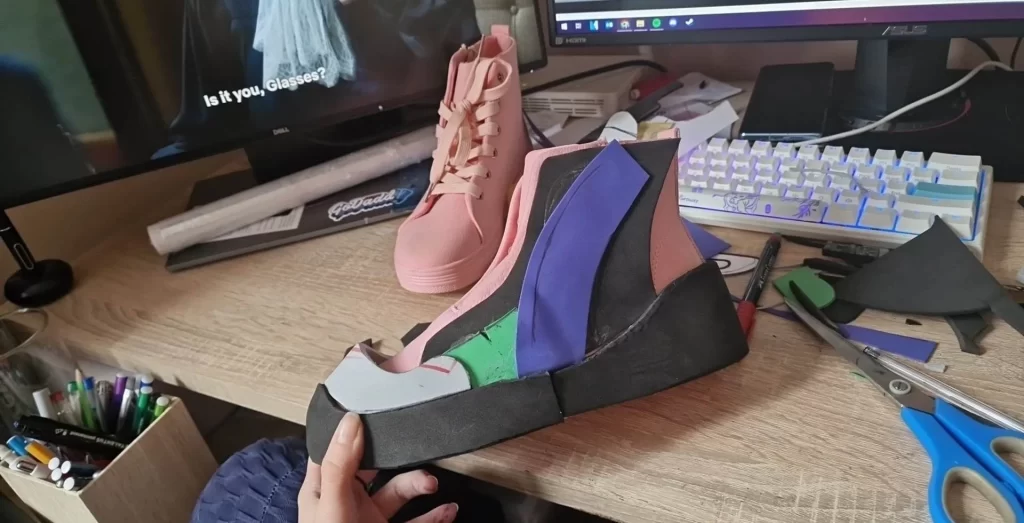
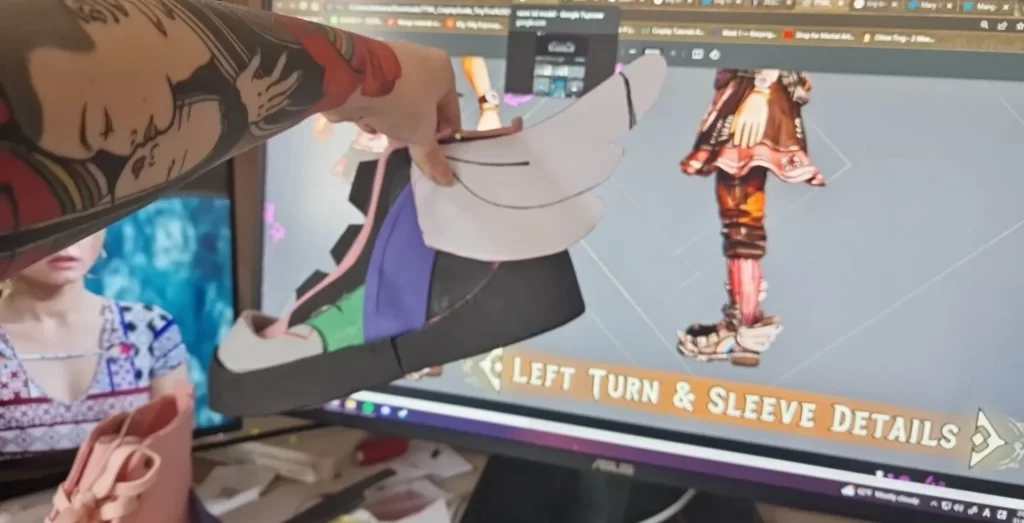
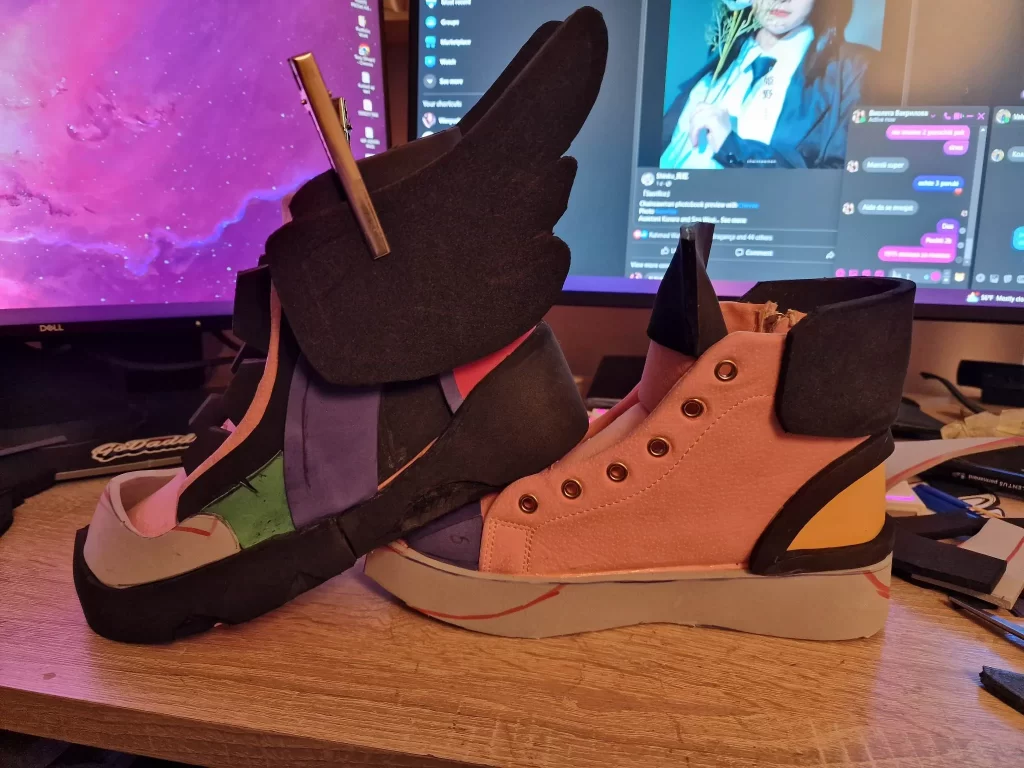
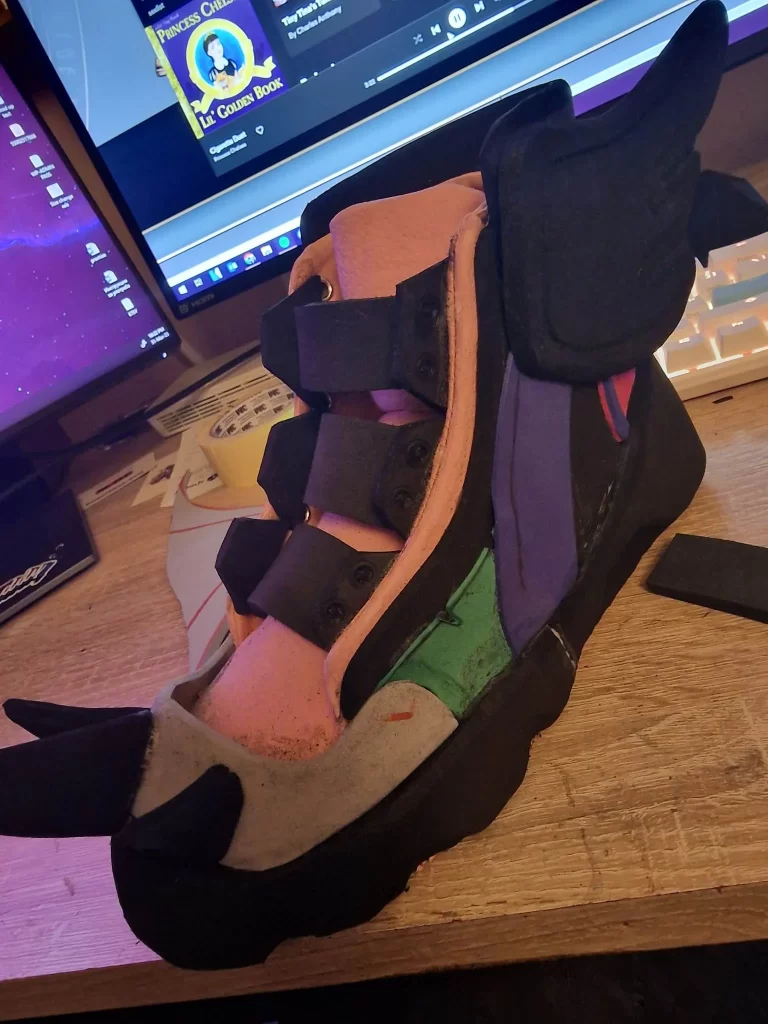
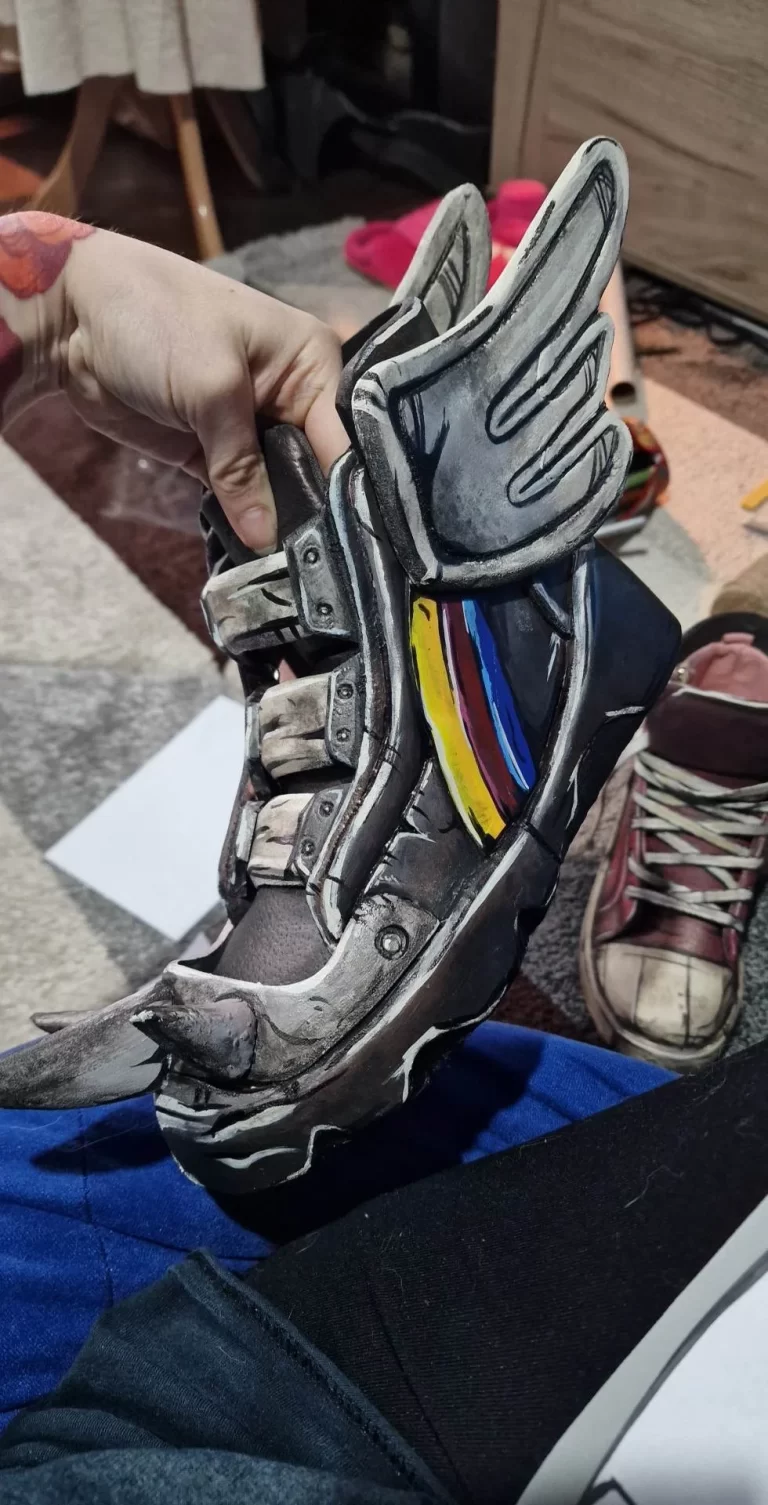
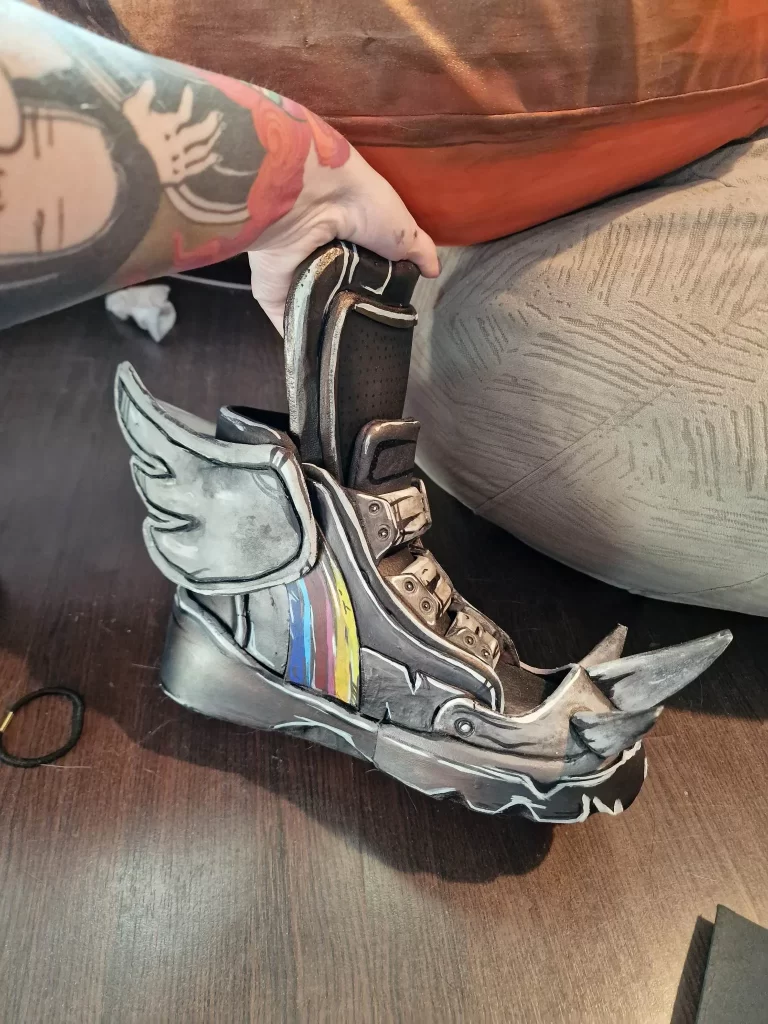
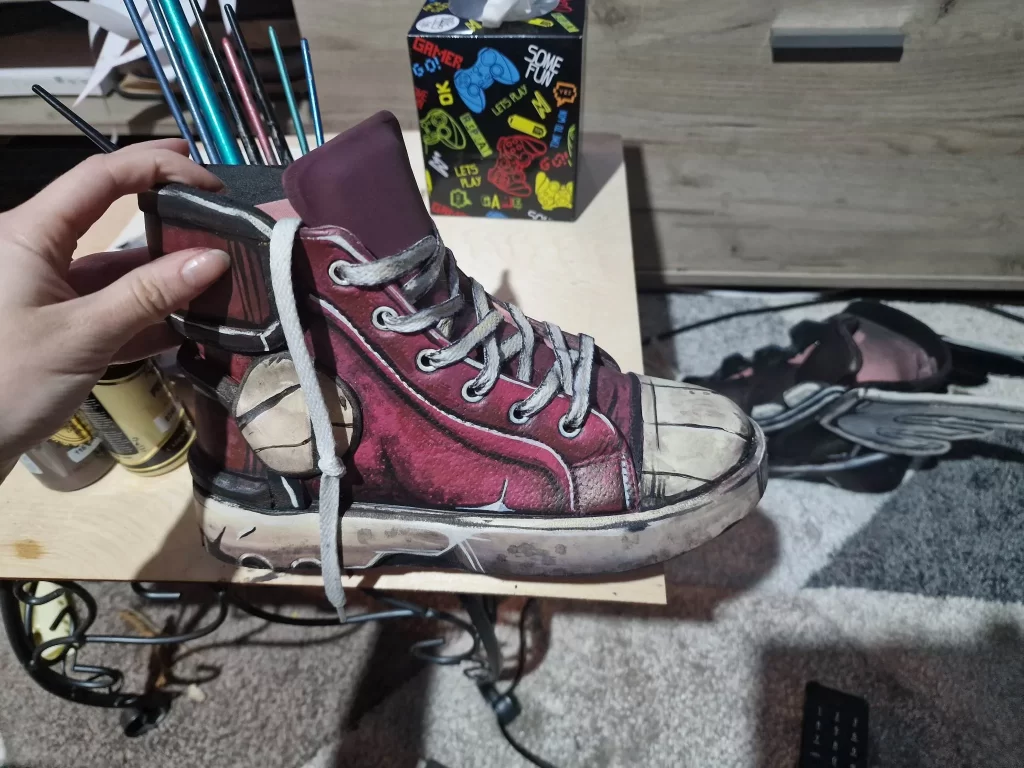
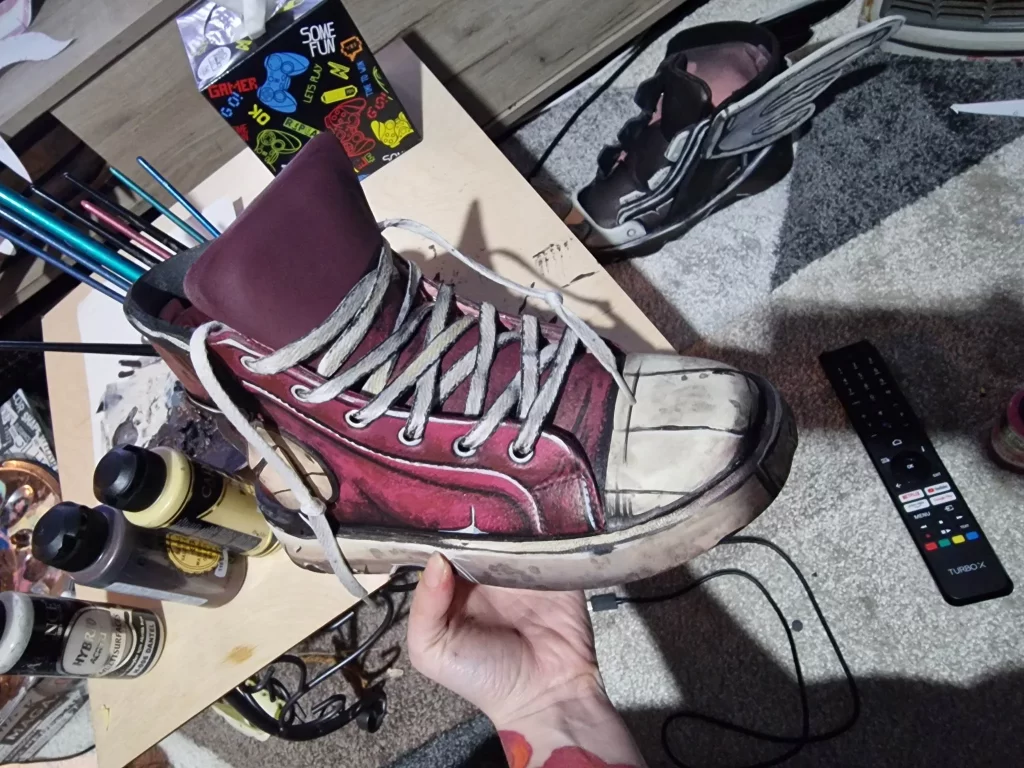
The Shoes
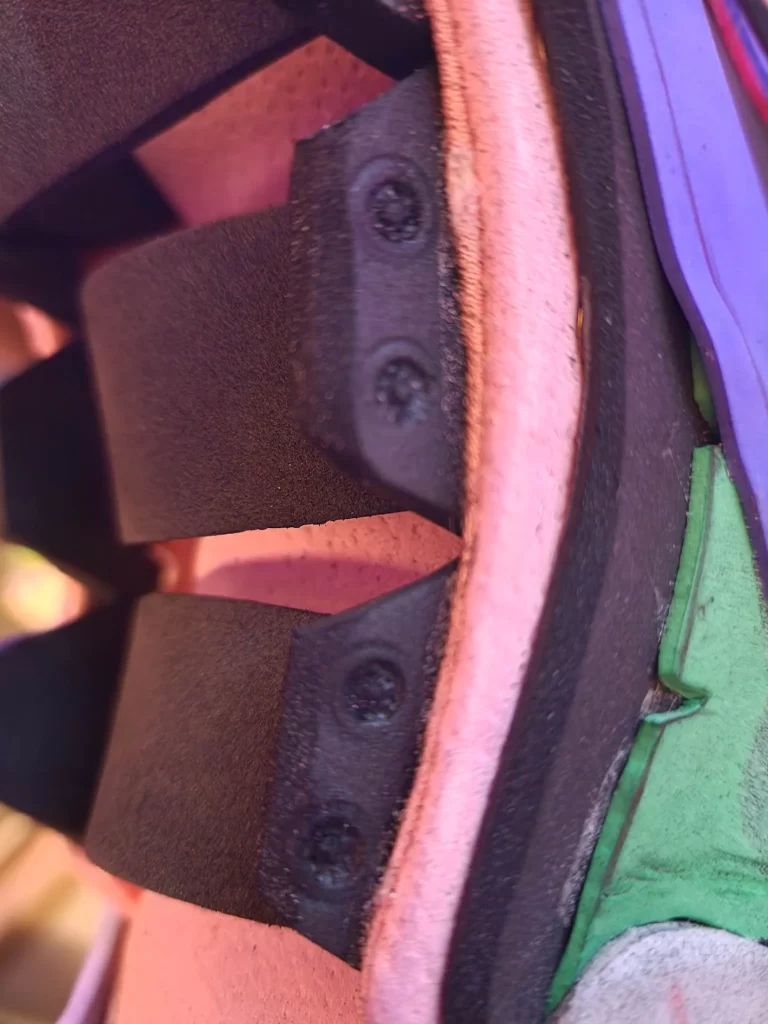
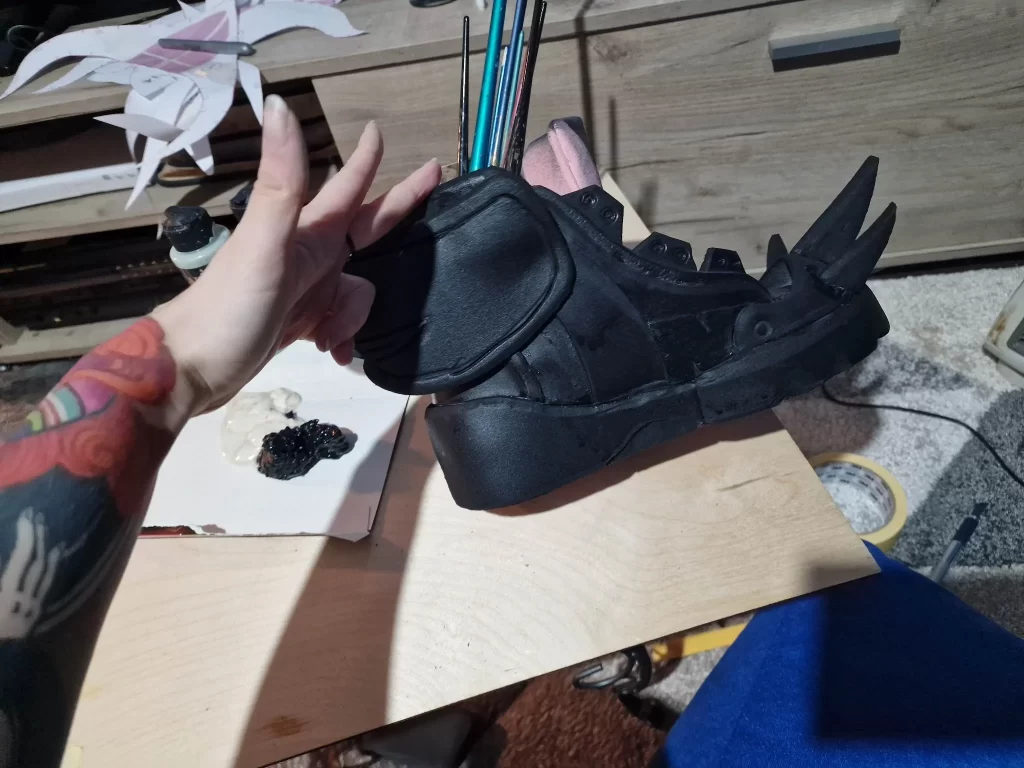
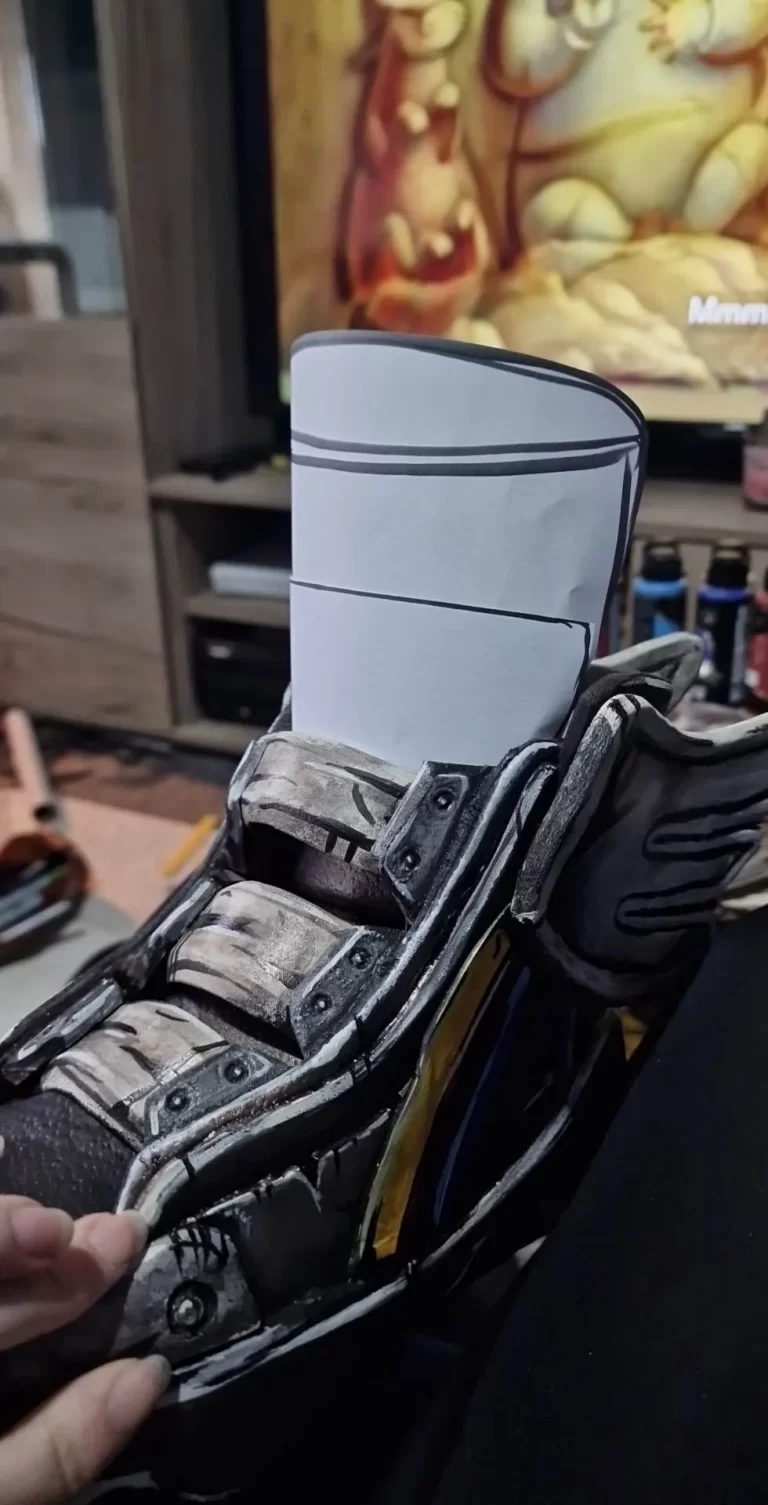
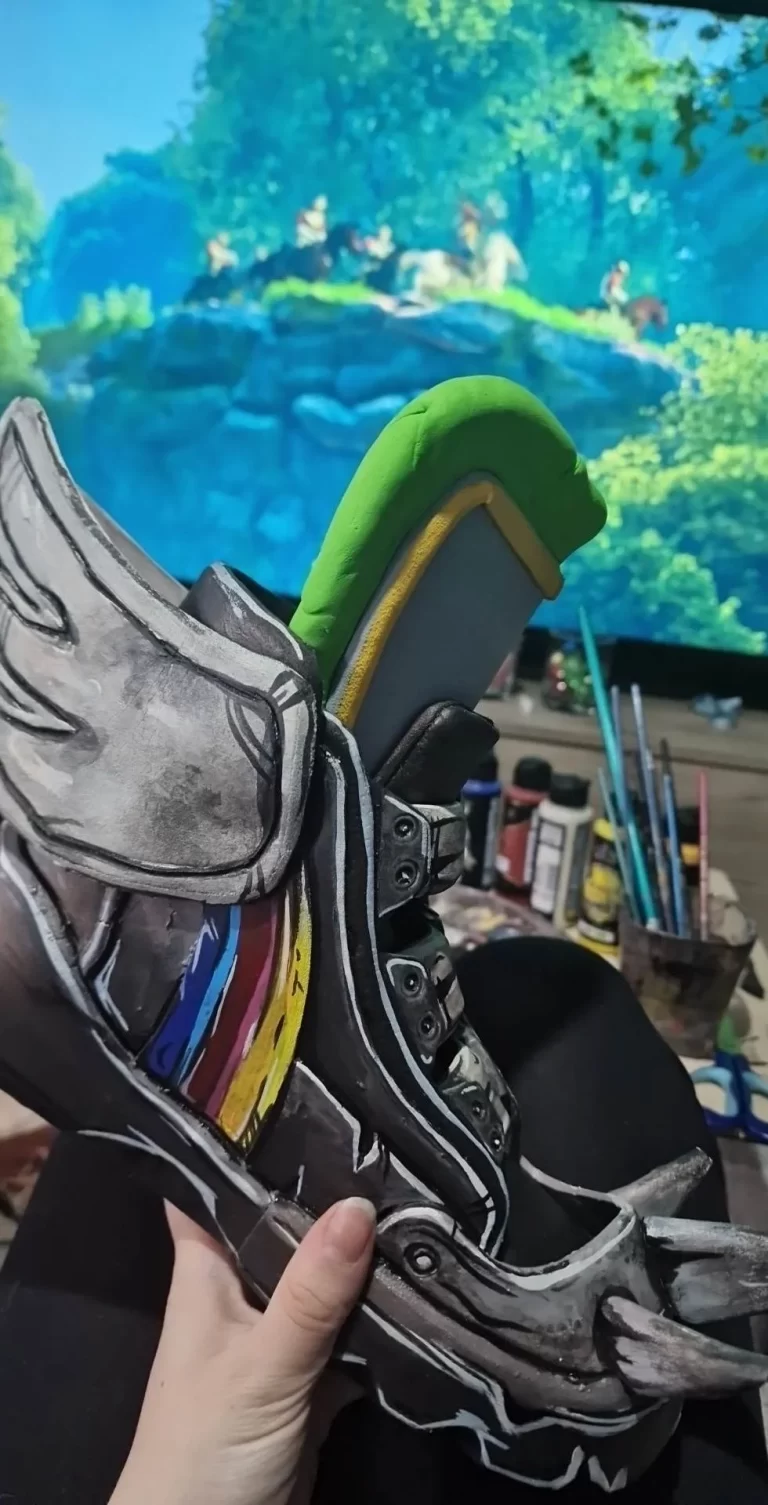
For the shoes, I used a ready-made base that is close to the original design. I put one shoe aside as it is mostly coloring and less redoing. I wrapped the left shoe with kitchen foil and then applied masking tape to make the pattern. The elements I painted I cut out of various EVA scrap pieces that had gathered throughout the years. After a lot of sanding, they finally got to the shape they needed to be. I glued everything up and primed the surface. I then painted the shoes for the next 2 days.
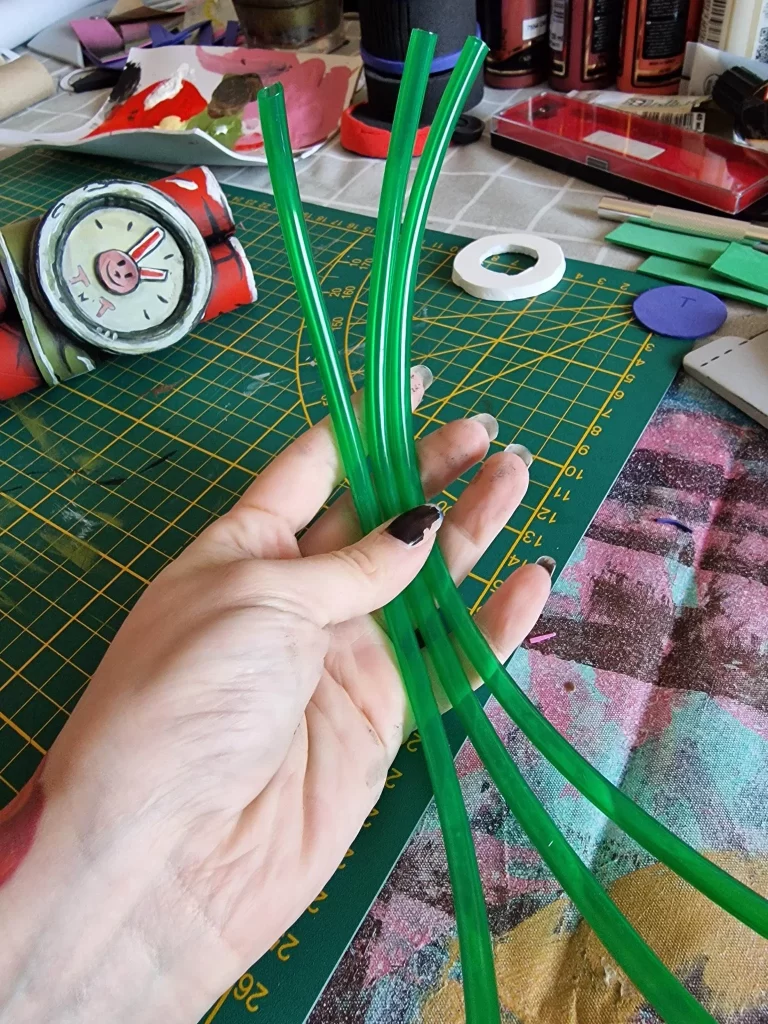
The Dynamite
To make the Dynamite, I repurposed used paper rolls to form the triple dynamite shape. I utilized garden hose tubing to fashion the fuse. After applying a coat of plasti-dip, I painted everything with acrylics. The clock and straps were crafted using 2mm foam, and carefully shaped to fit correctly. To ensure convenient portability, I added a clip that easily attaches to the belt of my backpack. Finally, I applied cell shading to complete the look.
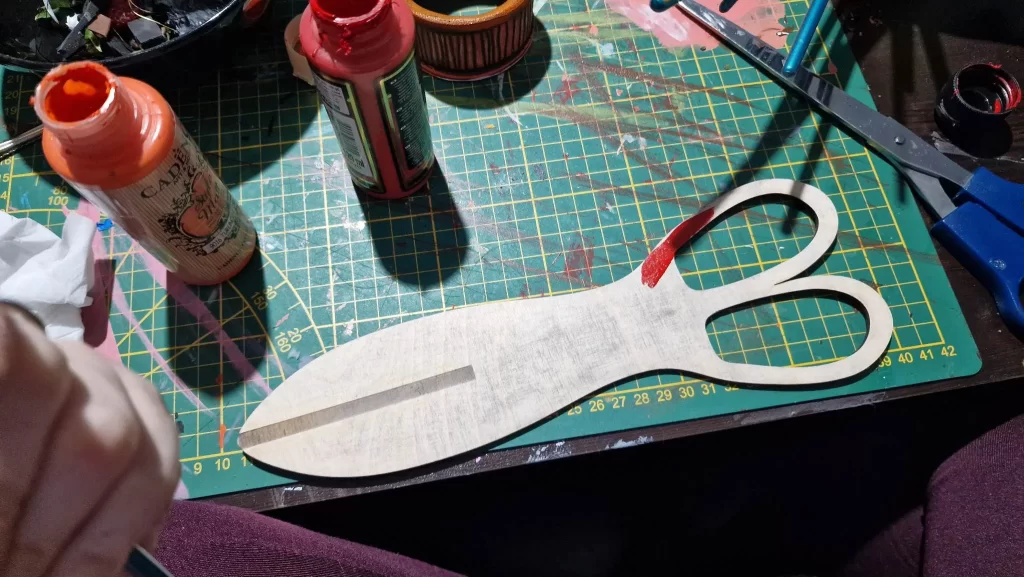
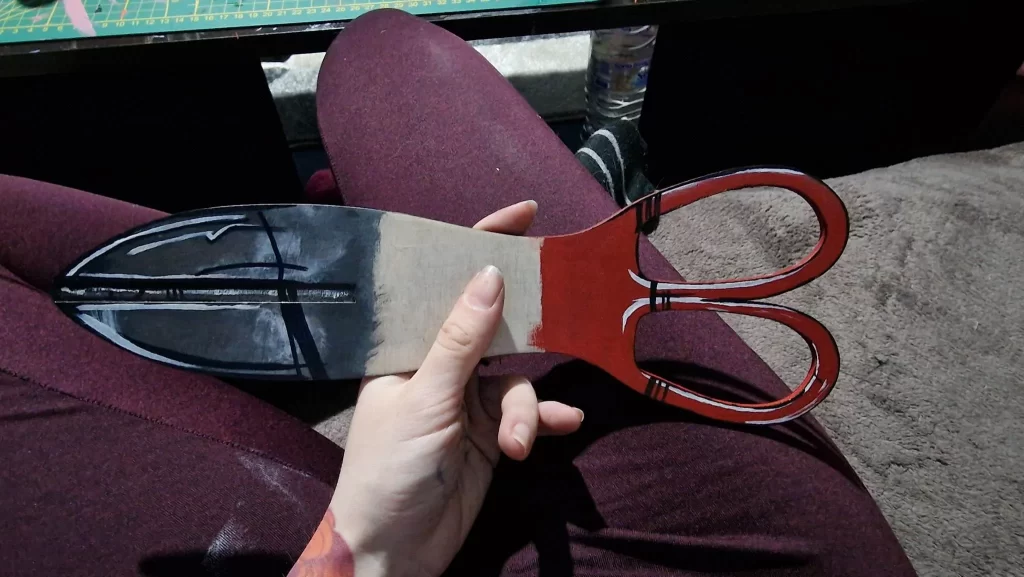
The Scissors
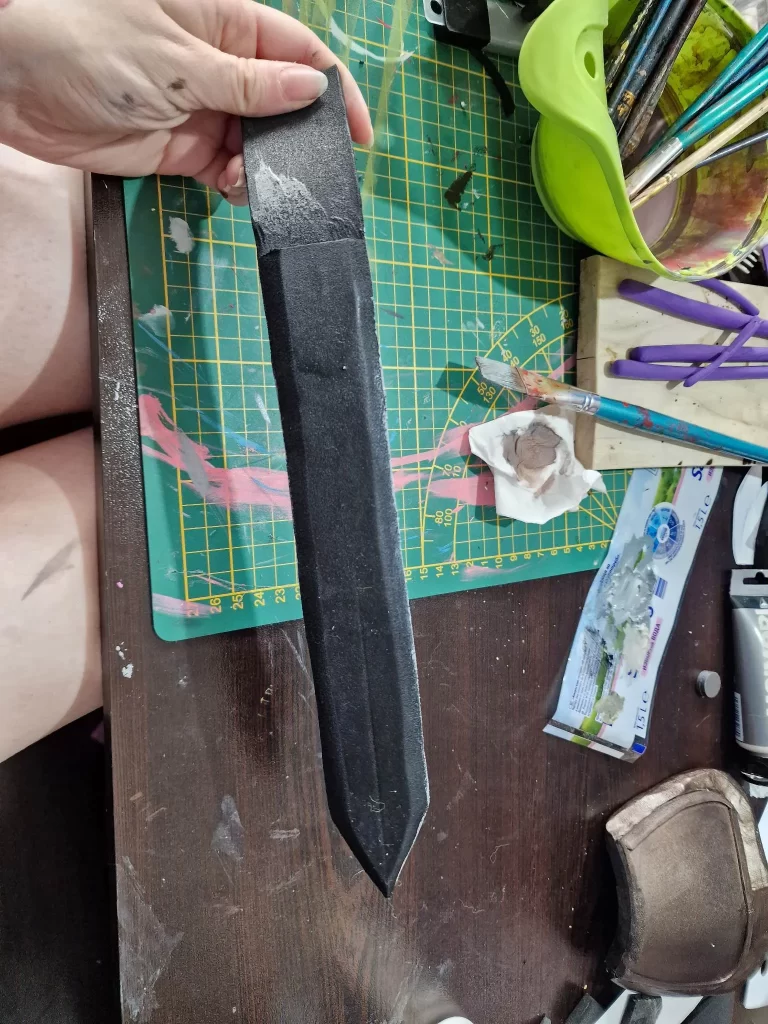
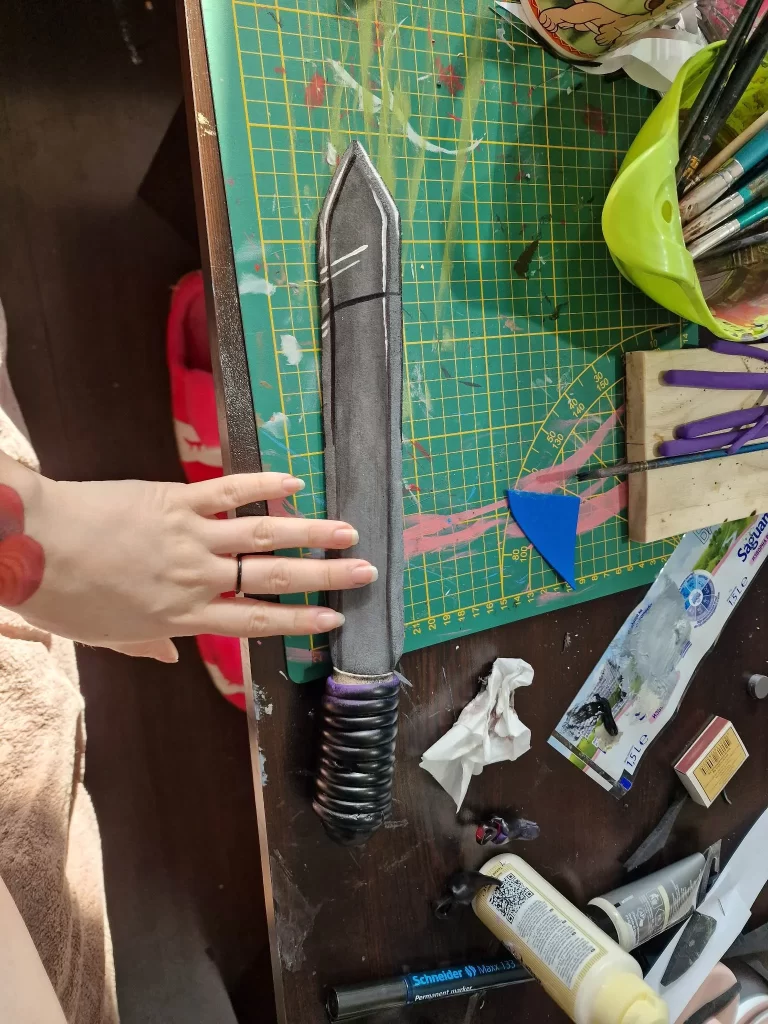
To create the Scissor, I used Illustrator to make an outline of the shape. Using a CO2 laser, I carefully cut out all the parts and engraved the section that represents the meeting point of the two scissor halves. To enhance the wood’s color, I sanded it down with 240-grit sandpaper. After applying a base color, I proceeded to cell shade the entire piece.
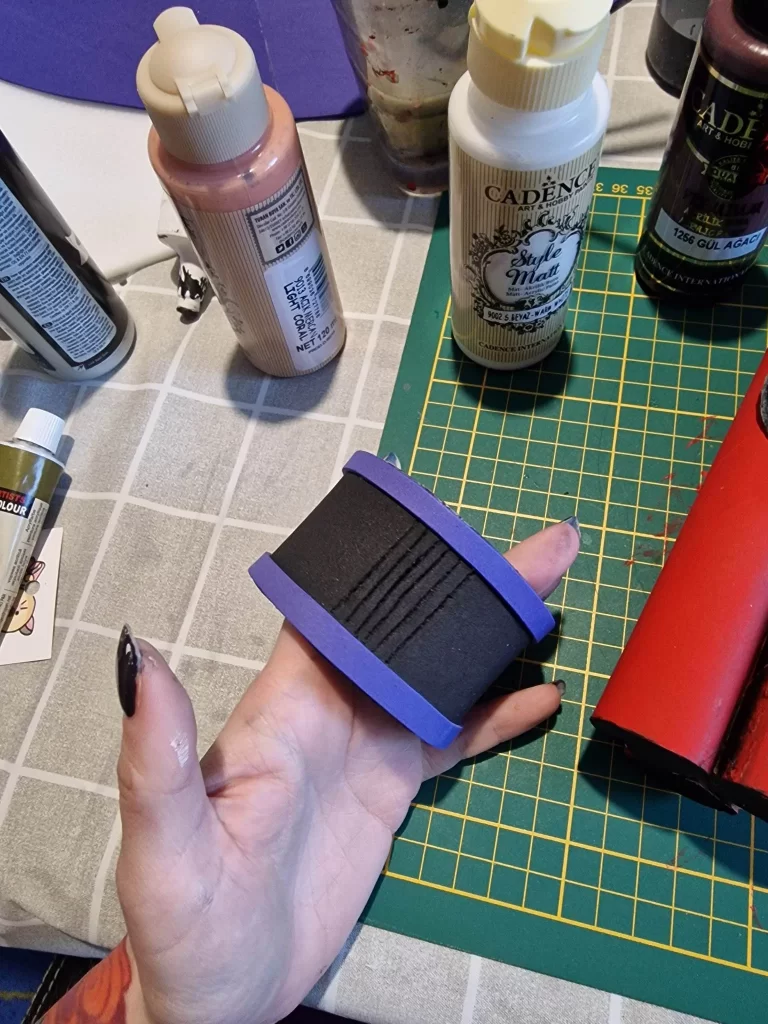
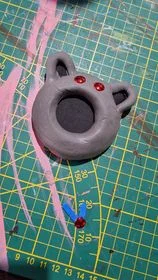
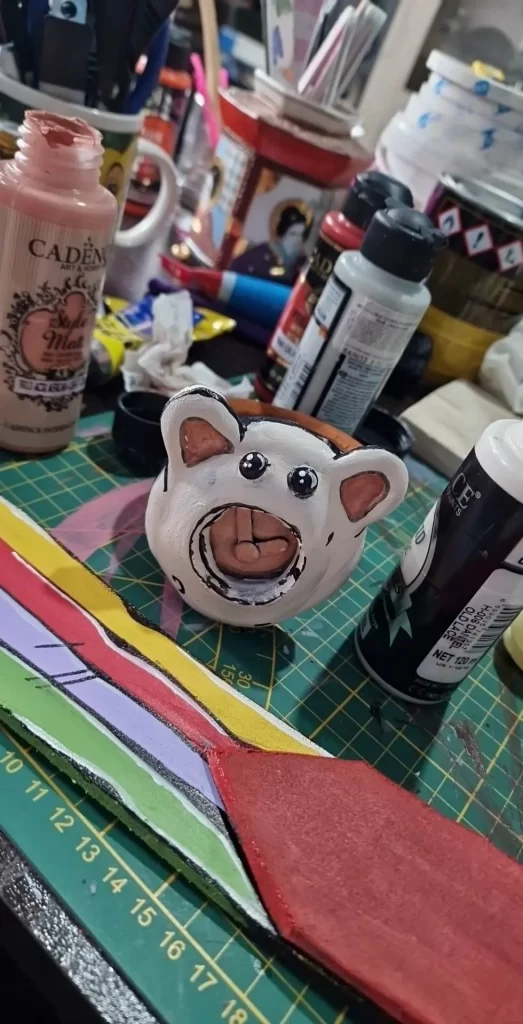
The Hamster watch
I made the hamster by cutting out some rough shapes of leftover EVA foam. I stacked it with Clay foam to create the half-sphere shape and added two little press-on buttons for the eyes. The little watch was made with 2mm EVA foam. Everything was sanded down and was Plasti dipped, painted, and cell-shaded. For the Base of the watch, I used 3 mm foam and a 2mm bevel foam that I created. I sanded everything and with the pyrograph made all the lining to get to the end which was of course to paint and shade.
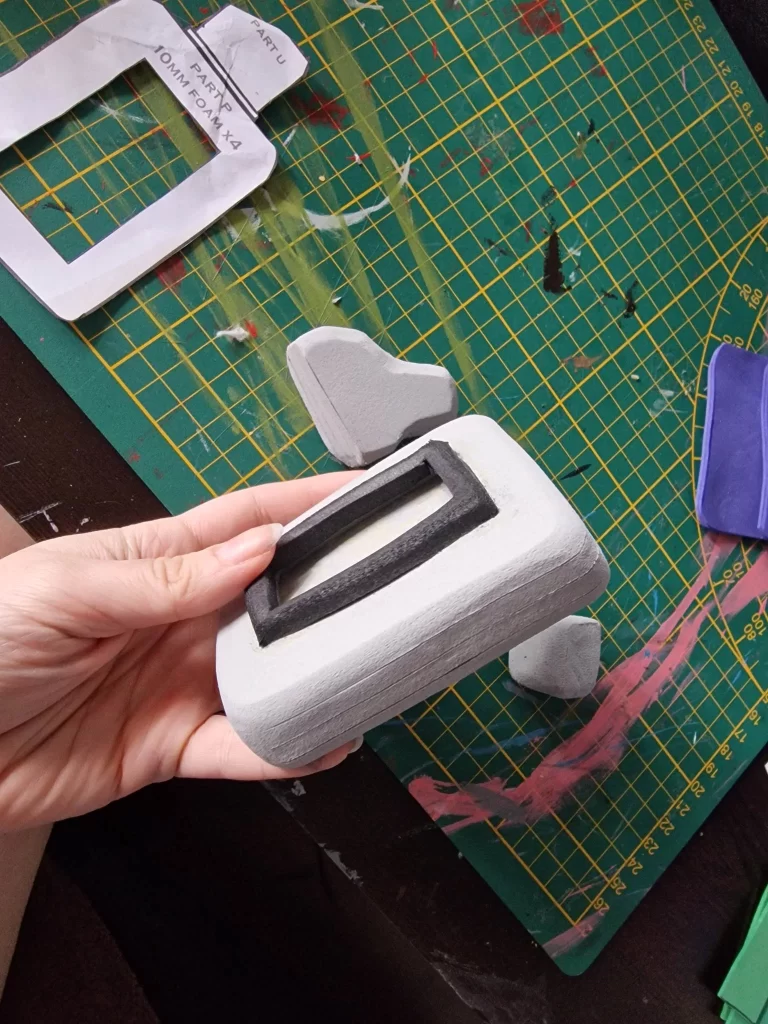
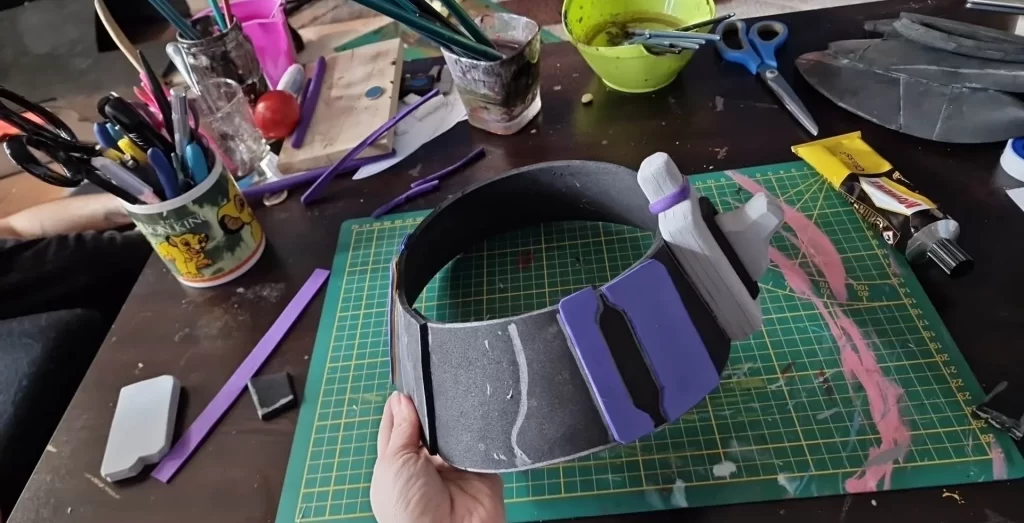
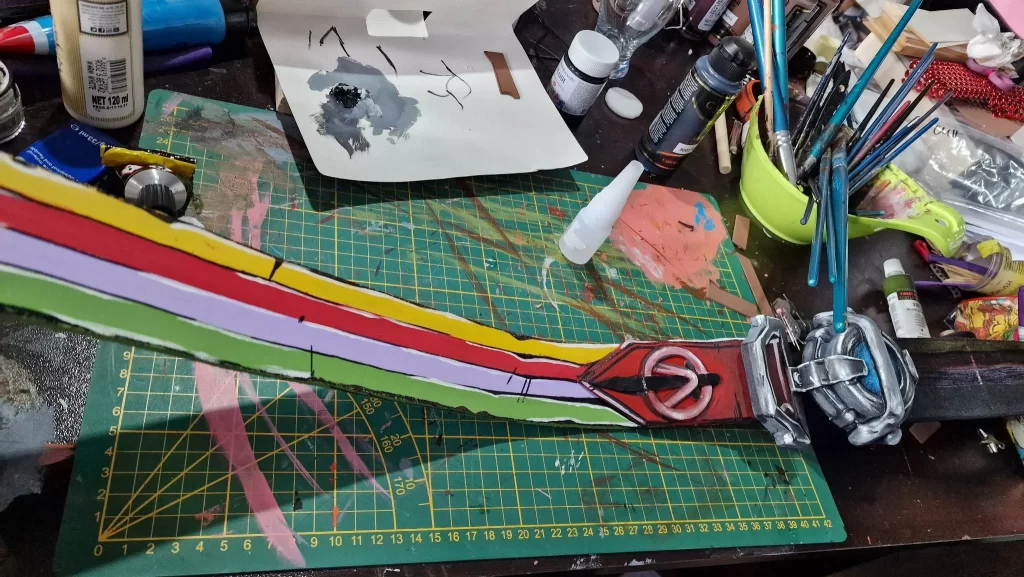
The Belt
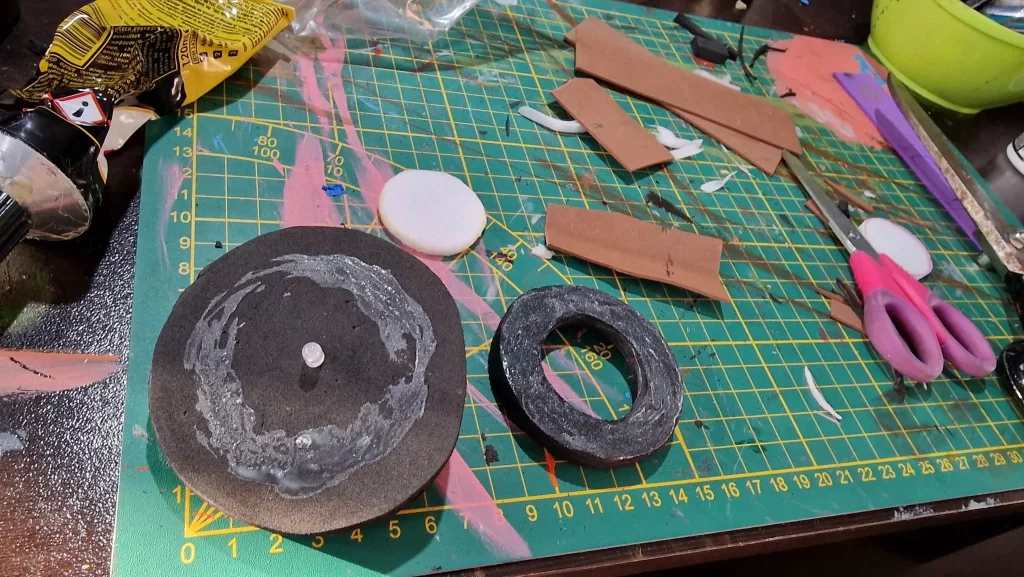
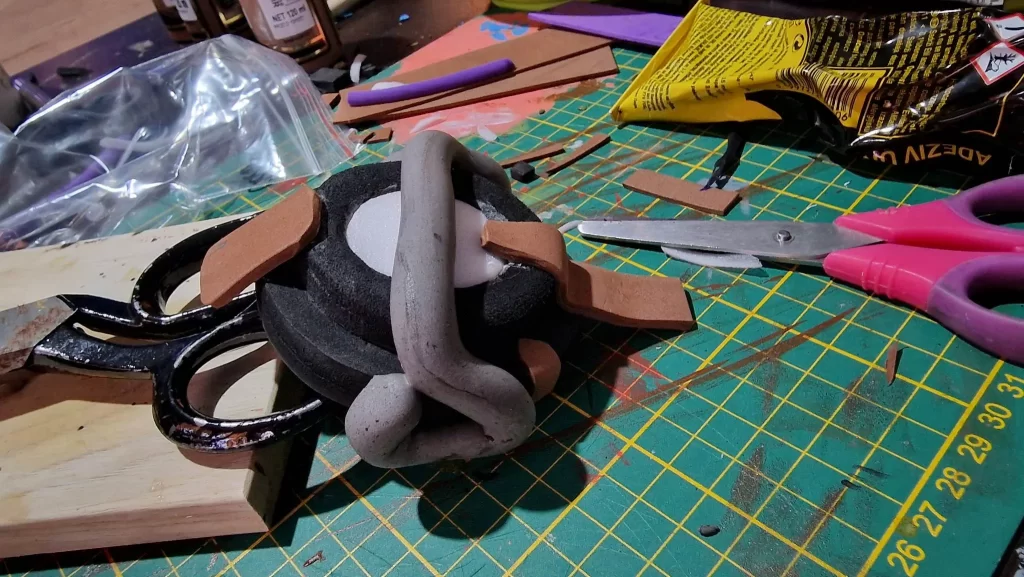
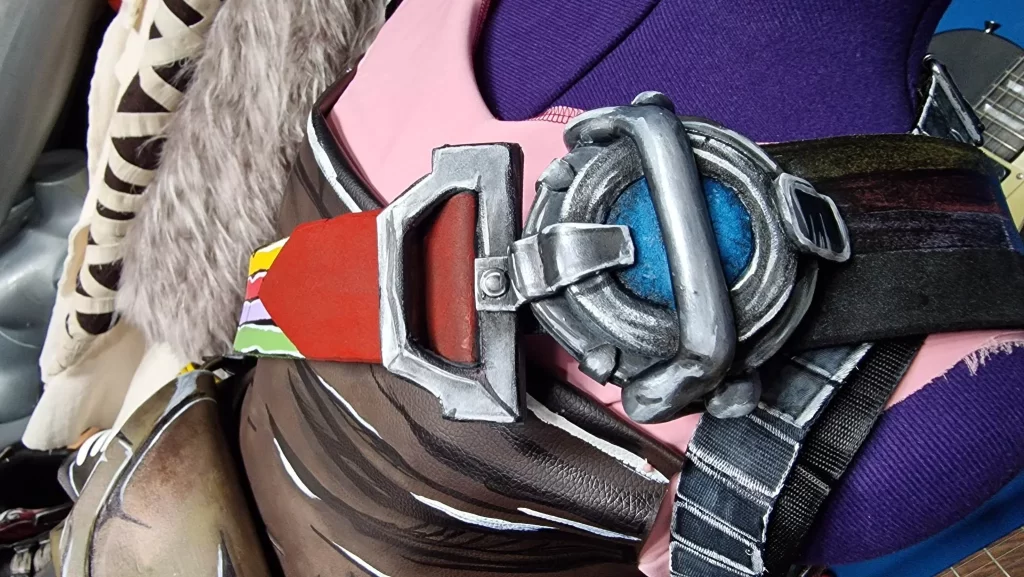
To make the belt, I utilized foam of varying thicknesses: 4mm, 5mm, and 6mm. Firstly, I cut a long strip for the base of the belt. Using paper tape, I marked out the lines and proceeded to fill in the main colors. Since I didn’t have all the necessary colors, I had to mix different shades to achieve the desired tones. For the Gadget part, I stacked foam spheres to create the overall shape and added clay foam for the finer details. To illuminate the inside, I used LED foam and incorporated a single-diode light powered by a flat lithium battery. The entire piece was sanded, primed, and shaded. To attach the belt, I repurposed leftover straps from bags and securely glued them to the back.
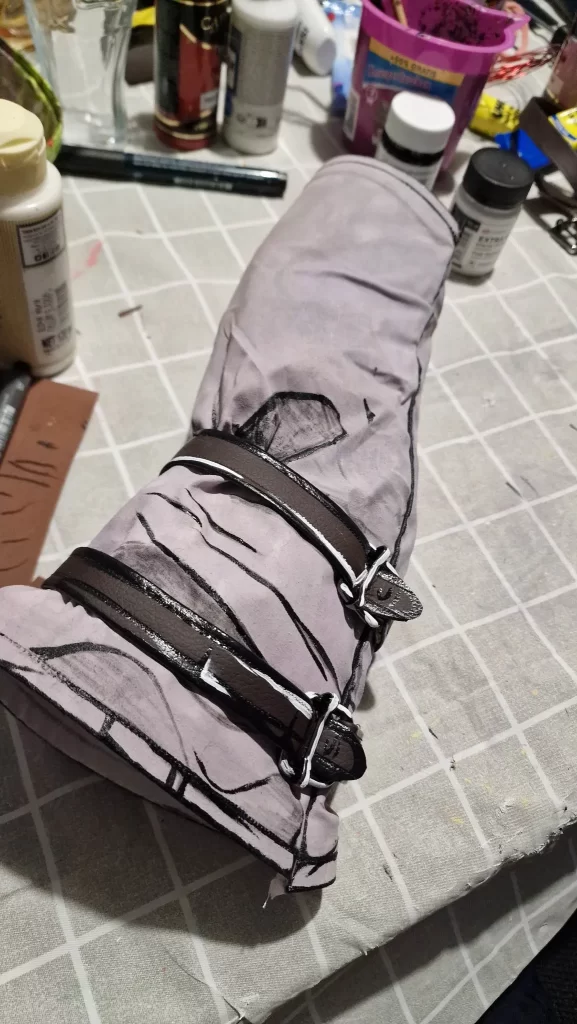
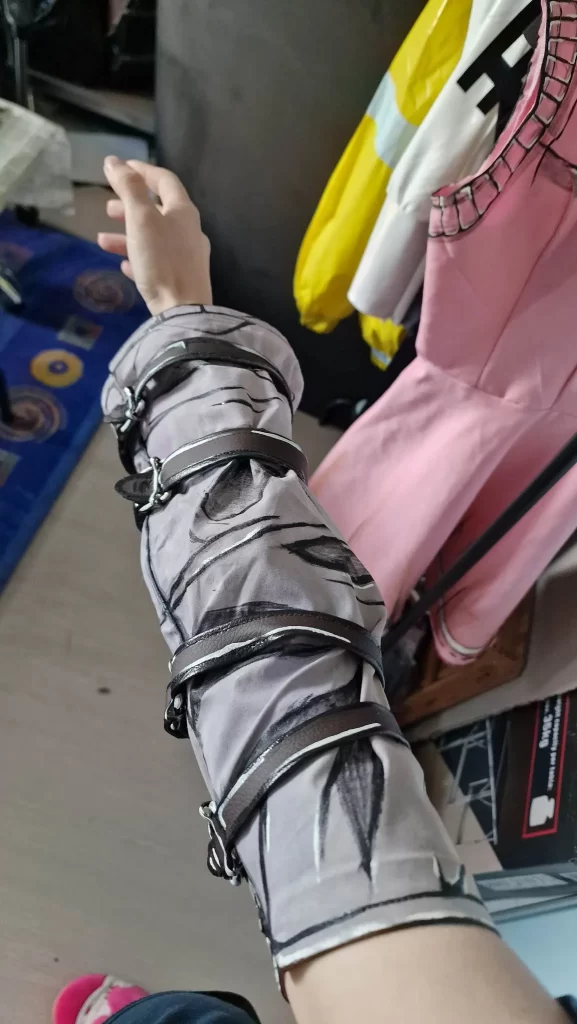
The Sleeve
For the Sleeve, I again resorted to leftover fabric. I made a pattern and then traced it out on paper. After I sewed it together, I moved on to the belts. I used the little scraps left from the apron to create the belts. I bought belt straps that were glued on. Once everything was in place I added the color to make it match the original and cell-shaded it all.
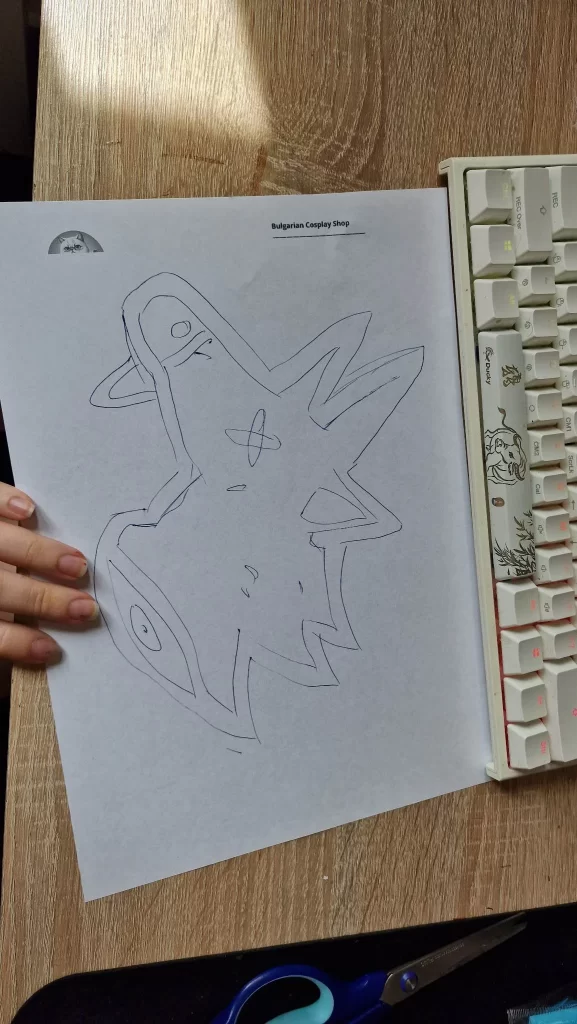
Sir Buttstalion
For the Unicorn aka Buttstalion, I used 4mm EVA foam to create the base. I drew the design on a piece of paper and traced it over to the foam. I glued it on top and began by adding base colors. Once everything was set I started shading and glued it on the inside of my small bag so it could be with me forever.
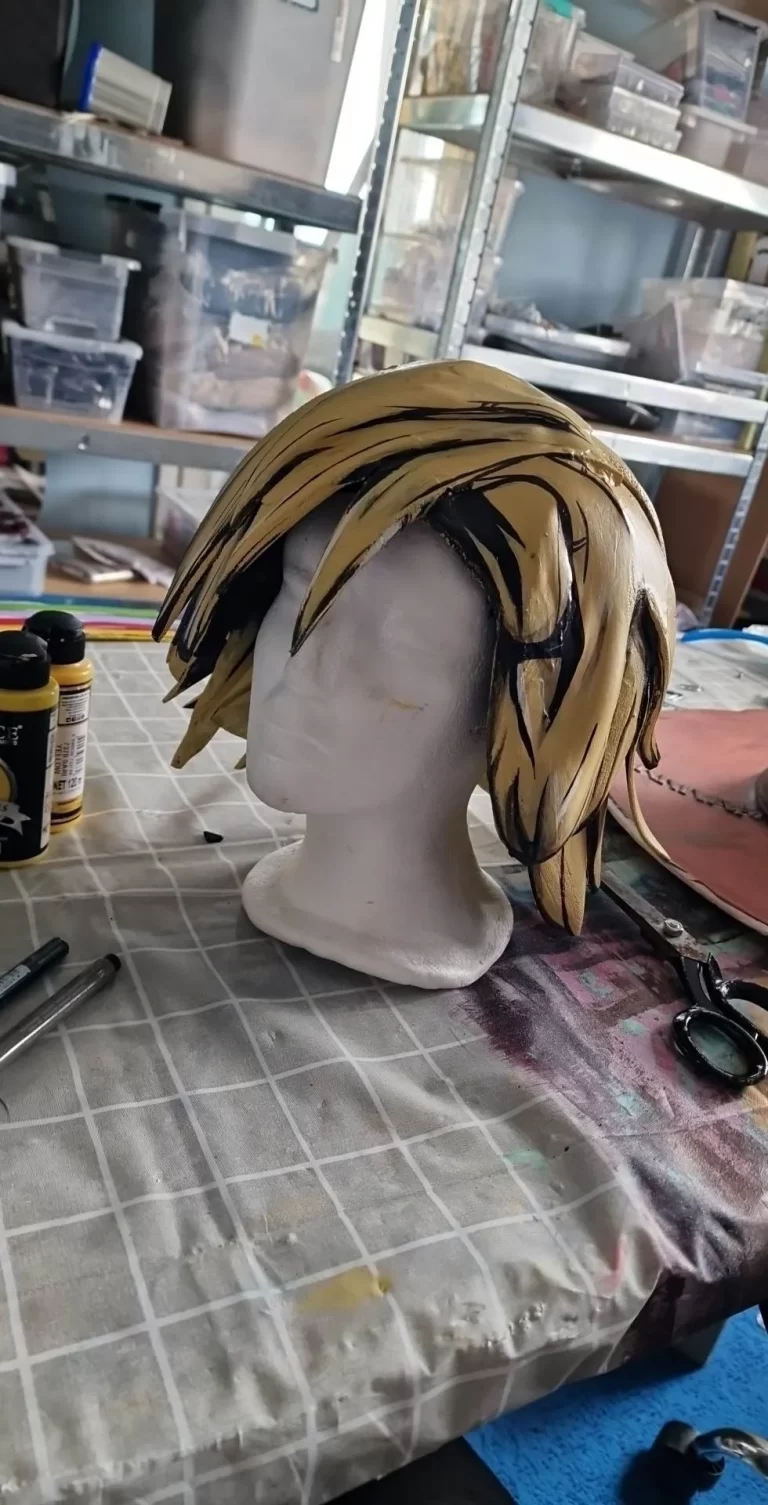
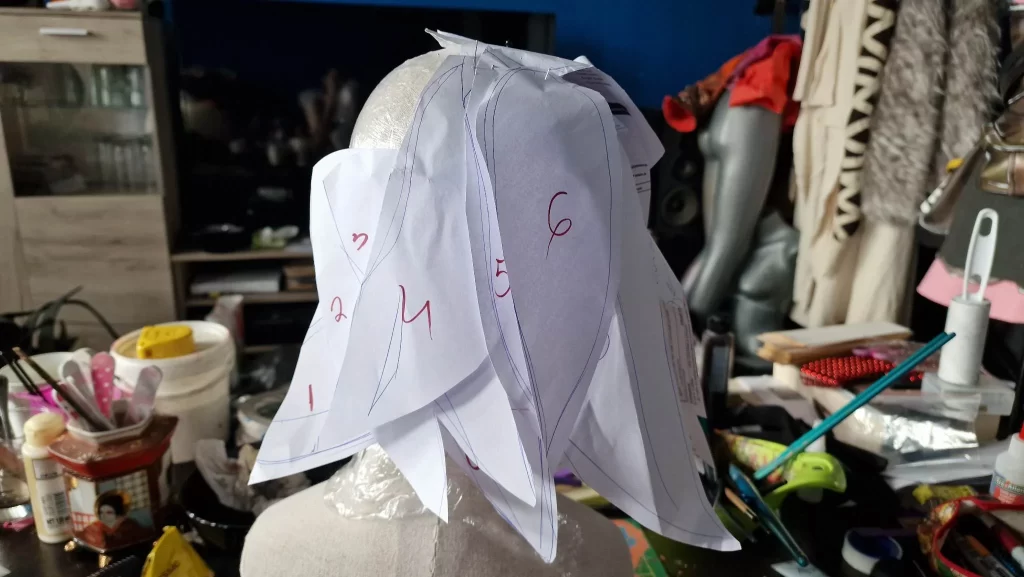
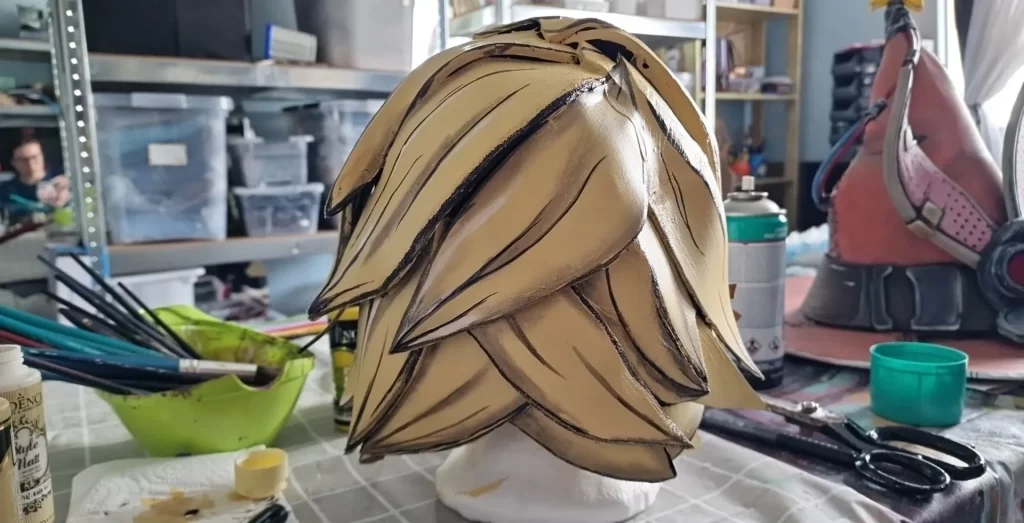
The Wig
I started creating the wig by tracing out each piece of her hair on paper. I transferred them over to EVA Foam and cut everything. I cut out the base of a baseball cap and started gluing the parts on stacking them to get the look of Tina’s hair. I made the ribbons from small 2mm Eva strips. Some minor details were added using clay foam. Everything was finally, sanded, primed, painted, and cell-shaded.